
Last updated: April 12, 2024
Available with any of the following subscriptions, except where noted:
|
|
If your blog isn't compatible with the smart copy import feature, you can import your blog content into HubSpot using a CSV file. Based on this sample CSV file, gather the content for each of your existing blog posts. Then import this file to generate new blog posts in HubSpot that are populated with your existing blog content.
Before you get started
- When you create your HubSpot account, there will be a new default blog in your account you can use to import your blog posts. You can create a new blog instead or customize the blog in your blog settings.
- There's a sample CSV file available to format your blog content for your import.
- Note that the following fields in your CSV import file are required:
- URL
- Title
- SEO title
- Author
- Meta description
- Publish date
- Post body
Import your blog content in a CSV file
- In your HubSpot account, click the settings icon in the top navigation bar.
- In the left sidebar menu, navigate to Content > Blog.
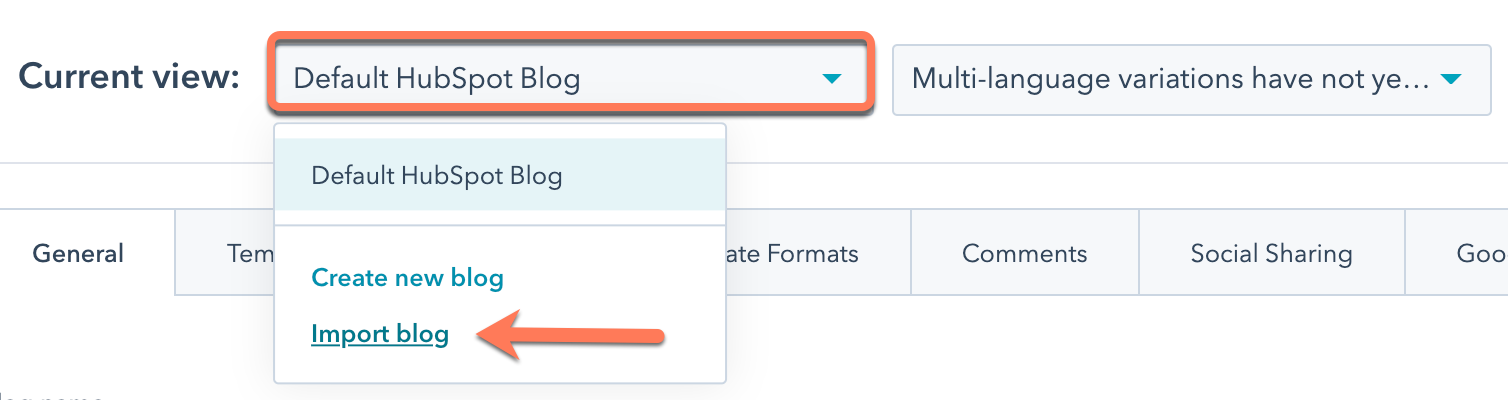
- In the Current view section, click the first dropdown menu and select Import blog.
- On the import overview page, click Import new blog in the top right. If you've already imported a blog, click the Start new import dropdown menu instead and select Blog posts.
- Select the CSV file upload option, then click Next.
- Click the Which blog platform are you currently using? dropdown menu and select your blog platform. If you don't know which platform hosts your blog, select I am not sure.
- Click the HubSpot blog dropdown menu and select the blog where the imported posts will be hosted. If you need to create a new blog, click Create new blog instead. Learn more about creating a blog in HubSpot.
- In the CSV file upload box, click select a file, then upload your CSV file.
- In the lower right, click Copy blog posts.
Map the columns from your import file
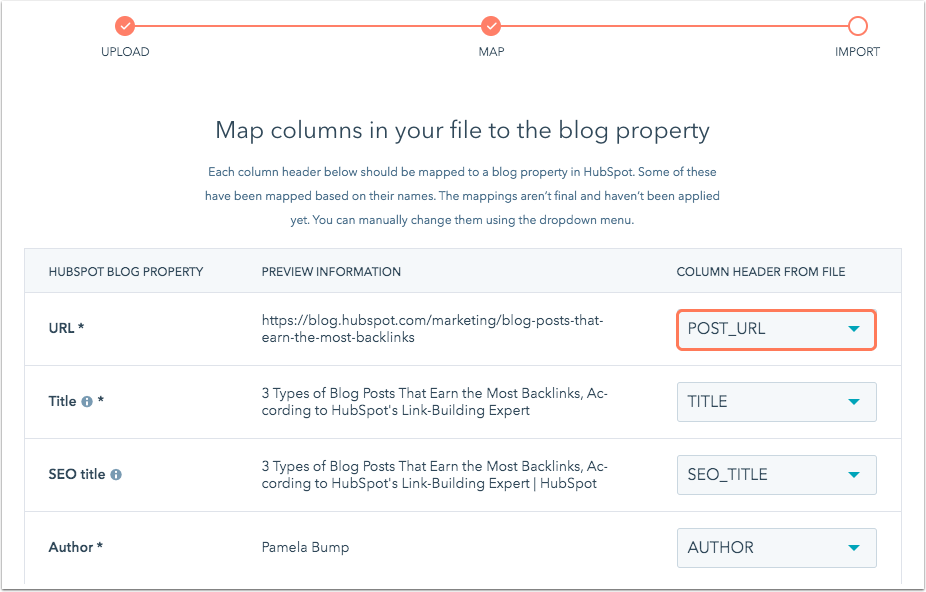
Next, you'll map the columns of your CSV file to the corresponding properties in your new HubSpot blog.
Learn more about HubSpot blog properties below. To see an example of how to format your CSV file and the blog content you're importing, review the sample CSV import file.
- URL (required): enter the URL of each blog post in this column.
- Title (required): enter the title for each blog post in this column.
- SEO title: if you want search engines to index a different title for your blog post than the one that appears to your readers, enter a custom SEO title in this column.
- Author (required): enter the name of the author of each blog post in this column. You can customize your blog author description after your import is complete.
- Featured image: the URL of the featured image for each blog post in this column. If you don't want to import any featured images for your blog posts, leave this column blank or omit it from your CSV file.
- Categories/Tags: enter the categories or tags applied to each blog post in this column. To import multiple tags or categories, separate them with a comma as illustrated in the sample CSV import file. If you don't want to import the categories or tags of this blog post, leave this column blank or omit it from your CSV file.
- Meta description (required): a brief summary of what your blog post is about. To automatically use the first 55 characters of your blog post as your meta description, click the Column Header From File dropdown menu and select Use default.
- Publish date (required): enter the publish date of each blog post in this column. Please note at this time only the date format MM/DD/YYYY is accepted. After the import, you can customize your blog's date formats settings in your blog settings, which are in your account settings.
- Post body (required): enter the source code of the main body of your blog post content, including tags and image URLs. For an example of how to format your blog post body, see the sample CSV import file.
To map the blog content from your CSV file into your new blog posts in HubSpot:
- Click the Column Header From File dropdown menu and select the corresponding HubSpot Blog Property. You'll see Preview Information with the value for the first row in your spreadsheet for that column.
- Confirm your mapping for each blog property you want to import from your CSV file.
- Then click Next in the lower right. The import process may take a few minutes to finish up.
- Click return to the dashboard to see the status of your import.
Finish your import
- To complete your import, click Review results.
- If there are any errors during the import process, you can review the details in the Errors tab. If there are issues with your URLs, you may see one of these errors.
- Click Preview to see a simplified preview of your blog post content, image URLs, and a listing of the values the importer tool identified for that post.
Please note: images from your blog post won't render in the blog post preview, you'll see the image URLs appear in the preview instead.
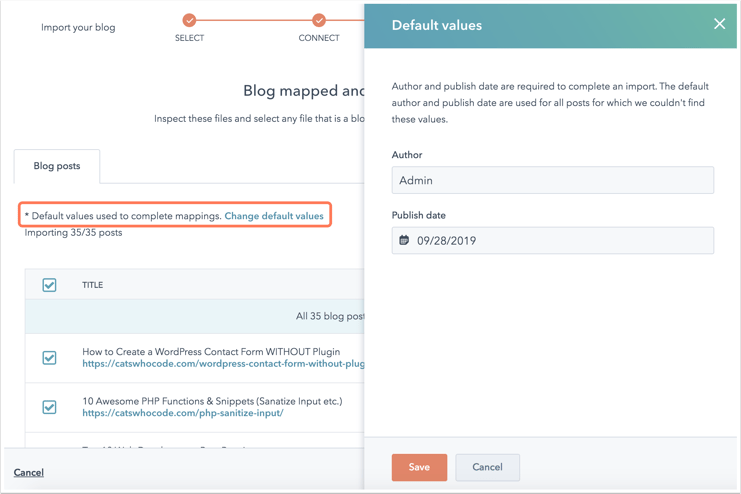
- If any default values were applied to your blog post features, you'll see a note that reads: Default values used to complete mappings.
- To review the default values, click Change default values.
- In the sidebar panel, review the default values for any blog features that couldn't be mapped for every blog post. In the example below, there's a default value populating for the blog Author and blog Publish date.
- Update the values in the text field to the desired values.
- Click Save to apply these values to all blog posts without a value for this property.
- All blog posts are selected for import by default. Deselect the checkbox on the left for any blog posts that you want to omit from your import.
- After you've finalized your selection, click Import.
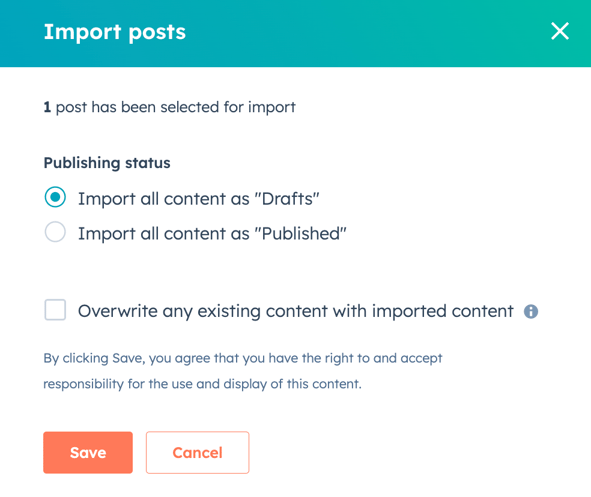
- In the dialog box, select whether to import these blog posts as drafts or as live published posts.
- If any current posts share a URL with imported posts, you can select the Override any existing content with imported content checkbox to replace the current post with the version in your CSV file. This will clear any existing analytics for posts being replaced.
- Click Save.
Your blog import status will update to Import in progress status. Once the import is complete, the status will update to Import completed.
If there were any issues detected with your import, click the More dropdown menu and select View details.
Next steps: set up your blog in HubSpot
After you've imported your blog posts, finish setting up your blog in HubSpot:
- Edit your blog settings to customize your blog title, URL, and social sharing options.
- Configure your blog subscription options to send email notifications to your blog subscribers.
- Learn more about how to manage your blog authors and blog tags in HubSpot.
- Set up the rest of your company logo and branding in your account settings.
- Learn how to edit your blog template to control the styles and appearance of your blog. If you're using a theme from your Content Hub account or the Asset Marketplace, learn how to apply a theme template to your blog.
- Learn how to edit and publish a new blog post in HubSpot.
