
Last updated: February 20, 2024
Available with any of the following subscriptions, except where noted:
|
|
|
|
To help your teams quickly identify and prioritize the most important deals and tickets in your pipelines, you can set up colored object tags based on certain criteria. For example, you could create a green deal tag called Large deal and assign it to any deal with an Amount value greater than $10,000.
Once you've set up object tags, you can use the Deal Tags and Ticket Tags properties in other HubSpot tools such as saved views, reports, workflows and lists.
Create object tags
Your account must have a Sales Hub subscription to create deal tags, or a Service Hub subscription to create ticket tags. Accounts with a Starter subscription can set up tags that apply to all pipelines, while accounts with a Professional or Enterprise subscription can create tags for individual pipelines.
Please note: in accounts created on or after March 5, 2024, users must have an assigned Sales seat to create deal tags and an assigned Service seat to create ticket tags. Learn more about HubSpot's new seats-based pricing.
Each account can have up to 10 tags for each object, and a user must have super admin permissions in order to create or edit object tags.
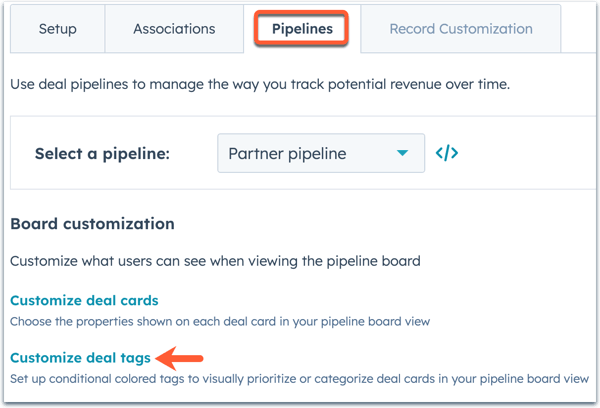
- In your HubSpot account, click the settings icon in the top navigation bar.
- In the left sidebar menu, navigate to Objects > Deals or Objects > Tickets.
- Click the Pipelines tab.
- Click Customize [deal/ticket] tags.
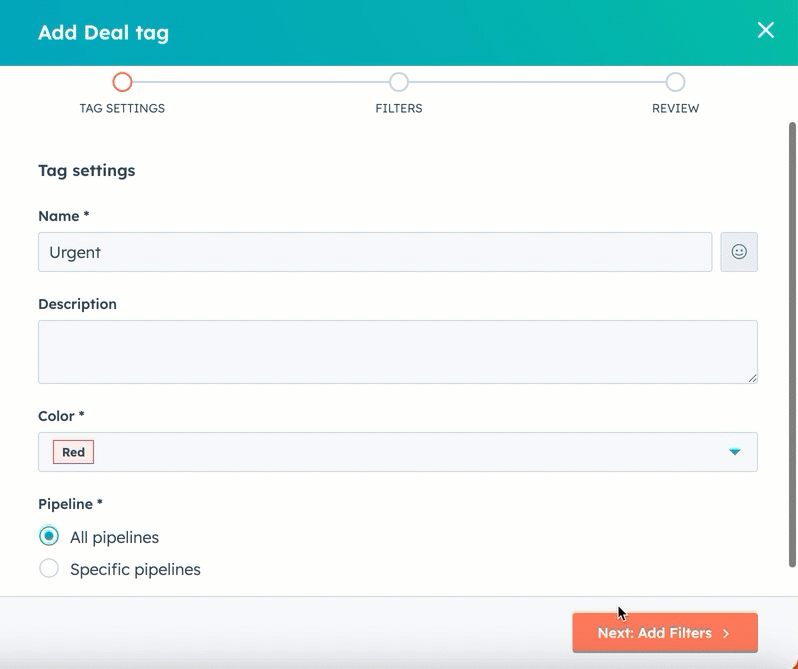
- To create a new object tag, click Add tag. For deal tags, you can select a preset tag, or click Create from scratch to customize your own.
- In the right panel, set up your object tag settings:
- Enter a name and an optional description for the object tag.
- Click the Color dropdown menu, then select the color assignment for the object tag.
- By default, an object tag will apply to all pipelines. To assign an object tag to certain pipelines (Professional or Enterprise only), select Specific pipelines, then in the dropdown menu, select the checkboxes for pipelines you want the object tag to appear on.
- Click Next: Add Filters.
- Set up filters for when the object tag should appear on a deal or ticket card:
- Click +Add filter to add your first filter group.
- By default, the tag will filter on the current object (e.g., Deals for a deal tag). To filter based on an associated object, click the Filtering on dropdown menu, then select the object to set criteria based on (e.g., a deal tag based on the deals' associated contacts).
- Select the filter category (e.g., object properties, membership in a list/import).
- Search for and select a property or list/import, then set your criteria.
Please note: you cannot currently set criteria based on the Deal stage or Ticket status properties. Object tags will appear on applicable records in all pipeline stages, however, you can set filters based on closed deal stages using the Is deal closed? property. To exclude closed deals, set the criteria for this property as is equal to: False.
-
- Within a group, click +Add filter to add additional criteria that must be met for the object tag. AND logic applies within a group, which means all filter criteria must be met within that group for the object tag to appear.
- To add an additional filter group, click +Add filter group, then set your filters and criteria. OR logic applies across groups, which means all filter criteria in at least one group must be met for the object tag to appear.
- Your changes are applied automatically. Click Discard changes to undo the changes. For new object tags, this will clear all filters. For existing object tags, it will revert back to the previously set filters.
- Click Next: Review Tag.
- View a preview of how the object tag will appear on a deal or ticket card, as well as the object tag's settings and filters.
- Once you're done, click Save.
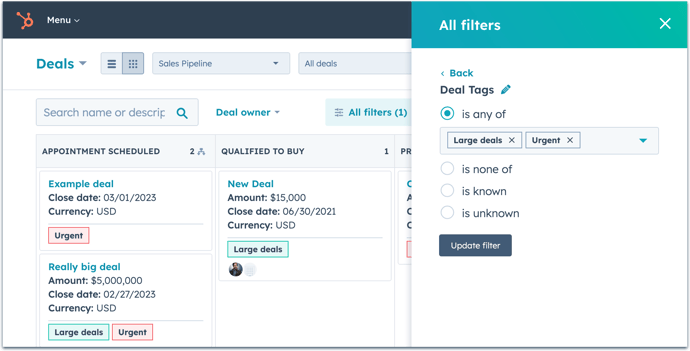
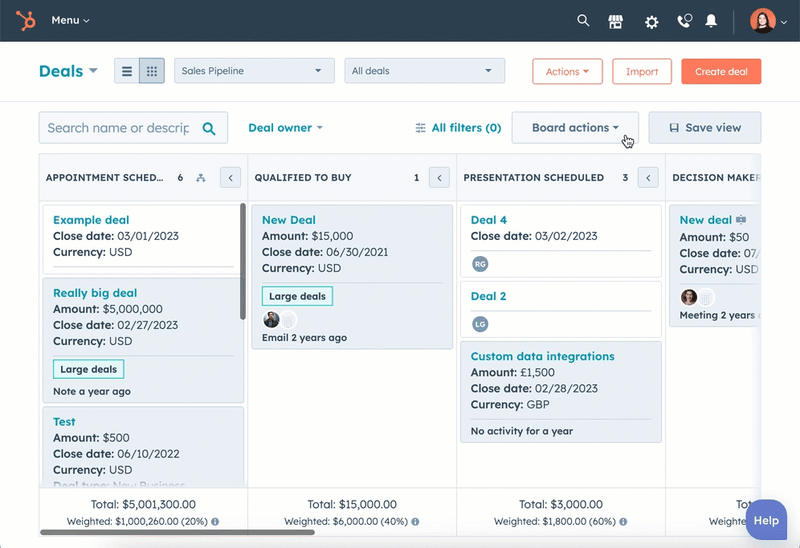
Once created, object tags will appear on applicable deal or ticket cards in board view and on individual deal and ticket records. For a user's individual views, they can filter their records by [Deal/ticket] tags to show only deals or tickets with specific object tags, or can choose to show or hide all object tags in a view.
Edit or delete object tags
In your object tag settings, you can manage or delete existing object tags. Users must have super admin permissions in order to edit or delete object tags.
- In your HubSpot account, click the settings icon in the top navigation bar.
- In the left sidebar menu, navigate to Objects > Deals or Objects > Tickets.
- Click the Pipelines tab.
- Click Customize [deal/ticket] tags.
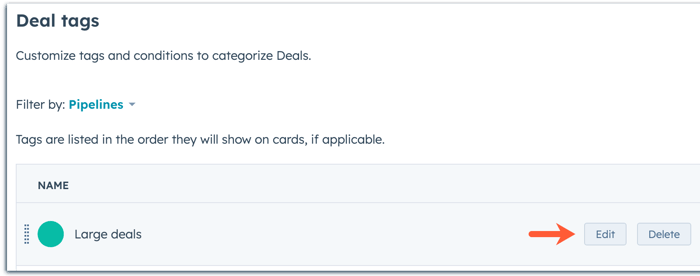
- By default, object tags for all pipelines will be shown. To view only certain pipelines, click the Filter by dropdown menu and select the checkboxes for the pipelines you want to view.
- In the Pipeline Assignment column, view which pipeline an existing object tag appears in, either All pipelines, or specific pipelines (Professional and Enterprise only).
- To edit an existing object tag's settings and filters, hover over the object tag, then click Edit.
- To delete an existing object tag, hover over the object tag, then click Delete. In the dialog box, click Delete tag to confirm.
Learn more about customizing deal pipelines or ticket pipelines.
Show or hide object tags in a view
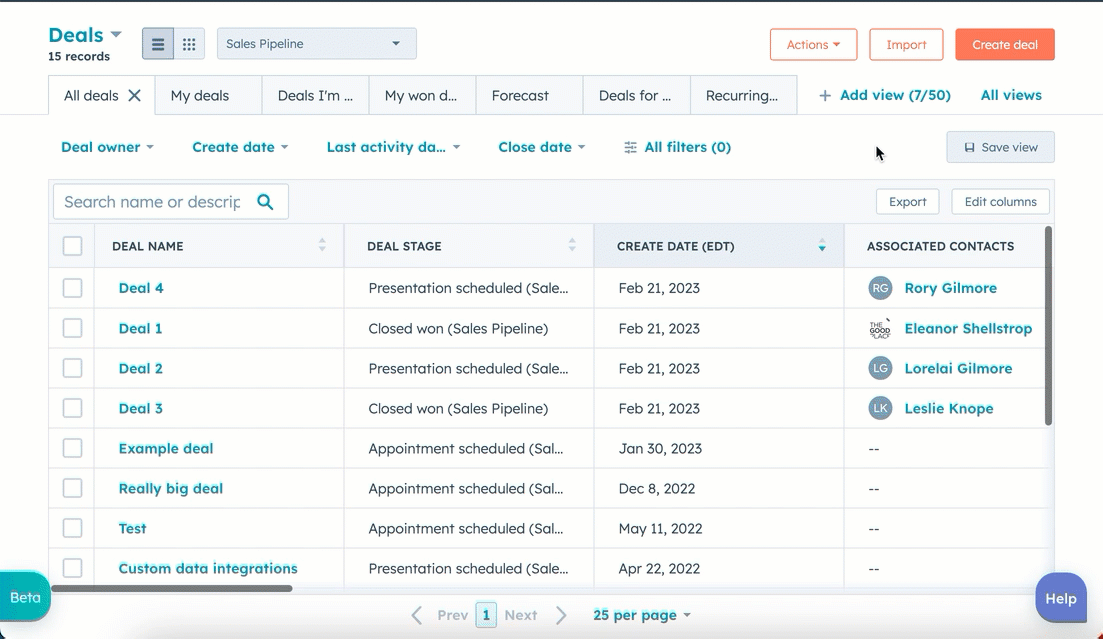
Once you create object tags, they'll appear on deal or ticket cards in board view by default, but you'll need to manually add object tags as a column in your list view. You can choose to hide or show object tags in your views at any time.
- Navigate to your deals or tickets:
- In your HubSpot account, navigate to CRM > Deals.
- In your HubSpot account, navigate to CRM > Tickets.
- In list view, to include or remove object tags as a column:
- Click Edit columns in the top right of the table.
- On the left side of the dialog box, search for [Deal/Ticket] Tags.
- To show object tags, select the [Deal/Ticket] Tags checkbox. On the right, click and drag [Deal/Ticket] Tags to your desired position in the column order, or click Move to top to set it as the second column following a record's name.
- To hide object tags, clear the [Deal/Ticket] Tags checkbox. The object tags will no longer appear as a column in your view.
- Click Apply.
- In board view, to show or hide object tags on board cards:
- Click the Board Actions dropdown menu, then select Edit cards.
- To show object tags on your board cards, select the Display tags checkbox.
- To hide object tags on your board cards, clear the Display tags checkbox.
- Click Save.
Learn more about how to customize columns in list view and edit the appearance of cards in board view.
