Last updated: October 17, 2023
Available with any of the following subscriptions, except where noted:
|
|
|
|
|
|
|
|
|
|
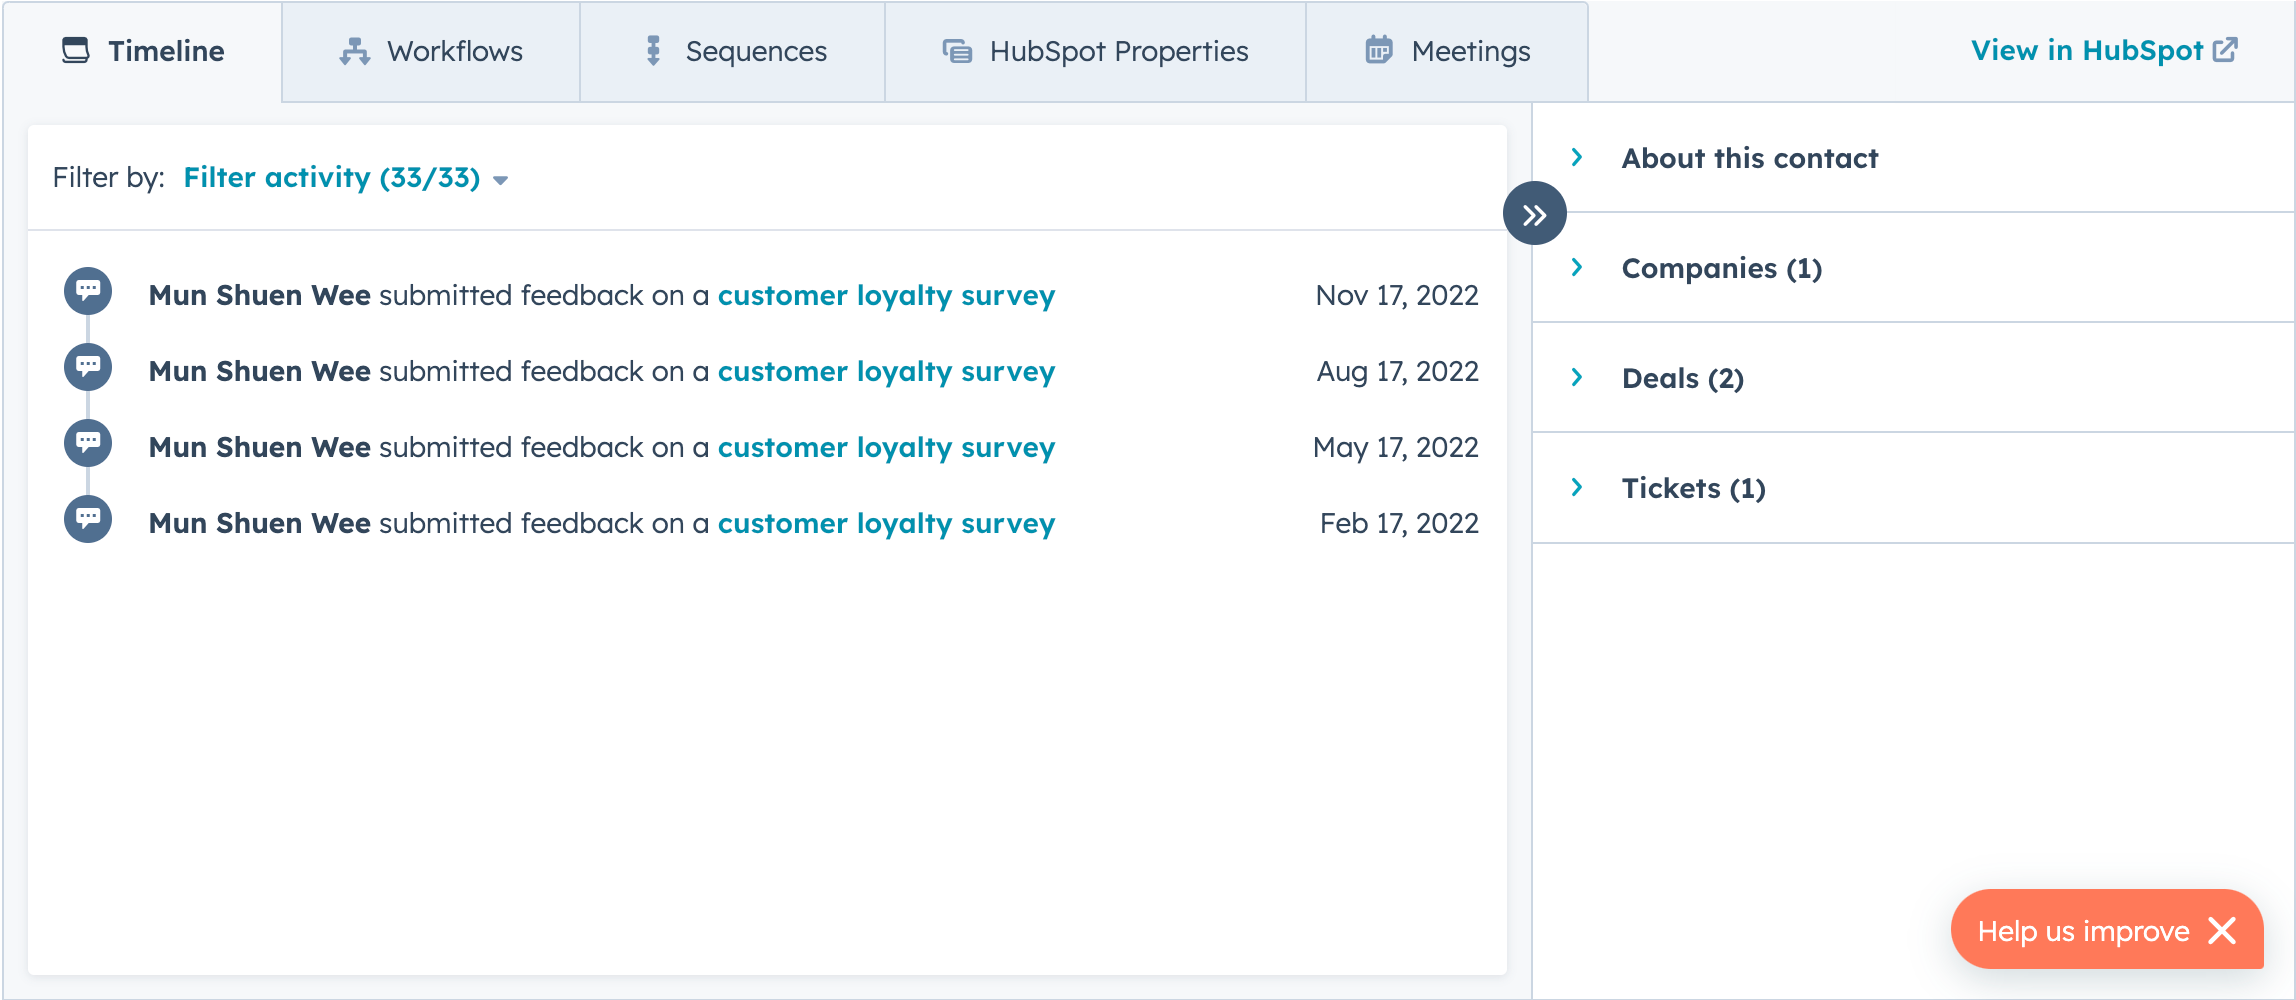
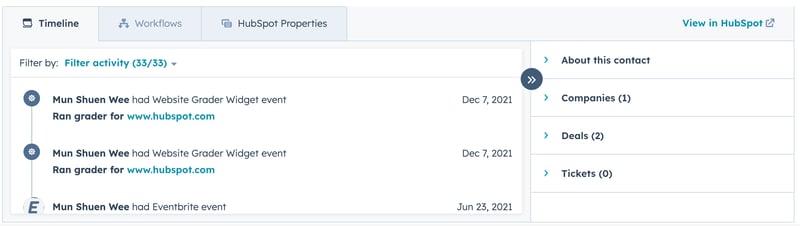
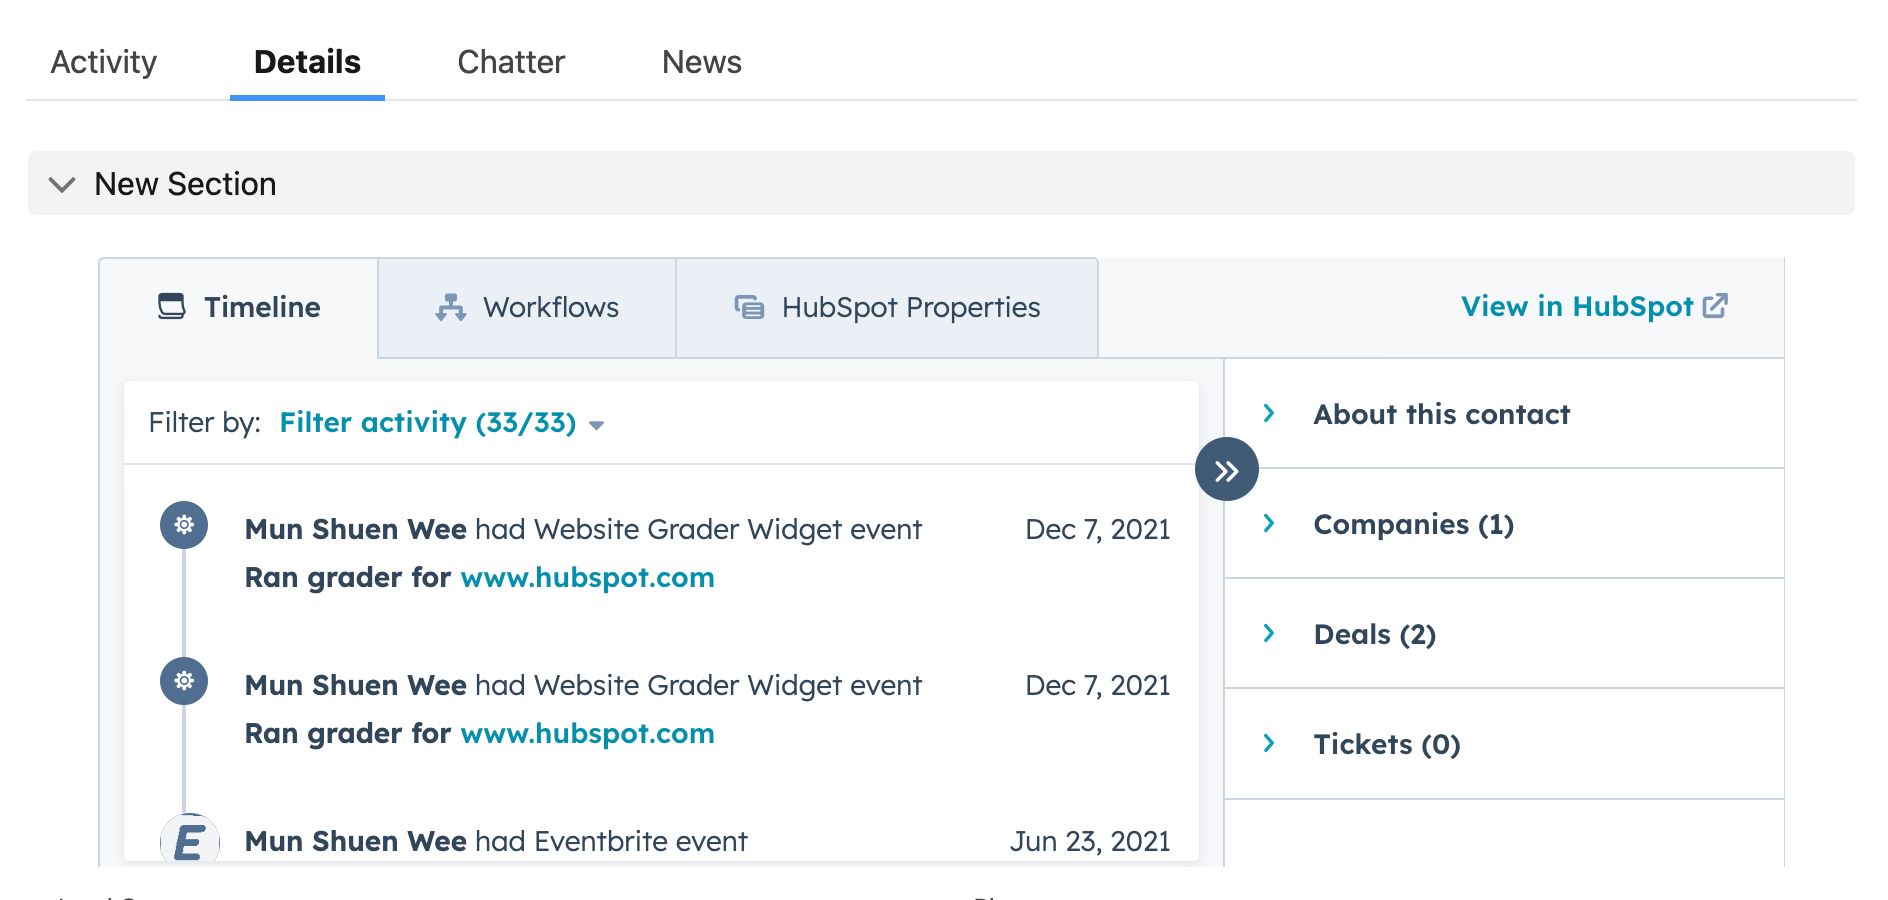
The HubSpot Embed is an iframe that displays a summary of the interactions a Salesforce record. It lives within the Visualforce framework in Salesforce. The window shows all timeline activities, object record association insights, and property history. You can also enroll the record in any HubSpot workflows directly from the Salesforce record.
You can add the HubSpot Embed to any Salesforce contact, lead, account, or opportunity records.
- To view the HubSpot Embed window on a Salesforce record, Salesforce users must also be a user in HubSpot and logged in to the latter system. Users will need the View records permissions in HubSpot.
- For the HubSpot Embed window to display information on a Salesforce account or opportunity record, the account/opportunity must be syncing with a respective HubSpot company/deal, and that company/deal must have an associated, syncing contact.
Turn on HubSpot Embed
- In your HubSpot account, navigate to Reporting & Data > Integrations.
- Click Salesforce.
- Click the Feature discovery tab.
- Click Install HubSpot Embed.
After installing the HubSpot Embed, log in to your Salesforce account to continue the set up. Follow the steps below for the relevant Salesforce interface:
Salesforce Classic
- Navigate to your Salesforce account.
- In the upper right, click Setup (or [Your Name] > Setup).
- To add the HubSpot Embed window to your Salesforce record page layouts, in the Build section in the left sidebar menu, navigate to Customize > Leads/Contacts/Accounts/Opportunities > Page Layouts.
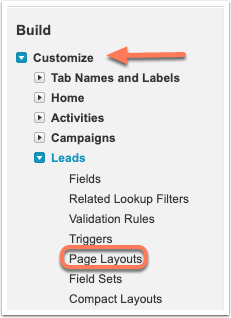
- You'll see a list of page layouts. Click Edit next to a page layout's name.
Please note: if you have multiple page layouts, you must add the HubSpot Embed window to each page layout you want to display the window on.
- Click the Section item in the toolbar and drag and drop it into the desired location on the page layout.
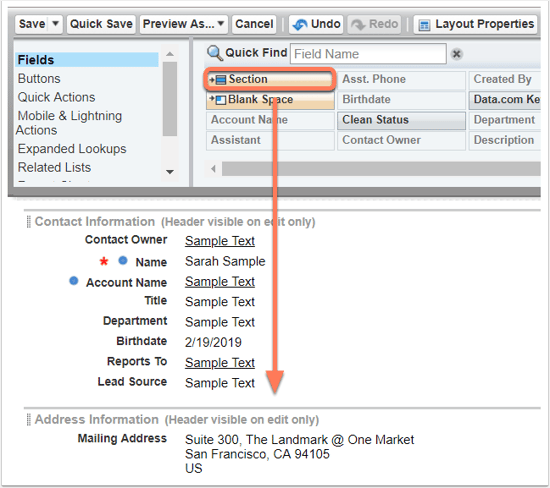
- In the dialog box, enter a Section Name (e.g., HubSpot Information). Under Layout, select 1-Column. Click OK.
- In the toolbar's left sidebar menu, select Visualforce Pages.
- Click the HubSpot_Embed_[object type]_V2 item in the toolbar and drag it into the newly-created section on the page layout.

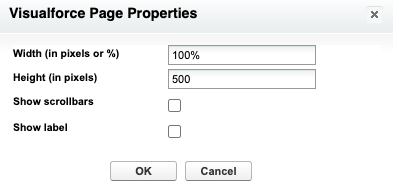
- Hover over the new HubSpot embed window and click the wrench icon in the top right.
- In the dialog box, change the window Height to 500, then click OK.
- In the top left of the toolbar, click Save to apply your layout changes.
- Navigate to a Salesforce contact, lead, account, or opportunity record to view the HubSpot Embed window.
Lightning Experience
- Navigate to your Salesforce account.
- In the upper right, click the gear icon and select Setup.
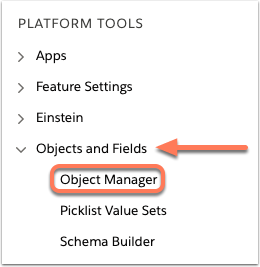
- In the left sidebar menu, in the Platform Tools section, navigate to Objects and Fields > Object Manager.
- In the list of objects, click Lead or Contact.
- In the left sidebar menu, navigate to Page Layouts.
- Click the name of a page layout.
Please note: if you have multiple page layouts, you must add the Visualforce window to each page layout you want to display the window on.
- Click the Section item in the toolbar and drag and drop it into the desired location on the page layout.
- In the dialog box, enter a Section Name (e.g., HubSpot Information). Under Layout, select 1-Column. Click OK.
- In the toolbar's left sidebar menu, select Visualforce Pages.
- Click the HubSpot_Embed_[object type]_V2 item in the toolbar and drag and drop it into the newly-created section on the page layout.
- Hover over the newly-created section and click the wrench icon in the top right.
- In the dialog box, change the window Height to 500, then click OK.
- In the top left of the toolbar, click Save to apply your layout changes.
- Navigate to a Salesforce lead or contact record and click the Details tab to view the HubSpot Embed window.
Repeat these steps for any other page layouts you want to add the HubSpot Embed window to.
To add the HubSpot Embed window to the Lightning app builder:
- In your Salesforce account, in the left sidebar, search for and click Visualforce Pages.
- For each HubSpot_Embed_[object]_V2 page, click Edit.
- Select the Available for Lighting Experience, Experience Builder sites, and the mobile app checkbox.
- Repeat these steps for each object type.
Resolve HubSpot Embed errors
You may see the following error in your HubSpot Embed window:
No HubSpot info for this contact. This contact couldn't be found. If you think this is an error, please contact your HubSpot account administrator.
To resolve this error:
- Ensure that the Salesforce record viewed is currently syncing with the correct HubSpot contact.
- Ensure that the user trying to view the HubSpot Embed window has adequate permissions in HubSpot to view that particular contact record.
Explore HubSpot Embed features
With the HubSpot Embed, you can:
- View the object record's timeline and any associated objects in Salesforce.
- Enroll the object in a workflow and view any previous workflow enrollments.
- View property and property history for the object record.
- Directly book meetings in HubSpot through Salesforce.
- Enroll contacts in a sequence through Salesforce.