
Last updated: April 12, 2024
Available with any of the following subscriptions, except where noted:
|
|
|
|
With the sequences tool, you can send a series of targeted, timed email templates to nurture contacts over time. You can also automatically create tasks to remind you to follow up with your contacts.
When contacts reply to the email or book a meeting, they will automatically unenroll from the sequence. After setting up and using sequences, you can segment your contacts with sequence enrollment properties.
Workflows are another automation tool that you can use to automatically enroll records in a series of actions. When creating your sequence, you can also create workflows from the Automation tab to automatically enroll contacts in this sequence. Learn more about using workflows.
Before you get started
To create and execute sequences, the HubSpot user account must meet the following requirements:
- The user account has an assigned Sales Hub Professional or Enterprise or Service Hub Professional or Enterprise seat.
- The user account has a connected personal email address. A team email address connected to the conversations inbox cannot be used to send sequence emails.
- The user account has Sequences permissions.
When using sequences, do also take note of the following:
- There's a limit to the number of sequences that can be created in your account by all users. You can view the total number of sequences created in your account in the top right corner of the sequences dashboard. Learn more about these limits in HubSpot's Product & Services catalog.
- Any tasks in a sequence will be assigned to the user who enrolled the contact into the sequence.
Create sequences
Create a sequence using email templates and task reminders. You can also customize the delay between sequence steps so emails and tasks execute when you want them to.
- In your HubSpot account, navigate to Automations > Sequences.
- In the top right, click Create Sequence.
- In the left panel, select Start from scratch or select a pre-made sequence template.
- In the top right, click Create sequence.
- In the sequence editor, click the pencil icon and enter a name for your sequence.
Add steps to your sequence
- To add a step, click the + plus icon.
| Step | What the step does |
| Automated email | Automatically send an email to the contact enrolled in the sequence. You can choose to start a new thread or reply to a previous sequence email. You can also create a template or use an existing template. |
| Manual email task | Get a task reminder to manually send an email. The email will not be sent automatically. You can choose to start a new thread or reply to a previous sequence email. You can use an existing template or create a new email when you reach out to the contact. |
| Call task | Get a task reminder to manually call the contact enrolled in the sequence. |
| General task | Get a task reminder to manually complete an action. |
| InMail Task | If you're using HubSpot's integration with LinkedIn Sales Navigator, you can create a task to remind you to manually send an InMail. |
| Connection request task | If you're using HubSpot's integration with LinkedIn Sales Navigator, you can create a task reminder to manually send a connection request. |
- In the right panel, select an action. You can add automated emails, or create email, call or general task reminders.
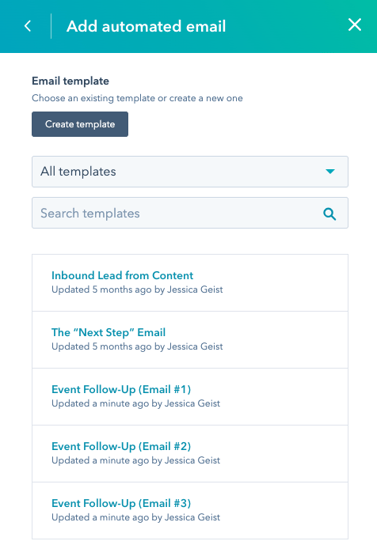
- To add an automated email, click Automated email.
- Choose your email type to start a new thread or reply to a previous email.
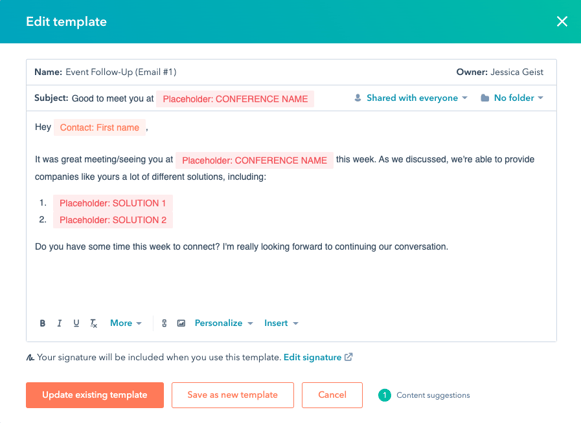
- To create a new template, click Create template.
- To filter your existing templates, click the Existing email templates dropdown menu, or use the search bar to find a template. Then, select a template from the list.
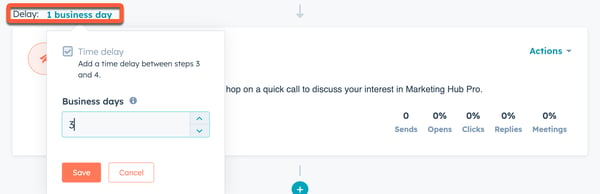
- If the automated email is not the first step in the sequence, click [number] business day next to Delay to set the number of days before the email sends.
- To add an automated email, click Automated email.
-
- To add a task reminder:
- In the right panel, click Manual email task, Call task, or General task.
- Under Task details, click the checkmark to pause the sequence until the task is completed.
- To add a task reminder:
-
-
- Enter a title for the task.
- To add personalization tokens in the title, click the Personalize dropdown menu.
- To set the task priority, click the Priority dropdown menu.
- To add the task to a queue, click the Queue dropdown menu.
- Enter the task details in the Notes field. Use the toolbar at the bottom to format the text, insert a link, insert a snippet, or add personalization tokens.
- Enter a title for the task.
-
-
-
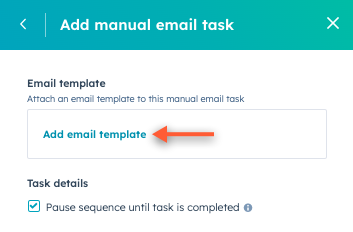
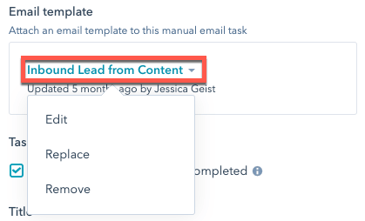
- If you're creating an email task reminder, you can add an email template to the follow-up task. When completing the task on the contact record, the email template will automatically populate in the email composer window.
- Click Add email template.
- To filter your existing templates, click the Existing email templates dropdown menu, or use the search bar to find a template. Then, select a template from the list.
- If you're creating an email task reminder, you can add an email template to the follow-up task. When completing the task on the contact record, the email template will automatically populate in the email composer window.
-
Please note: to automatically open the email composer window on a contact record and populate it with the template selected in the sequence email task, you must add the email task to a task queue. Otherwise, you will need to manually review and send the email from the contact record after the task is created.
-
- Click Add.
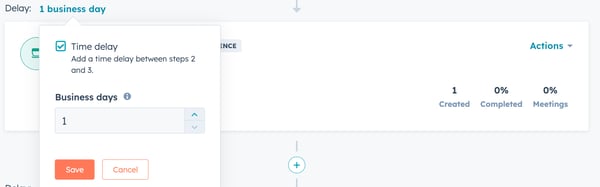
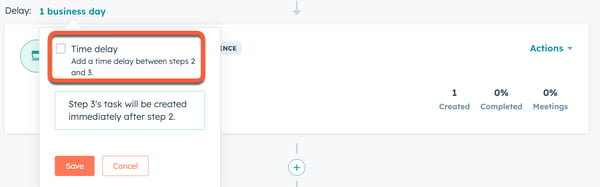
- To configure when the task executes:
- To set a delay, click [number] business day next to Delay to set the number of days before the task executes.
-
-
- To create a task immediately after the previous step, unselect the Time delay checkbox.
-
- If you're using HubSpot's integration with LinkedIn Sales Navigator, you can create a task reminder to send an InMail or send a connection request. When you complete the task in a queue, the LinkedIn Sales Navigator will open on the contact's record so you can send the InMail or connection request.
-
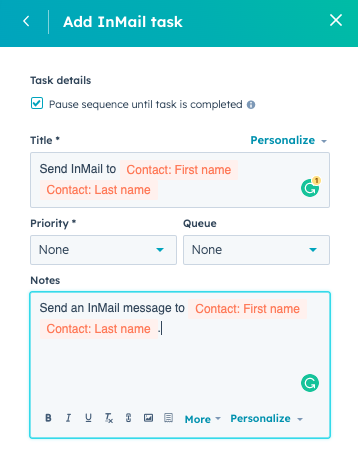
- In the right panel, click Sales Navigator - InMail task or Sales Navigator - Connection request task.
- Under Task details, click the checkmark to pause the sequence until the task is completed.
-
- Enter a title for the task.
- To add personalization tokens in the title, click the Personalize dropdown menu.
- Enter a title for the task.
-
- To set the task priority, click the Priority dropdown menu.
- To add the task to a queue, click the Queue dropdown menu.
- Enter the task details in the Notes field. You can use this field to enter the message you would include in your InMail or connection request. This message will not automatically populate in the LinkedIn Sales Navigator pop-up box when completing the task. Use the toolbar at the bottom to format the text, insert a link, insert a snippet, or add personalization tokens.
- Add steps until your sequence is complete and click Save. Each sequence is limited to 10 email templates, although you can add as many task reminders as needed.
- In the right panel, select the radio button next to the desired sharing setting. By default, new or cloned sequences will be set to Only Me. Learn more about sharing sales content and bulk-sharing sequences.
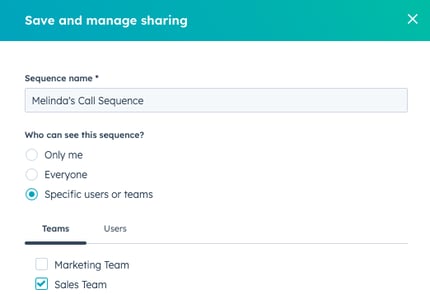
- Click Save.
Edit sequence settings
After adding steps to your sequence, you can edit the sequence settings, including the follow-up email send times and default task creation times. These settings only apply to the emails and tasks that execute after the first step in your sequence.
Please note: when your sequence is set to only send emails on business days, the delays will only count the business days between each step. For example, if an email is sent on a Thursday at 5pm and the following email is scheduled to send three days later, the email will send on Tuesday at 5pm. Keep in mind, the timing of the follow-up email will depend on your automated email send window.
To configure your sequence settings:
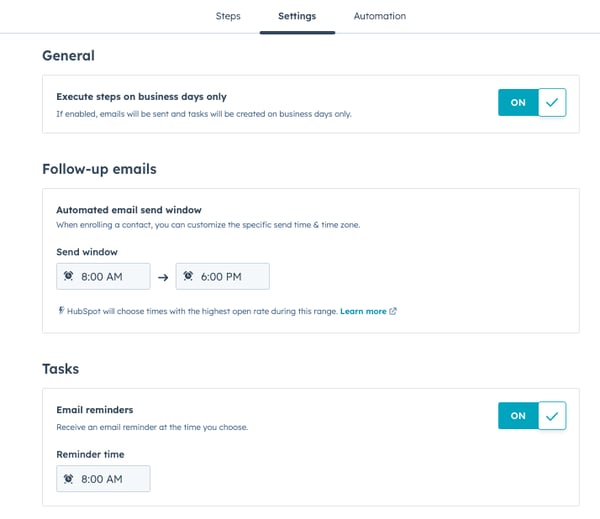
- At the top of the sequence editor, click the Settings tab.
- By default, follow-up emails in a sequence are only sent on business days. To send emails on Saturdays and Sundays, click to toggle the Execute steps on business days only switch off.
- To customize the timing of each follow-up email, set a time range using the Automated email send window time pickers. HubSpot will review previous email opens and the set timezone to automatically determine the best time to send in this range.
- Sequence tasks are created at the start of your account's calendar day, which is based on the time zone selected when enrolling contacts. These tasks are included in the Tasks daily digest email. To receive an additional email reminder each time a task is created in a sequence:
- Click to toggle the Email reminders switch on.
- Use the time picker to select the default time when you'll receive the task reminder. The task will be due at 5pm on that calendar day in the time zone selected when enrolling the contact in the sequence.
- After you have edited your sequence settings, click Save.
Edit sequence enrollment automation
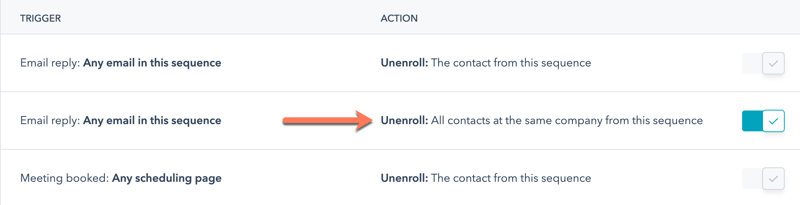
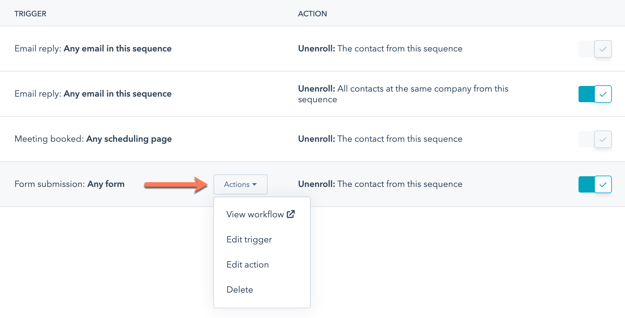
Edit the automatic unenrollment triggers or set up embedded workflows to automatically enroll or unenroll contacts in the sequence. By default, contacts will be automatically unenrolled when they reply to any email in the sequence or book a meeting on any scheduling page. These triggers cannot be turned off.
To edit the sequence enrollment triggers:- At the top of the sequence editor, click the Automation tab.
- To unenroll all contacts at the same company from this sequence when a contact replies to an email in the sequence, click to toggle the Unenroll: All contacts at the same company from this sequence switch on.
- After you have edited your sequence enrollment automation, click Save.
- You can also create workflows from the Automation tab to automatically enroll or unenroll contacts from this sequence based on other triggers. These workflows can be turned on and off from the Automation tab, or managed in the workflows tool. To create a workflow:
-
- In the top right, click Create workflow.
-
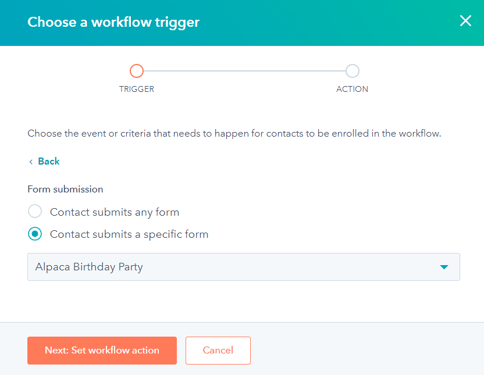
- To trigger a workflow based on form submission:
- In the right panel, select either Form submission to enroll a contact into the workflow when they submit a form.
- To trigger a workflow based on form submission:
-
-
- Select Contact submits any form to enroll contacts who submit any form on your website, or Contact submits a specific form and select a form from the dropdown menu.
- Select Contact submits any form to enroll contacts who submit any form on your website, or Contact submits a specific form and select a form from the dropdown menu.
-
-
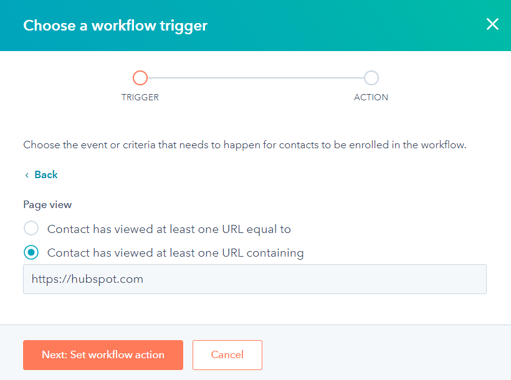
- To trigger a workflow based on page views:
- In the right panel, select Page view to enroll a contact into the workflow when they view a page on your website.
- To trigger a workflow based on page views:
-
-
- Select a page view option to refine the page view criteria by URL. A wildcard (*) will not work.
- Select a page view option to refine the page view criteria by URL. A wildcard (*) will not work.
-
- Click Next: Set workflow action.
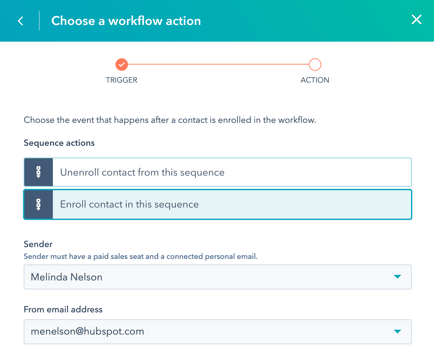
- In the Sequence actions section, select an action to take place when contacts meet the trigger criteria:
- To unenroll a contact from the sequence when they meet the workflow enrollment criteria, select Unenroll contact from this sequence .
-
- To enroll a contact in the sequence when they meet the enrollment criteria of the workflow, select Enroll contact in this sequence. Use the Sender and From email address dropdown menus to select an email sender.
- To enroll a contact in the sequence when they meet the enrollment criteria of the workflow, select Enroll contact in this sequence. Use the Sender and From email address dropdown menus to select an email sender.
- In the bottom left, click Create.
- In the dialog box, click Turn on to immediately turn on the workflow or Save as draft. The new workflow will appear in the list of triggers on the Automation tab.
- To edit the workflow in the workflows tool, edit a trigger, edit an action, or delete a workflow, hover next to the workflow the click the Actions dropdown menu.
Edit sequences
You can edit your sequence templates, update the tasks included in your sequence, and adjust your sequence settings. As you are editing your sequence, you can review analytics from the Step performance report for each step If you have contacts that are currently active in a sequence, learn more about how changes to an active sequence can impact your contacts.
- To re-order the steps in the sequence, in the top right corner of the sequence step, click the Actions dropdown menu and select Move up or Move down.
- You can also edit email threading, automated emails, or manual email templates directly from the sequence:
- Learn how to edit email threading.
- To edit an automated email, click the Actions dropdown menu for the Automated Email step in the sequence, then click Edit email. You can then edit the body of the email and save it as a new template.
-
- To edit a manual email template, click the Actions dropdown menu for the Manual Email Task step in the sequence, then click Edit task. Click the name of the email template, then click Edit in the dropdown menu.
-
- To edit all other tasks, in the top right corner of the sequence step, click the Actions dropdown menu, then click Edit task.
- To remove a step from your sequence, in the upper right, click the Actions dropdown menu, then click Delete.
- When you have finished editing your sequence steps:
- To apply the changes you just made to the existing sequence, in the top right, click Save existing.
- To create an entirely new sequence that includes the changes you just made:
- In the top right, click Make copy.
- In the dialog box, enter a name for the new sequence and select a folder if you wish.
- Click Save.
Learn how to enroll your contacts in a sequence.
