Last updated: October 30, 2023
Available with any of the following subscriptions, except where noted:
|
|
In the content editor, you can use drag and drop tools to add, edit, and rearrange the content in your blog posts and pages. Drag and drop tools are not available for some posts and pages.
Add and edit modules
Modules are individual blocks of website content. Some modules, like rich text modules, can contain multiple types of content.
-
Navigate to your content:
- Website Pages: In your HubSpot account, navigate to Content > Website Pages.
- Landing Pages: In your HubSpot account, navigate to Content > Landing Pages.
- Hover over your content and click Edit.
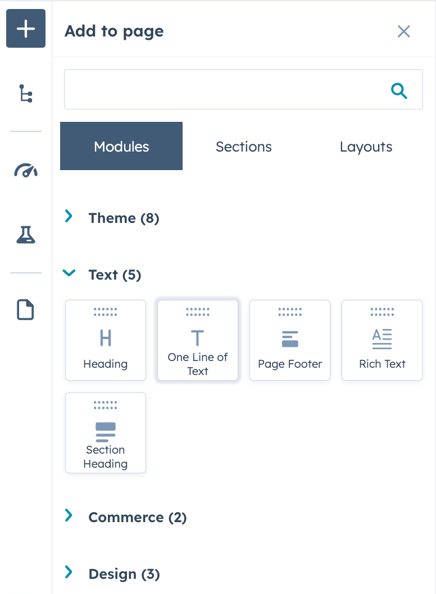
- In the left sidebar, click the Add icon.
- Click to expand a module category, then click a module and drag it into position in your content. .
- To adjust the width of a module, click the vertical divider between columns and drag it into position.
- To edit a module, click the module in your content.
- To add a copy of a module to your content, hover over the module and click the clone icon.
- To remove a module from your content, hover over the module and click the delete icon.

Use sections
Sections are larger groups made up of different modules. You can create reusable page sections by dragging modules onto a blank section layout. Developers can also create resuable sections using our developer documentation. Once created, sections can be used on any page that uses the same theme and supports drag and drop editing
Please note: no more than 50 reusable sections can be saved at one time. To save a new reusable section, delete an existing reusable section.
Create a section
You can create a section by selecting a layout, then adding modules to it.
-
Navigate to your content:
- Website Pages: In your HubSpot account, navigate to Content > Website Pages.
- Landing Pages: In your HubSpot account, navigate to Content > Landing Pages.
- Hover over a page and click Edit.
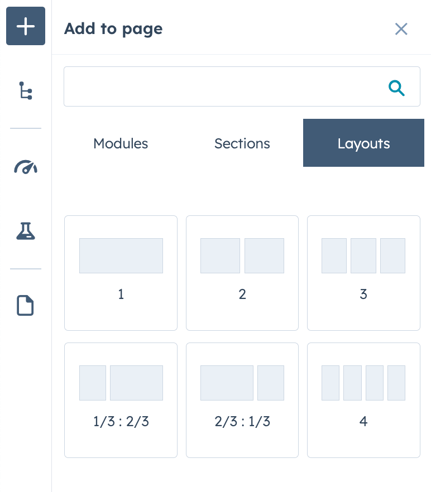
- In the content editor, click the Add icon in the left sidebar.
- Click the Layouts tab, then click a layout and drag it into place on the page.
- In the left sidebar, click the Add icon, then click the Modules tab.
- Click to expand a module category, then click a module and drag it into position. Repeat for each module of your section.
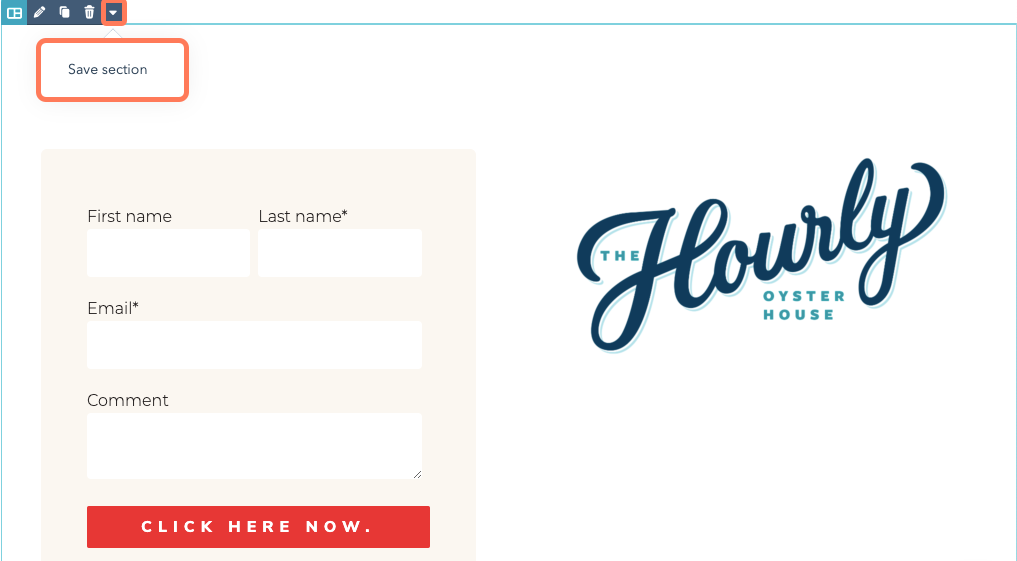
- Hover over the section and click the down icon, then select Save section.
Please note: existing page sections and those created without a layout can also be saved as reusable sections.
- In the dialog box, enter a name and description for your section, then click Save.
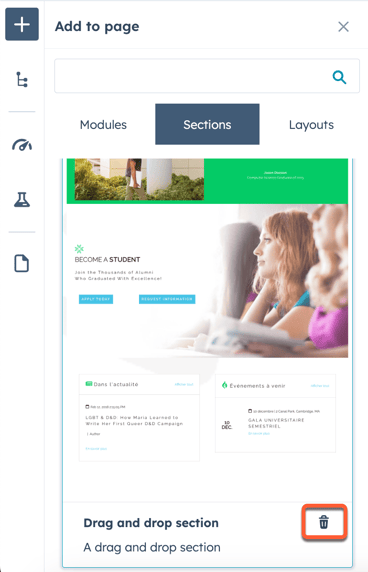
Add or delete a section
-
Navigate to your content:
- Website Pages: In your HubSpot account, navigate to Content > Website Pages.
- Landing Pages: In your HubSpot account, navigate to Content > Landing Pages.
- Hover over a page and click Edit.
- In the content editor, click the Add icon in the left sidebar, then click the Sections tab.
- Click to expand a section type:
- Saved: sections created in the content editor, then saved for use on different pages.
- Theme: sections created by the developer of the theme used for your page.
- Click a section, then drag it into position on your page.
Please note: Adding a saved section that contains smart rules will apply those rules to the newly added section. These sections will be labeled as Smart.
- To delete a section from your saved sections, hover over it and click the delete icon. In the dialog box, click Delete.
Style content
In the content editor, you can edit styling options, such as padding and margins, on the Styles tab of the sidebar editor. You can edit styles for modules and sections, as well as rows and columns of content.
Available style options for custom modules and themes are set by the creating developers. Learn more about module and theme style options in our developer documentation.
-
Navigate to your content:
- Website Pages: In your HubSpot account, navigate to Content > Website Pages.
- Landing Pages: In your HubSpot account, navigate to Content > Landing Pages.
- Blog: In your HubSpot account, navigate to Content > Blog.
- Hover over your content and click Edit.
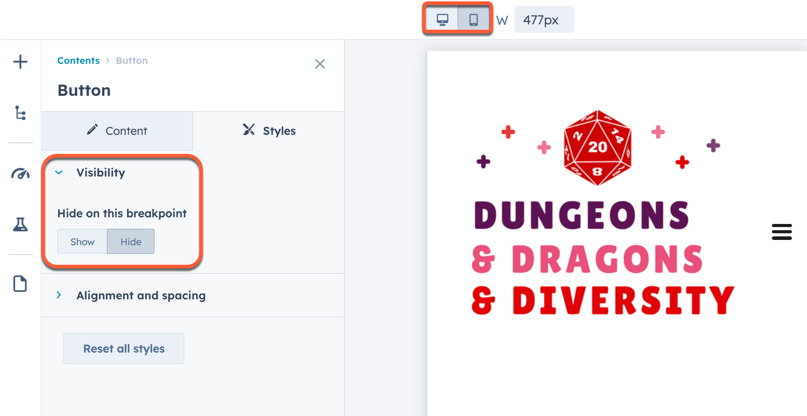
- In the content editor, click a module, or an element's section, row, or column icon.
- In the sidebar editor, click the Styles tab.
- To hide an element:
- Click to expand the Visibility section.
- In the Hide on this breakpoint section, click Hide. By default, this will hide the module on desktop and mobile views.
- To show the module on mobile or desktop only, click the mobile or desktop icon at the top of the page. Click to expand the Visibility section. In the Hide on this breakpoint section, click Show. This will show the module on the selected device type, but hide it otherwise.
- To set padding and margins:
- Click to expand the Alignment and spacing section, then click Padding or Margin.
-
- To add uniform spacing to all sides, select the Apply to all sides checkbox, then enter a value in pixels in any field.
- To add different padding to each side, enter values in pixels in the Top, Left, Right, and Bottom fields.

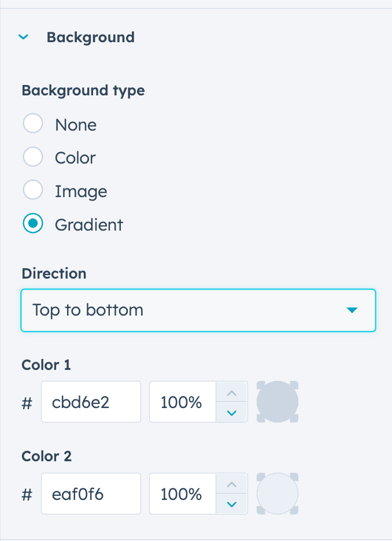
- To set an element's background, click to expand the Background section, then select an option:
- None: remove any background colors or images.
- Color: set a single color as the background. Enter a hex value, or click the color picker and select a color, then enter a transparency value.
- Image: set an image as the background. Click Upload to add an image from your computer, or click Browse images to select an image from your files.
- Gradient: set two colors fading together as the background. Click the Direction dropdown menu and select a gradient direction. For each color, enter a hex value, or click the color picker and select a color, then enter a transparency value.
Please note: the exact options that appear in the Styles tab may vary, especially for custom modules. Learn more about style options for custom modules in our developer documentation.
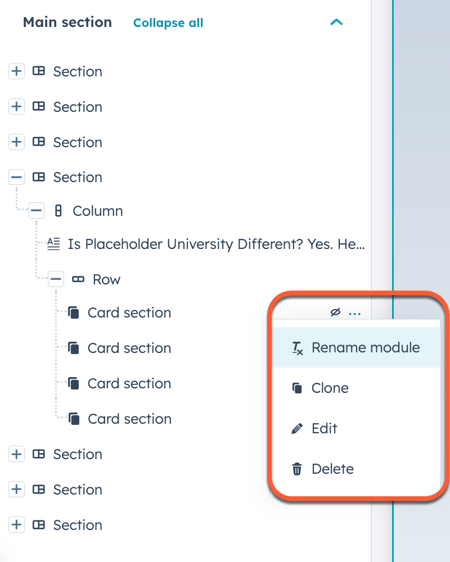
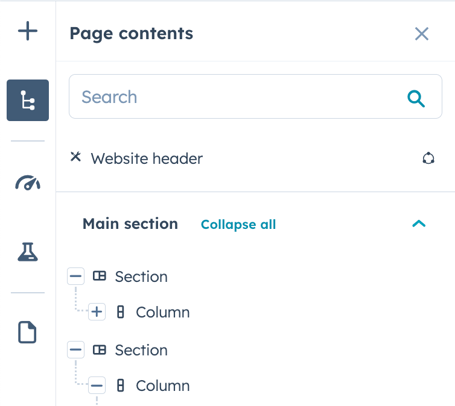
Manage your content
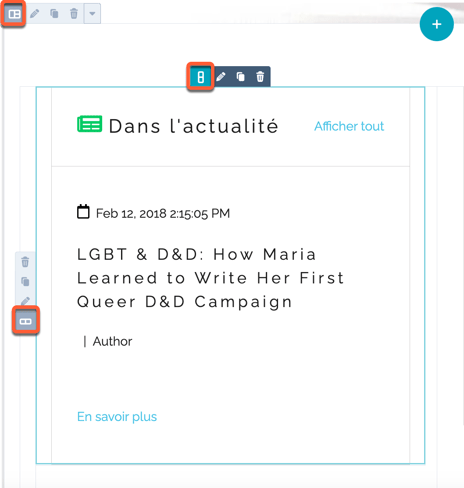
In the sidebar editor, you can see an overview of the sections, rows, columns, and modules in your content. From there, you can rename, edit, clone, delete, or hide them:
-
Navigate to your content:
- Website Pages: In your HubSpot account, navigate to Content > Website Pages.
- Landing Pages: In your HubSpot account, navigate to Content > Landing Pages.
- Hover over a page and click Edit.
- In the left sidebar, click the Contents tab.
- You can control which page elements are visible in the sidebar editor:
- To view only the sections of your page, click Collapse all. This will collapse all rows, columns, and modules so only sections are visible in the sidebar editor.
- To see all content on your page, click Expand all. This will show all sections, rows, columns, and modules in the sidebar editor.
- To view an individual page element or container, click the + plus sign next to its name.
- To hide an element or container, click the - minus sign next to its name.
- You can also edit, rename, clone, delete, and hide page elements:
- To edit an element, click its name.
- To rename an element, click the three dots next to its name, then select Rename [element]. In the dialog box, enter a name for the element, then click Save.
- To clone an element, click the three dots next to its name, then select Clone. This will create an exact copy of the original element adjacent to it.
- To delete an element, click the three dots next to its name, then select Delete.
- To hide a module, click the hide icon. This will hide the module in the content preview, but not in the sidebar editor. To display a hidden module on the page, click the display icon.