
Last updated: January 20, 2023
Available with any of the following subscriptions, except where noted:
|
|
|
|
| Legacy Marketing Hub Basic |
By default, HubSpot balances uploaded images for both load time and image quality. You can customize an image's optimization settings when adding an image to your HubSpot content. For example, you may want an email image to be higher resolution, or a page image to be lower resolution for a faster load time.
To customize an image's optimization settings:
-
Navigate to your content:
- Website Pages: In your HubSpot account, navigate to Content > Website Pages.
- Landing Pages: In your HubSpot account, navigate to Content > Landing Pages.
- Blog: In your HubSpot account, navigate to Content > Blog.
- Knowledge Base: In your HubSpot account, navigate to Content > Knowledge Base.
- Email: In your HubSpot account, navigate to Marketing > Marketing Email.
- In a rich text or image module, start by browsing for an image:
- In a rich text module, click the image icon at the top of the editor.

-
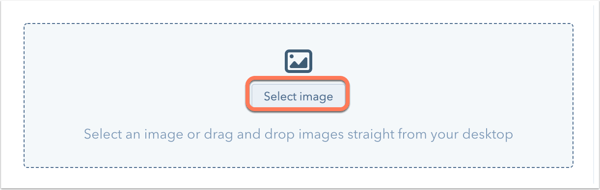
- In an image module in the drag and drop editor, click Select image.
-
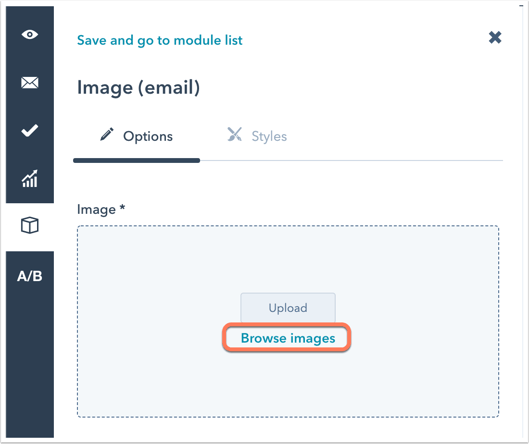
- In an image module in the classic email editor, click Browse images.
- In the right pane, hover over the image you want to insert, then click the information icon that appears.
- Click the Image Optimization dropdown menu.
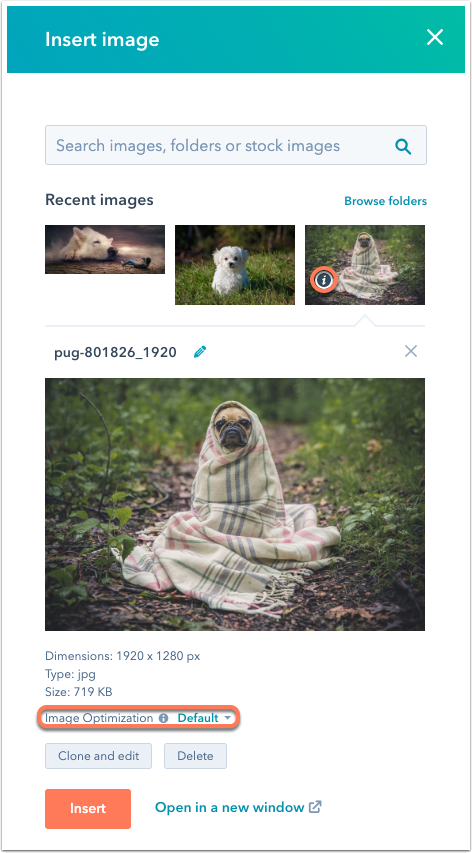
- Select an image optimization level:
- High: your image will be served at the highest quality but will increase longer load time.
- Default: your image will be served to balance both fidelity and load time.
- Low: your image will be served at a lower quality to optimize for the fastest load time.
- Click Insert to add your image.
Please note: You cannot customize the image optimization for dynamically sized media types, such as SVG files.
