
Last updated: July 22, 2026
Available with any of the following subscriptions, except where noted:
-
 Content Hub
Professional, Enterprise
Content Hub
Professional, Enterprise
In the video editor, you can trim and edit your video clip directly from the video timeline. Use the timeline to make precise edits to your clip, including reordering, splitting, trimming, and removing sections.
If your video file size is less than 200MB, an audio waveform will appear in the timeline to help you navigate your content.
- In your HubSpot account, click More, then navigate to Content > Video. If More doesn't appear in your account, navigate to Content > Video directly.
- From the video library, hover over the video. Then, click the edit icon. You'll be automatically redirected to the video editor.
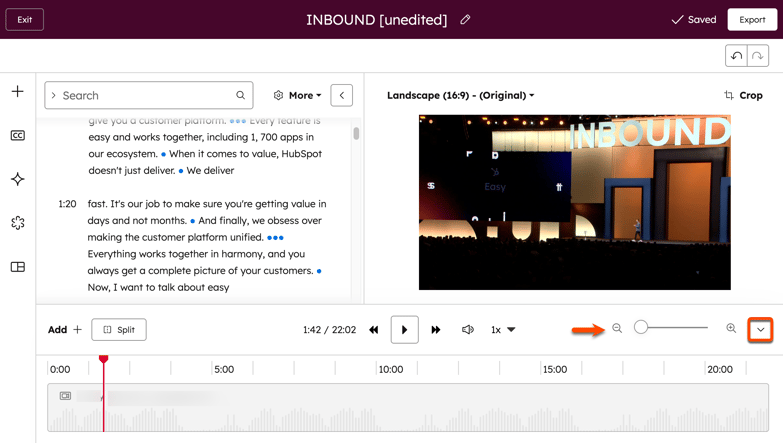
- To zoom in or out of the timeline, in the bottom right, use the magnifying slider.
- To review your video timeline in detail, hover over specific points in the timeline. The timestamp for that point will appear.
- To hide or display the timeline, in the bottom right, click the hide timeline icon or show timeline icon. You'll still be able to preview and scrub through your video using the minimized timeline bar.
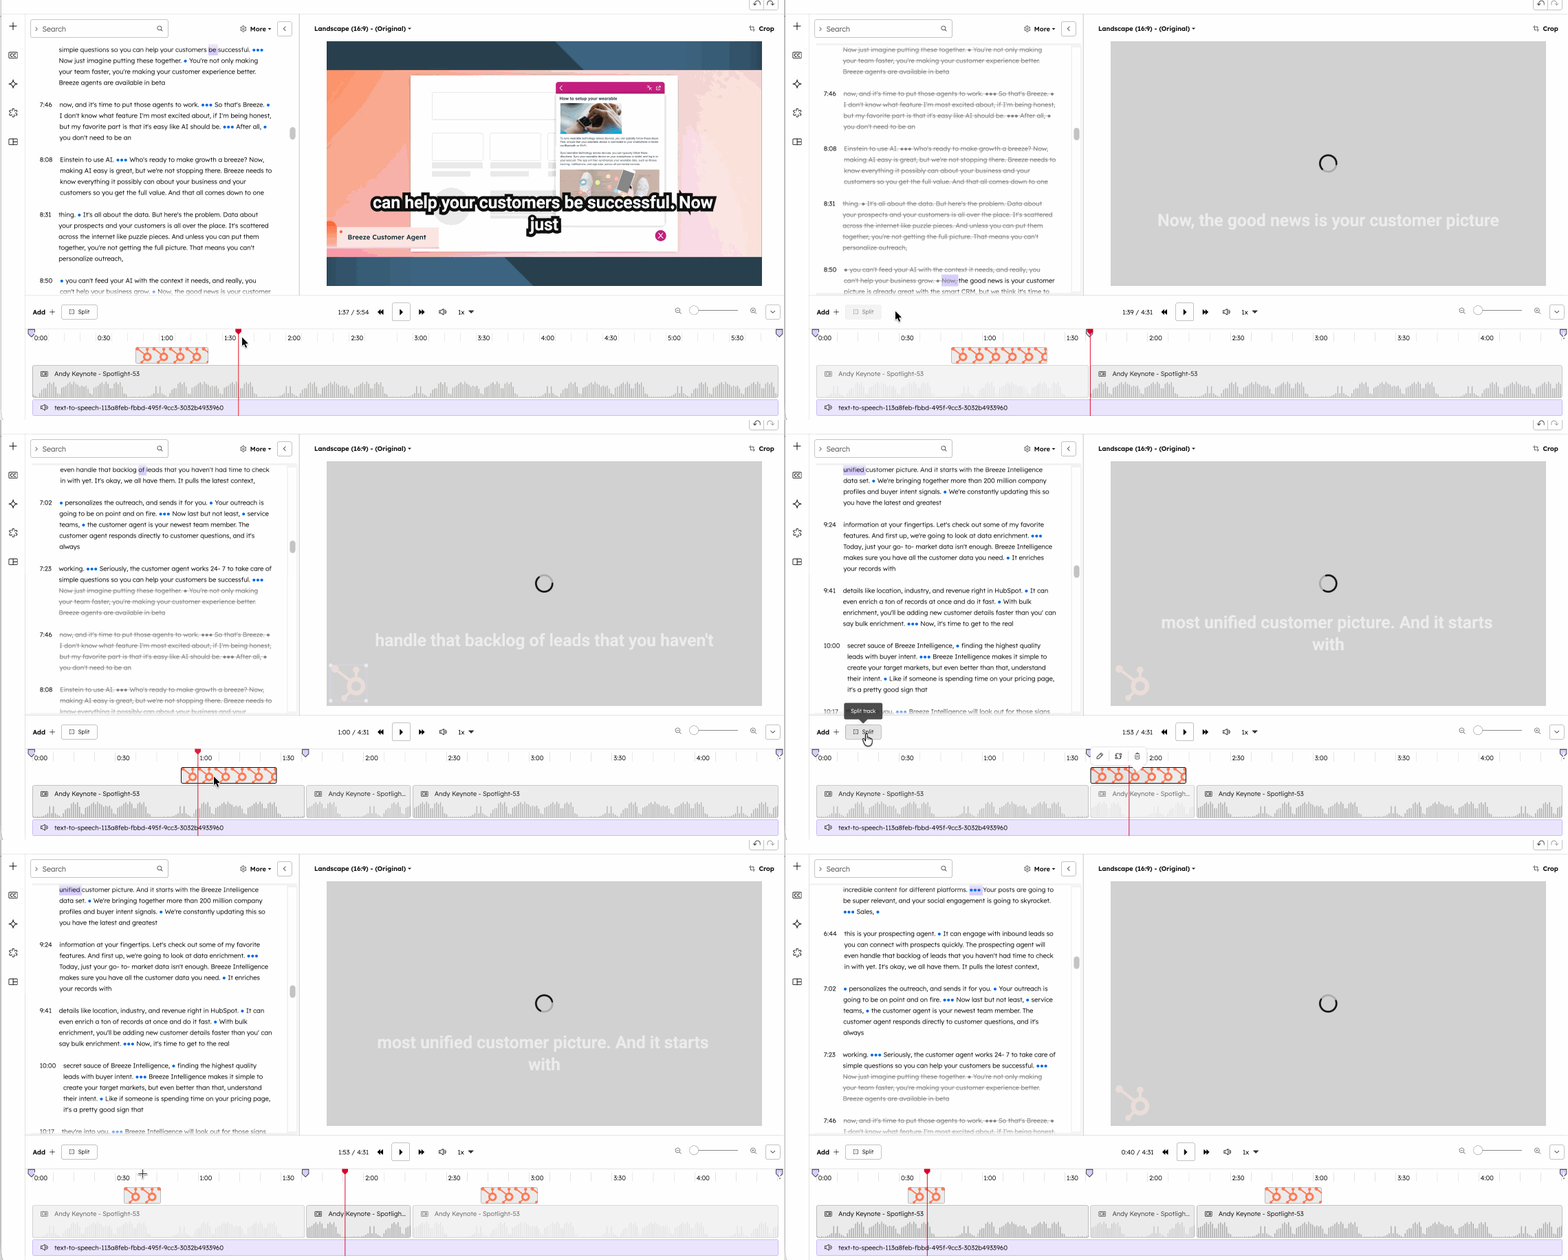
- To reorder your clips, click and drag the clip to the desired position in the timeline.
- When moving your clips, alignment guides will automatically appear.
- The transcript will also automatically reflect your new video order.
- To split clip, hover over specific point and click Split. You can split video clips, image overlays, text overlays, and audio clips. After splitting your content, to add new content between existing sections, hover over the split point and click the + add icon.
- To trim your clips, at the beginning or end of your video, click and drag the video edges to trim to the desired amount.
- In the timeline, you can crop out specific sections of the video. For example, if you'd like to remove any mistakes, or create jumpcuts in your video.
- Click and drag an area in the timeline to highlight the section that you'd like to remove. The corresponding section will be highlighted in the transcript.
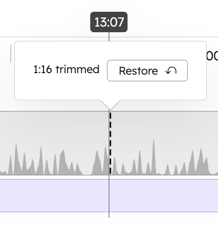
- Click Trim to remove the section. The cropped sections will automatically reflect with a strikethrough in the transcript. The trimmed section will also appear in the timeline with a dashed line.
- To restore your trimmed area in the timeline, you can hover over the dashed line. Then, click Restore.
- In the timeline, you can choose to retain only a specific section of the video clip for editing. For example, if you wanted to create a new clip from an existing video.
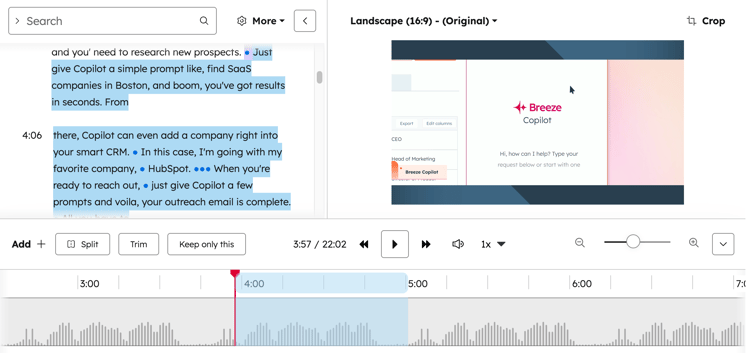
- Click and drag an area in the timeline to highlight the section that you'd like to keep. The corresponding section will be highlighted in the transcript.
- Click Keep only this to retain only the selected section. This will remove all other sections except for the area selected.
- To delete a track from your timeline, click the track. Then, select the delete icon. Alternatively, you can also use the backspace or delete key in your keyboard.
- You can delete video clips, image overlays, text overlays, and audio clips.
- The deleted sections will automatically reflect with a strikethrough in the transcript.
- You cannot delete the primary video clip track.
To continue editing your video, learn more about editing your video files.
