You can use folders to organize your marketing emails. For example, you could create different folders for different campaigns or email creators.
Create folders
- In your HubSpot account, navigate to Marketing > Email.
- Click the Folders tab in the upper right of the email index page.
- In the upper left, click Create folder.

- In the dialog box, enter a folder name, then click Create.
Manage folders
- In your HubSpot account, navigate to Marketing > Email.
- Click the Folders tab in the upper right of the email index page.
- Click the name of a folder in the left column.
- To rename the folder:
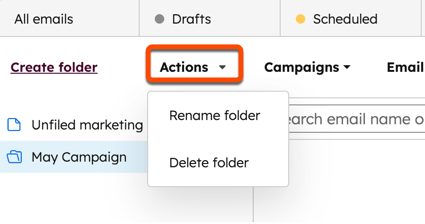
- Click the Actions dropdown menu in the upper left and select Rename folder.
- In the dialog box, enter a new name for the folder, then click Save.
- To delete the folder:
- Click the Actions dropdown menu in the upper left and select Delete folder.
- In the dialog box, click Delete folder.

Please note: when you delete a folder, the emails inside will be moved to Unfiled marketing emails.

