- Knowledge Base
- Sales
- Meetings
- Share scheduling pages
Share scheduling pages
Last updated: February 26, 2025
Available with any of the following subscriptions, except where noted:
After you create a scheduling page, you can share it with your contacts using a meeting link. The meeting link will allow the contact to access your scheduling page so they can book time with you. If you connected your calendar, booked meetings will sync with yourconnected Gmail or Office 365 calendarso your appointments will always be up-to-date.
If a calendar is not connected, the scheduling page will be in offline mode, so meetings can be requested but will not be automatically added to the calendar.
To insert suggested times directly into an email instead of sharing a link, learn more about sending proposed meeting times in a one-to-one email.
Please note: if you are using a sandbox account, you can only book meetings with other users in the sandbox account.
Share a scheduling page on your desktop
You can share a scheduling page for yourself or another user using a meeting link. You can share the meeting link directly with the contact in an email or live chat message, or add it to a CTA on your website.
- In your HubSpot account, navigate to Sales > Meetings Scheduler.
- Hover over the meeting name and click Copy link.
- Share the link with your contact.

To view another user's scheduling page, click the Owner dropdown menu and select another user.
Depending on your HubSpot subscription, you can also embed the scheduling widget on your HubSpot pages or your external pages.
If you want to track clicks on your meeting link, learn how to add tracking parameters before you share it. When a contact books a meeting using a meeting link with tracking parameters, the parameter values will populate the contact's Campaign of last booking in meetings tool, Source of last booking in meetings tool, and Medium of last booking in meetings tool properties.
Please note: if a new contact or an existing contact that does not already have a contact owner assigned books a meeting, the meeting organizer will be set as the contact's owner.
Share a scheduling page on the HubSpot mobile app
- Open the HubSpot app on your iOS or Android app.
- In the bottom navigation menu, tap Menu.
- Tap Meeting Links in the left sidebar.
- Tap on a specific meeting to copy the link to your clipboard.
- To share, copy, or preview the link, tap theverticalMenuthree dot menu beside the meeting link.
Receive bookings
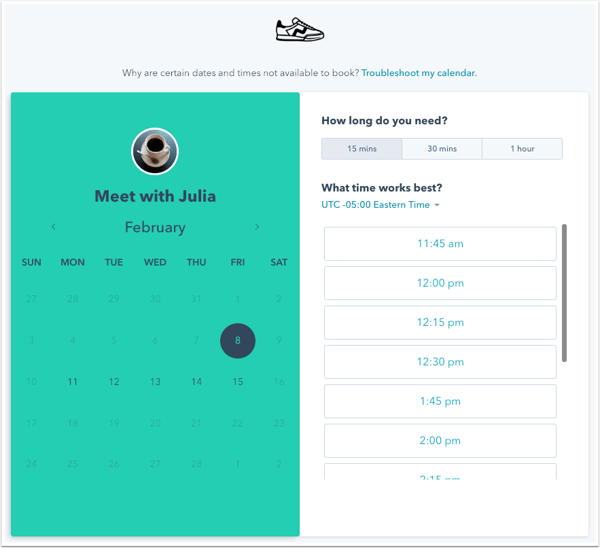
When a contact clicks your meetings link, a scheduling page will open in another browser tab. They can then select a date, time, and length of time if you've set multiple meeting duration options. After selecting a time, they can enter their contact information and answer any custom questions you've added.

If you're using the payments tool and have added a payment link to your scheduling page, the price will be listed above the available time slots. After selecting a time and entering their contact information, the contact will be asked to enter their payment information on a checkout page.

Depending on your scheduling page settings, the following may occur when a contact books a meeting:
- If a contact has booked a meeting in the past and the Pre-populate fields with known values setting is turned on for the scheduling page, HubSpot will recognize the cookie in their browser and the device they were using, and pre-populate the form with information from their contact record that they have previously submitted on that device. The form will also be pre-populated if a known contact books a meeting on a scheduling page hosted on a custom domain or embedded on your website and the contact previously submitted a marketing form on that same domain.
- If the Auto-submit form when all fields are pre-populated setting is turned on, the form will automatically be submitted with the contact's pre-populated information, unless your scheduling page includes custom form questions. Custom form questions will not pre-populate because these responses are not saved to a property.
When a meeting is booked, you'll get an email alert with the booking time and the contact's name. You can click to view the contact in the CRM or view the calendar event in your connected default personal calendar. The contact will also receive a confirmation notification and calendar invitation with all of the meeting details. If you collected a payment, a confirmation message will appear letting the contact know that their payment was submitted and the meeting was scheduled. Learn more about what happens after a payment is collected in HubSpot.

Your calendar event will show that the contact has not responded until they accept the calendar invite on their calendar.
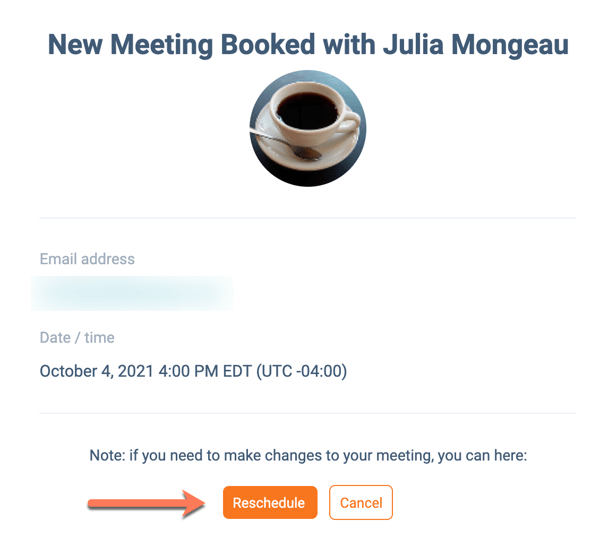
Contacts can cancel or reschedule the meeting from the invite or notification by clicking Reschedule or Cancel. If you don't want to include the cancel or reschedule links in the event description, learn how to turn them off in the scheduling page's overview settings.

When the meeting is canceled, the meeting outcome will be updated to Canceled and the user will be notified of the cancellation. If they reschedule, the HubSpot user will be notified and the meeting engagement will be automatically updated with the new date and time.
If you're using the HubSpot mobile app, your upcoming meetings will also appear on the Today tab.
Add a meeting outcome
After the meeting takes place, you can assign a meeting outcome to better track your meeting engagements with your contacts.
- Navigate to your records:
- Contacts: In your HubSpot account, navigate to CRM > Contacts.
- Companies: In your HubSpot account, navigate to CRM > Companies.
- Deals: In your HubSpot account, navigate to CRM > Deals.
- Tickets: In your HubSpot account, navigate to CRM > Tickets.
- Custom objects: In your HubSpot account, navigate to Contacts > [Custom object]. If your account has more than one custom object, hover over Custom Objects, then select the custom object you want to view.
- Hover over a meeting engagement and click the Actions dropdown menu, then select Edit.

- Click the Outcome dropdown menu and select a meeting outcome.

- ClickSave.