- Knowledge Base
- Content
- Design Manager
- Add a JavaScript file to HubSpot
Add a JavaScript file to HubSpot
Last updated: April 12, 2024
Available with any of the following subscriptions, except where noted:
You can host and edit JavaScript files in the design manager. Learn how to create a JavaScript file and link it to a template or domain.
Create a JavaScript file
- In your HubSpot account, navigate to Content > Design Manager.
- In the left sidebar menu, click File > New file. You may need to click the folder folder icon to expand the menu.
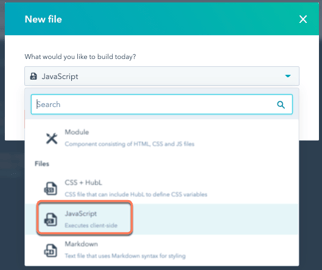
- In the dialog box, click the What would you like to build today? dropdown menu and select JavaScript.

- Click Next.
- In the File name field, enter a name for your JavaScript file.
- To update the file's location, in the File location section, click Change and select the folder to add the file to.

- Click Create.
- Type or paste your JavaScript into the code editor.
- If you've enabled ESLint, you can see any JavaScript warnings or errors by clicking to toggle the Show output switch on.

- In the upper right, click Publish changes to take your changes live.
Attach a JavaScript file to a template
- In the finder on the left, click the template you want to update.
- In the inspector on the right, click the Edit tab.
- In the Linked JavaScript files section, click the Add dropdown menu and select your JavaScript file.
- In the upper right, click Publish changes to take your changes live.
Include a JavaScript file on HubSpot pages
You can include your JavaScript file on all the pages of a HubSpot-hosted domain, or on individual pages by using the public URL.
To access the file's public URL:
- In the left sidebar menu, select your JavaScript file.
- Click Actions > Copy public URL.

- In your HubSpot account, click the settings settings icon in the top navigation bar.
- In the left sidebar menu, navigate to Content > Pages.
- Click the Choose a domain to edit its settings dropdown menu and select the domain to add the JavaScript file to. You can select Default settings for all domains if you want the JavaScript file to apply to all connected domains.
- In the Site footer HTML section, paste the public URL as the value for the script tag’s source:
<!-- start Main.js Do Not Remove -->
<script src='insert your file's public URL here'></script>
<!---End Main.js-->
- Click Save.
Or, to add the file to an individual page:
-
Navigate to your content:
- Website Pages: In your HubSpot account, navigate to Content > Website Pages.
- Landing Pages: In your HubSpot account, navigate to Content > Landing Pages.
- Hover over the page that you want to edit, then click Edit.
- In the page editor, click the Settings menu and select Advanced. .
- In the Footer HTML section of the dialog box, paste the public URL as the value for the script tag's source:
<!-- start Main.js Do Not Remove -->
<script src='insert your file's public URL here'></script>
<!---End Main.js-->
- In the top right, click Publish or Update.
Design Manager
Thank you for your feedback, it means a lot to us.
This form is used for documentation feedback only. Learn how to get help with HubSpot.