- Knowledge Base
- Marketing
- Marketing Email
- Manage your marketing email account settings (Marketing Hub Starter and HubSpot CRM accounts)
Manage your marketing email account settings (Marketing Hub Starter and HubSpot CRM accounts)
Last updated: February 11, 2025
Available with any of the following subscriptions, except where noted:
Before you send your first email, review your email settings to confirm your default settings and make use of HubSpot's email features.
Please note: these settings apply to Marketing Hub Starter accounts and HubSpot CRM accounts. Learn how to set up Marketing Hub Professional and Enterprise marketing email account settings.
- In your HubSpot account, click the settings settings icon in the top navigation bar.
- In the left sidebar menu, navigate to Marketing > Email.
- Your marketing email settings include:
- Configuration
- Double opt-in
- Subscription Types (Marketing Hub Starter accounts only)
Configuration
On the Configuration tab you'll set your default email size, colors, and email footer information.
Footer
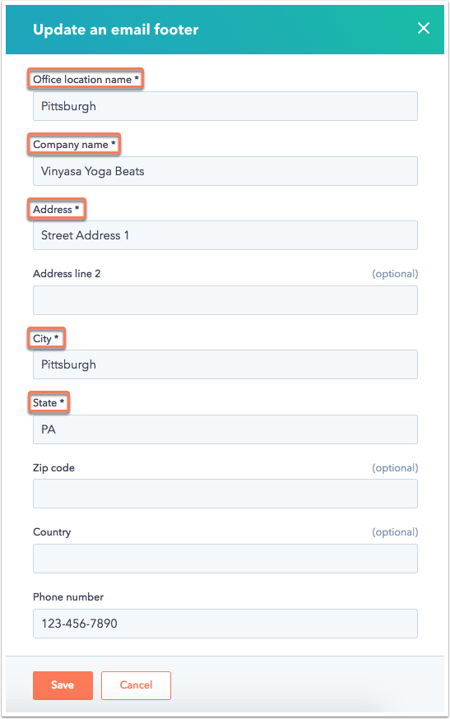
Your email footer contains the physical address of your business. This information is automatically included in the footer of all marketing emails.
The following fields are required to send marketing emails:
- Office location name
- Company name
- Address
- City
- State

Learn more about required email footer information, and how to manage your email footer in HubSpot.
Default values for personalization
Set your global defaults for contact and company personalization tokens. Learn more about setting global defaults for personalization tokens.
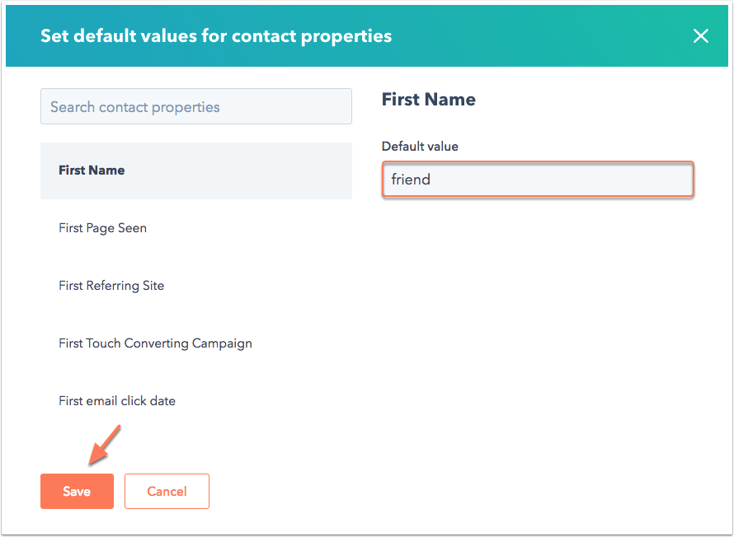
- Click Edit defaults to edit the Contact property defaults or Company property defaults.
- In the dialogue box that appears, search for and select a property, then enter a default value.
- Click Save to apply your changes.

Double opt-in
Manage your double opt-in settings for your pop-up forms. This extra confirmation step verifies the email address of all new contacts via form, and can greatly improve email deliverability. Learn more about how double opt-in works.
- Switch the Double opt-in toggle on to send a confirmation email to new contacts created via form submission.
- Use the sender dropdown menu to select a From address for the double opt-in email.
- Use the Double opt-in language to select a default language.
- Enter a subject line for your double opt-in email.
You'll see a preview of how your double opt-in email will appear to your recipients.
Subscription Types
Please note: subscription types settings apply to Marketing Hub Starter accounts. Learn more about how subscription types work for free HubSpot CRM accounts.
Email subscription types summarize the type of content your subscribers will receive when they opt in. You'll have a Marketing Information email subscription type in your account by default.
To create a new subscription type:
- Click Create subscription type.
- Enter a name and internal description for your subscription type.
- Select the Active checkbox. This ensures the subscription type will appear on your email preferences page.
- Enter a public-facing preview of your email subscription type. This information will appear on your email preferences page.
Learn more about how to create and manage your subscription types, and how these types impact contact properties and more.