Last updated: September 11, 2026
Available with any of the following subscriptions, except where noted:
-
 Sales Hub
Professional, Enterprise
Sales Hub
Professional, Enterprise
-
 Service Hub
Professional, Enterprise
Service Hub
Professional, Enterprise
-
 Seats required
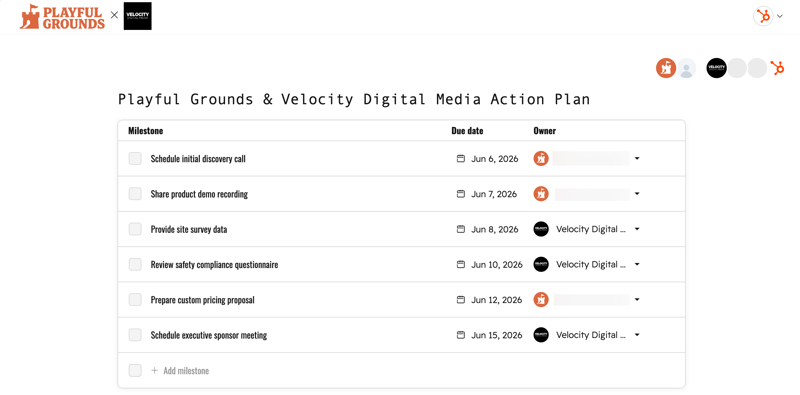
Deal plans give sales reps and their buyers a shared space to track milestones, assign ownership, and monitor progress from a single location. Sales managers can configure templates and control access so reps spend less time building plans from scratch.
For example, Sprocket Supply Co., an eCommerce company selling sustainable office supplies, uses deal plans to keep buyers on track by using actionable milestones that represent specific friction points in the sales process. Their sales team can complete milestones assigned to them and assign action items to the buyer.
Please note: you must be enrolled in the Deal Progression: Next Best Actions and Deal Plans public beta to set up deal plans.
Before you get started
You must connect a website subdomain to HubSpot to share the deal plans portal with your customers. The hs-sites HubSpot-provided domain should only be used for internal testing because it doesn't support membership email sending.
Seats required An assigned Sales or Service seat is required to set up, create, and use deal plans.
Set up deal plans
Permissions required Super Admin permissions are required to set up deal plans.
As a sales manager, set up the space where buyers can access deal plans and create plan templates specific to certain pipelines.
- In your HubSpot account, click the
settings icon in the top navigation bar. - In the left sidebar menu, in the Data Management section, click Objects.
- On the Objects page, click the Select an object dropdown menu and select Deals.
- Click the Deal Plans tab. Depending on your screen size, you may need to click the More tab, then select Deal Plans.
- Click Turn on deal plans.
Configure the portal domain and URL
- Navigate to deal plan settings.
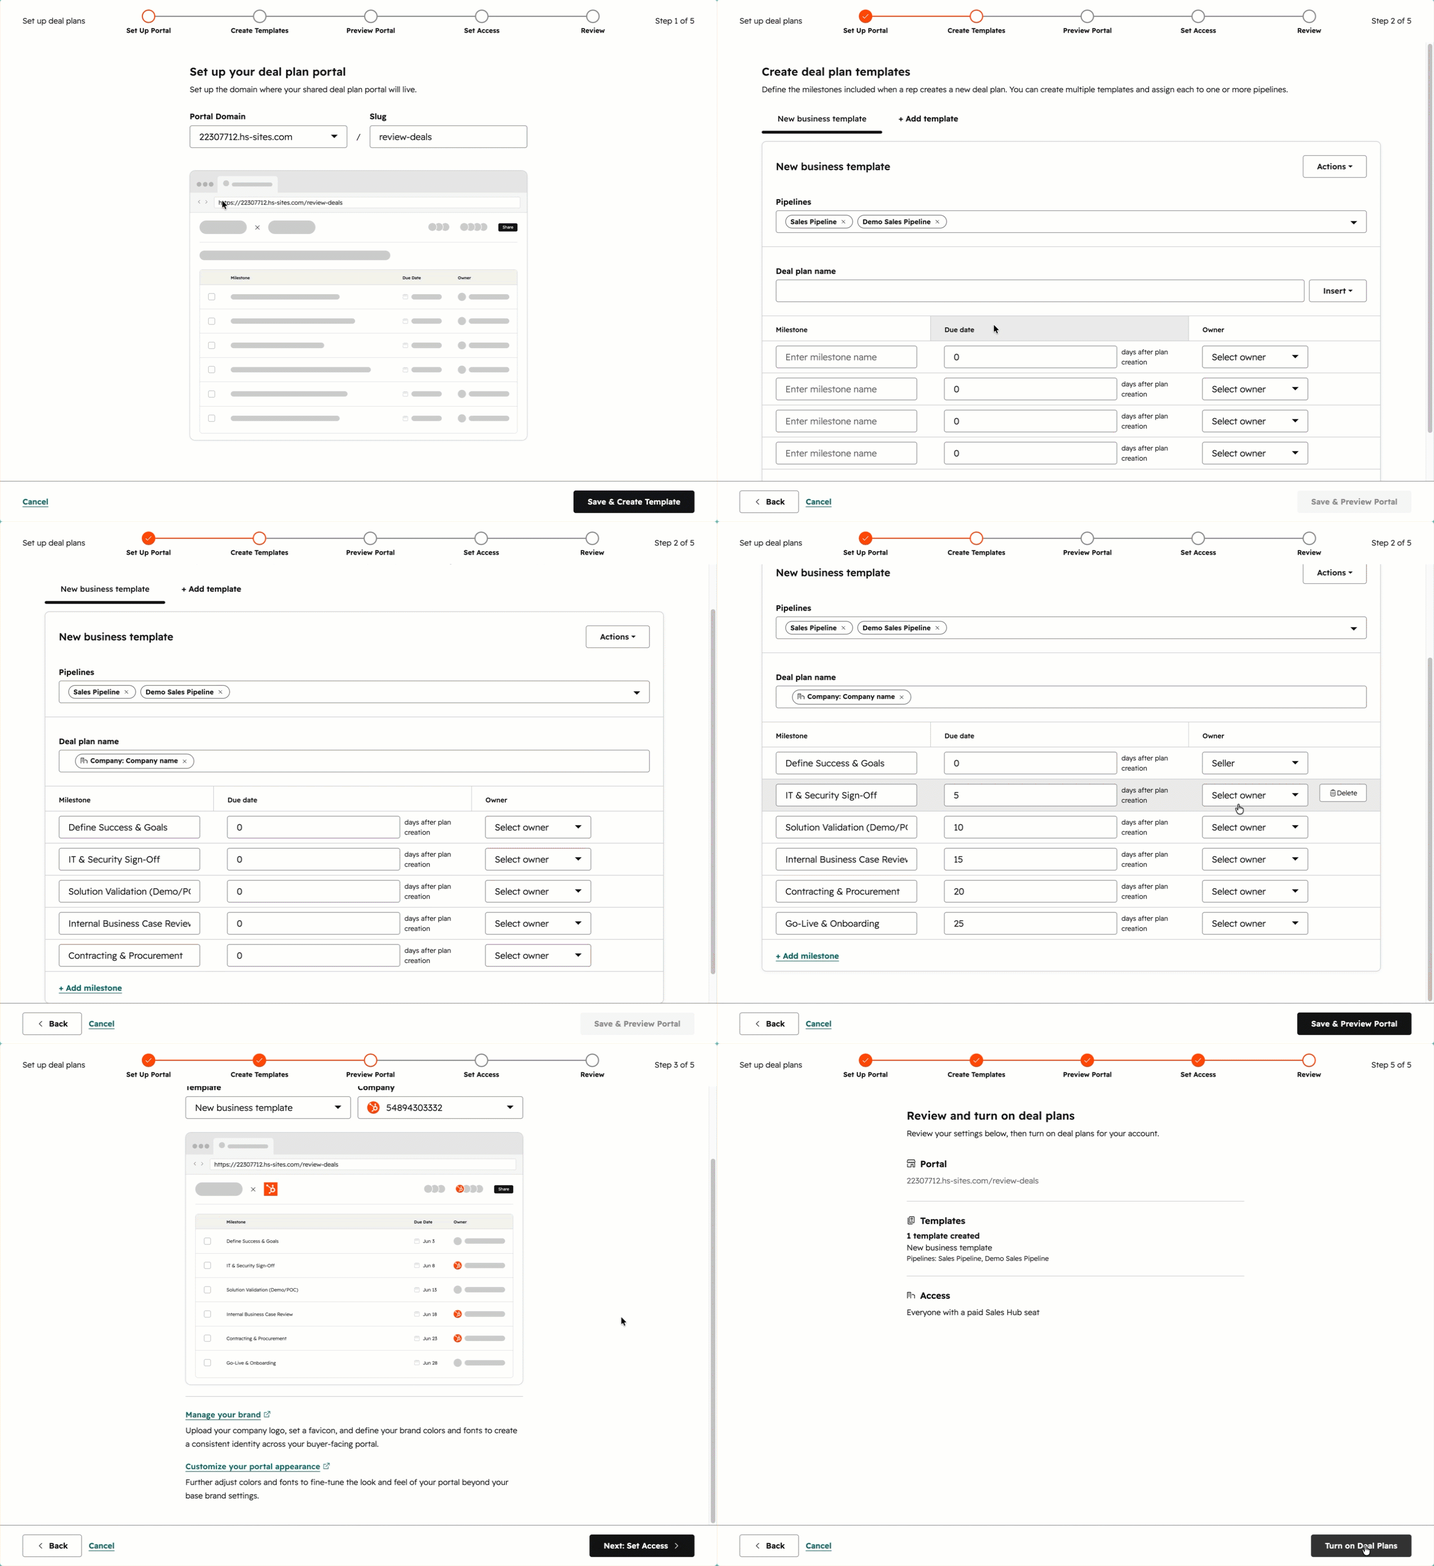
- In the setup wizard, click the Portal Domain dropdown menu, then select a custom connected domain.

- In the Slug text field, enter text. Multiple words must be connected by a dash (e.g., seller-portal). This will be the URL visible to the buyer.
- Click Save & Create Template.
Create a deal plan template
Optionally, create templates to help sales reps reduce time spent creating a plan from scratch during the selling process.
- Navigate to deal plan settings.
- In the setup wizard, click Create a template.
- Enter a template name and select the applicable pipelines.
- Click Create.
- In the Deal plan name text field, enter a default name for all deal plans created using this template. You can also click Insert to use the name of the company you're selling to as a dynamic token.
- In the Milestone text field, enter a name for the action item the buyer or seller needs to complete.
- In the Due date text field, enter the number of days after the deal plan is created that the milestone is due.
- Click the Owner dropdown menu and select an option:
- Seller: the owner of the deal or the deal plan creator. This will be automatically filled using the Deal owner value and can be manually changed by the deal plan creator.
- Buyer: the company to which you're selling. This will be automatically filled using the name of the primary associated company and can be manually changed by the buyer or deal plan creator.
- Click Add milestone to add other action items. If needed, hover over a milestone and click Delete.
- When you're finished, click Save & Preview Portal.
Set access controls and activate the deal plan portal
- Navigate to deal plan settings.
- In the setup wizard, select a template and company to preview the perspective of the buyer viewing a deal plan.
- Click Next.
- Select an access option to give all users with assigned Sales Hub seats access to create individual deal plans or to restrict access to certain users or teams.
- Click Save & Review.
- Click Turn on Deal Plans.
Users with access can now create deal plans from the Deal Plan card on deal records.
Customize the deal plan portal appearance
By default, the deal plan portal uses your account's configured brand theme. If you haven't configured a theme or you want to set the portal apart from your other content, customize the font, colors, and style.
To change the portal appearance:
- In your HubSpot account, click the
settings icon in the top navigation bar. - In the left sidebar menu, in the Data Management section, click Objects.
- On the Objects page, click the Select an object dropdown menu and select Deals.
- Click the Deal Plans tab. Depending on your screen size, you may need to click the More tab, then select Deal Plans.
- Click Customize your portal appearance.
- In the new tab, configure the portal colors and font.
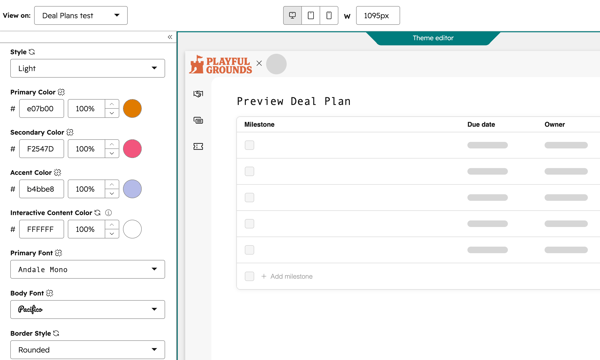
- In the upper right, click Publish theme.
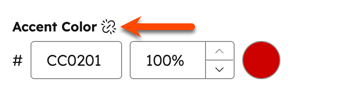
To reset the appearance back to your brand defaults:
- Navigate to deal plan settings.
- Click Customize your portal appearance.
- Click the reset back to brand default icon.
- In the upper right, click Publish theme.
Create an individual deal plan
As a sales rep, create a deal plan to address hidden friction points that can prevent a deal from moving forward.
- In your HubSpot account, click More, then navigate to CRM > Deals. If More doesn't appear in your account, navigate to CRM > Deals directly.
- Click the name of a deal for which you want to create a plan.
- On the Catch-up tab, navigate to the Deal Plan card.
- Click Create deal plan.
- To create from scratch:
- In the dialog box, select Blank, then click Create.
- In the new tab, configure the deal plan milestones and assignees.
- Optionally, click Add description to enter a description or add links.
-
- When you're done, close the tab.
- To create from a template:
- In the dialog box, select a template, then click Create.
- Make changes to milestones and assignees, if desired.
- Optionally, click Add description to enter a description or add links.
-
- When you're done, close the new tab.
- On the Deal Plan card, click Share.
- In the pop-up box, enter email addresses for the buyers who need to review and complete action items in the plan, then click Send invite.
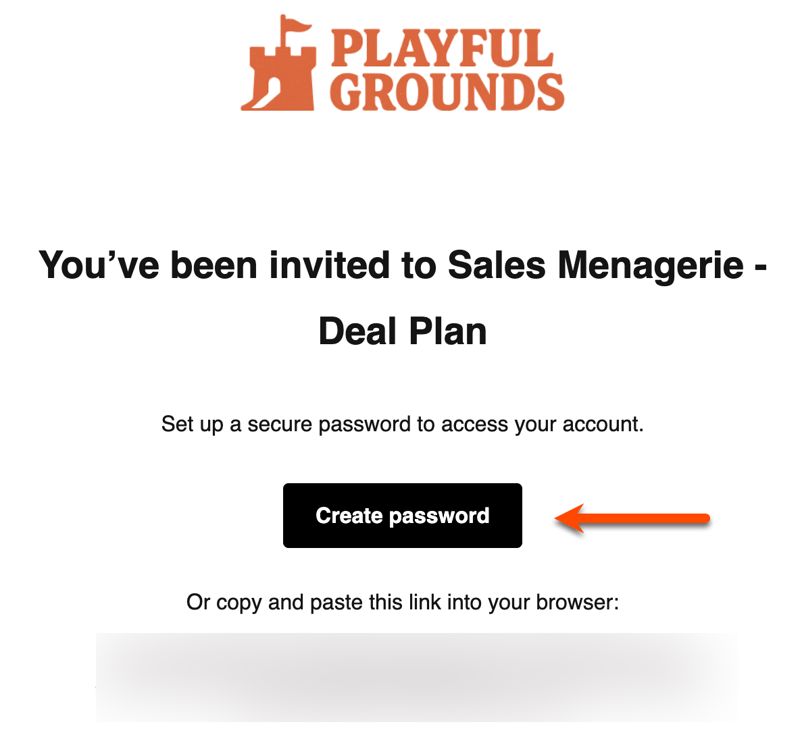
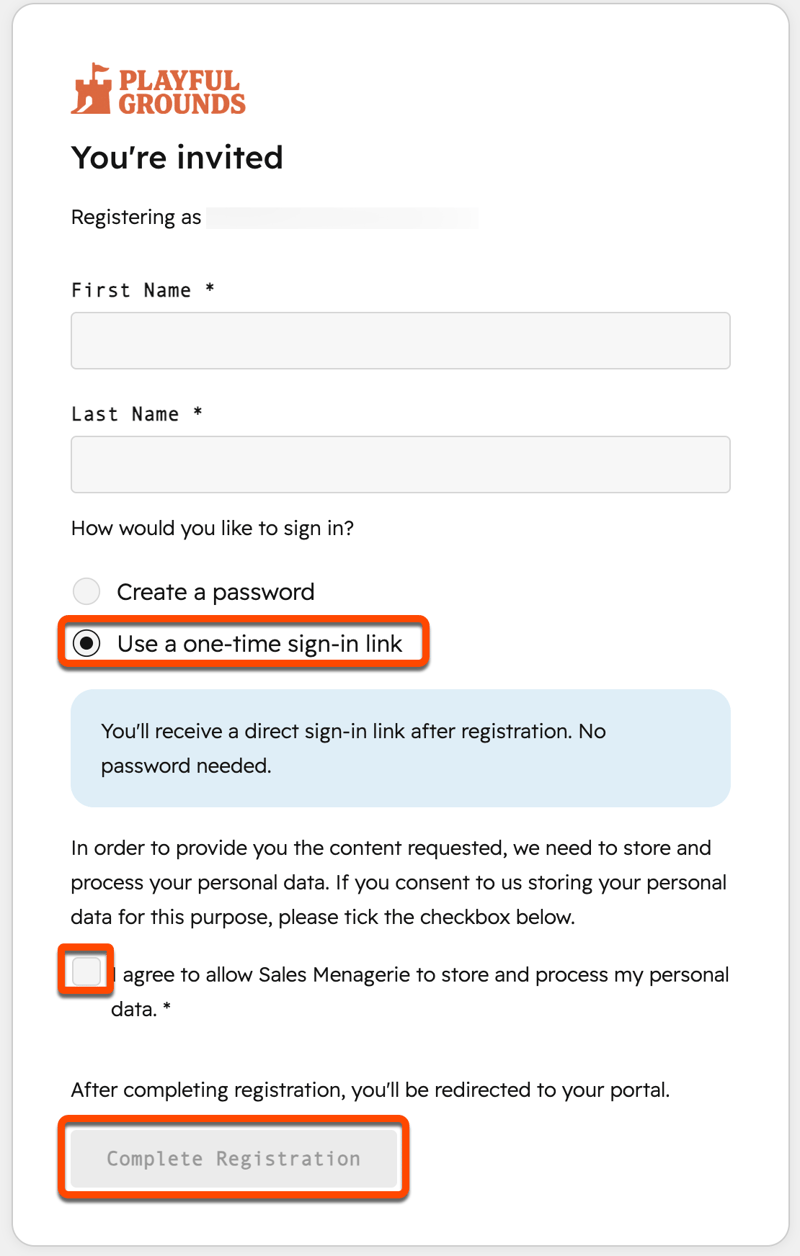
The buyer will receive an email notification where they can access the deal plan via passwordless authentication with their email address or by creating a password.
 |
 |
Use an individual deal plan
As a sales rep, monitor deal plan progress from the deal record or the buyer-facing deal plan portal. Buyers can also add, edit, complete, or delete milestones from the portal.
- In your HubSpot account, click More, then navigate to CRM > Deals. If More doesn't appear in your account, navigate to CRM > Deals directly.
- Click the name of a deal with a deal plan you want to work on.
- On the Catch-up tab, navigate to the Deal Plan card.
- Take any of the following actions:
- Complete a milestone: select the checkbox next to the milestone.
- Edit a milestone: update the name, due date, or assignee.
- Add a milestone: click Add milestone, then enter the name, due date, and assignee.
- Delete a milestone: hover over a milestone, then click the three horizontal dots icon and select Delete.
- Review people with access: click Share and review buyers who can access the deal plan.
- View the plan: click View to open the deal plan URL in a new tab.