Last updated: May 26, 2026
Available with any of the following subscriptions, except where noted:

When viewing a segment, you can select which segment properties are displayed as columns. For example, in a contact segment, view recent engagements and converting campaign details, but in a deal segment, view close dates and deal amounts.
You can customize columns for an individual segment or apply the column configuration to all segments of a given object (e.g., all contact segments, all deal segments). Individual users can customize their own columns, or if you're a Super Admin, you can set up default columns for segments.
To customize the columns shown in segment views instead, learn how to manage your segment views.
Customize segment columns as an individual user
You can edit a segment's columns for your individual use. When you customize your own columns, the properties you select apply to your browser only. Other users and devices accessing the segment will not have the same columns.
- In your HubSpot account, navigate to CRM > Segments.
- Click the name of a segment.
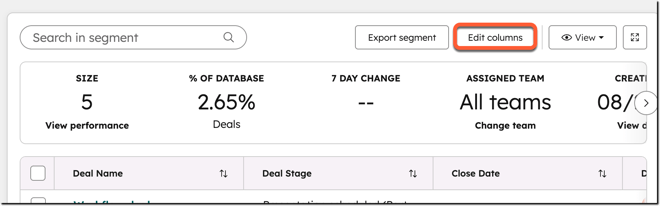
- Above the table, click Edit columns.
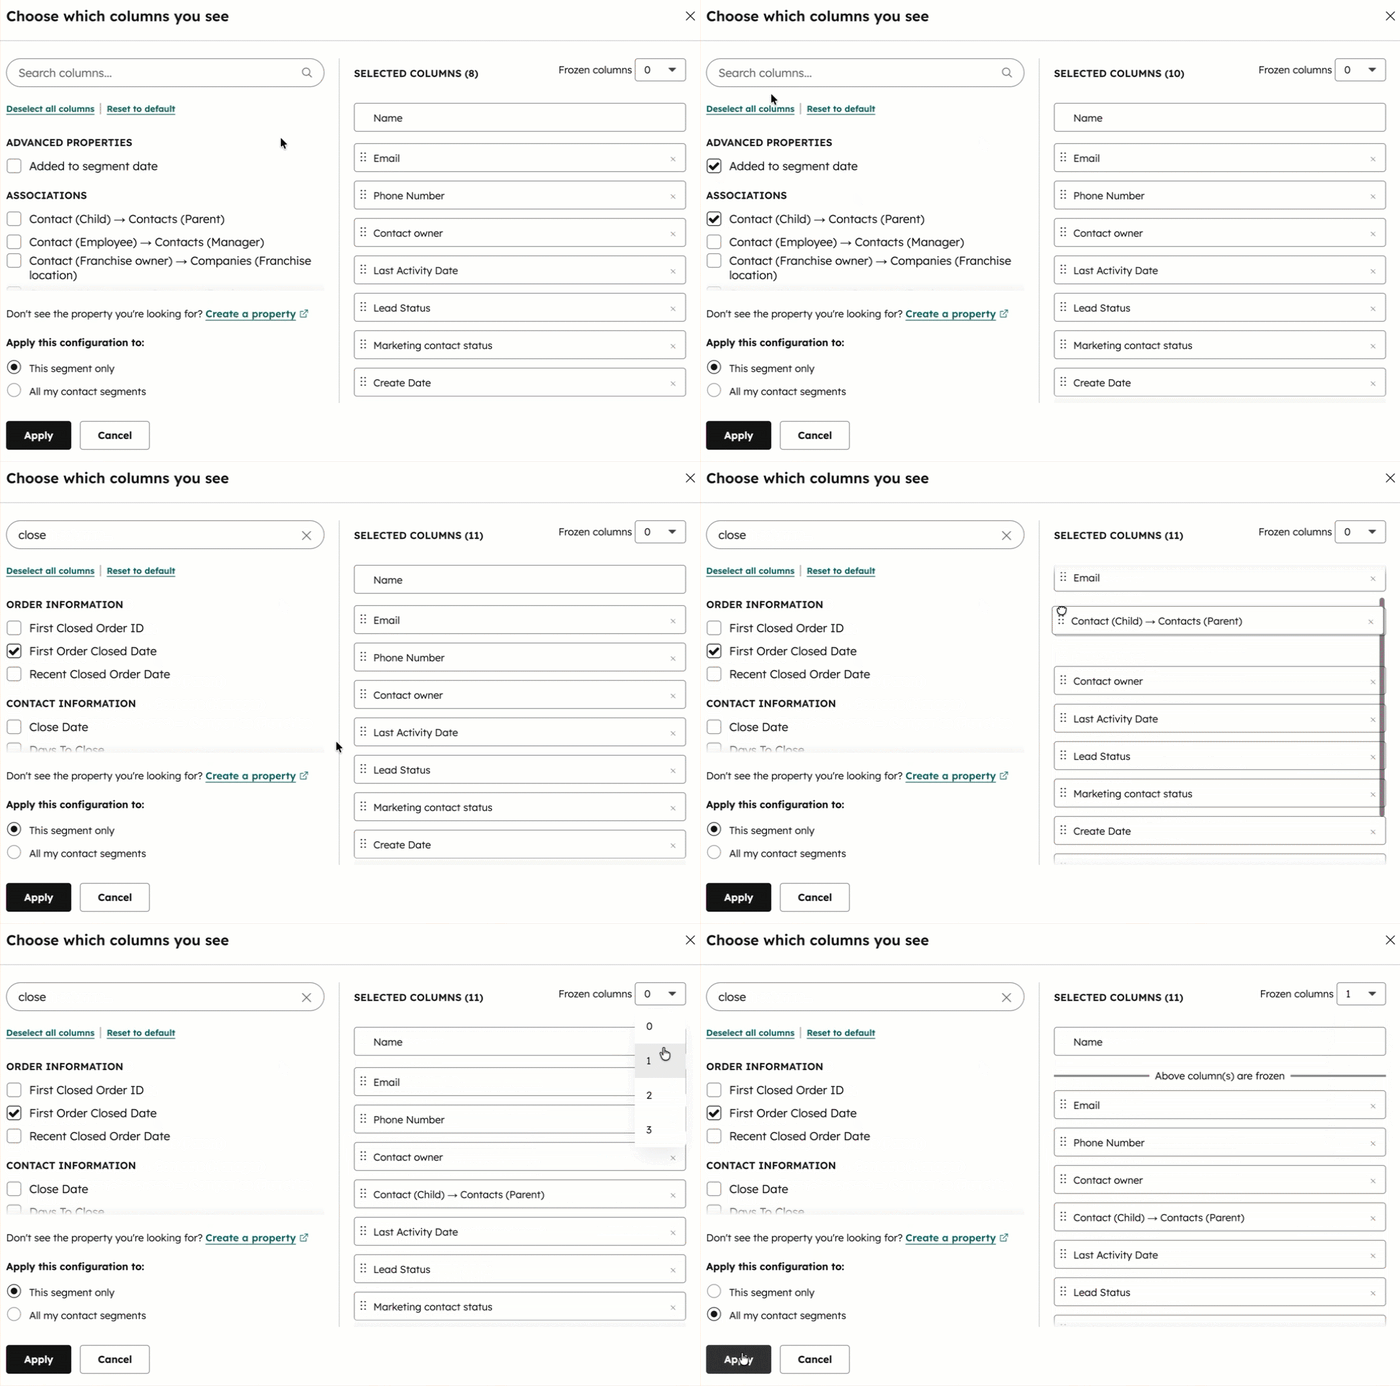
- To add a property to your selected columns, select the checkbox next to the property on the left.
- To reorder a column, click and drag a property on the right. To move it to the top-most position, hover over the property and click Move to top.
- To remove a column, click the X to the right of the property.
- To freeze the left most columns in the segment, click Frozen columns. When frozen, columns will remain visible as you scroll to the right in the table.
- Select the number of columns you want to freeze, up to three properties. The number you select will always include the primary display property, so selecting 1 will freeze only the default first column (e.g., First name for contacts).
- To add a property to the frozen columns, drag the property above the Above column(s) are frozen line.
- To reset your columns to the system default, click Reset to default.
- To apply the column configuration to only the current segment, select This segment only, then click Apply.
- To apply the column configuration to all segments of that object, select All my [object] segments, then click Apply. This will apply to all segments of that object, excluding segments for which columns were previously customized.
Set up default segment columns as an admin (BETA)
Admins can set default columns for a single segment or all segments of a given object (e.g., all contact segments). Default columns are shown to new users or users that haven't customized their own columns. The default will not overwrite a user's customized columns, but users can revert back to the default at any time.
If you're a Super Admin, you can opt your account into the Admin-configured default views in Segments beta.
Permissions required Super Admin permissions are required to set up default segment columns.
- In your HubSpot account, navigate to CRM > Segments.
- Click the name of a segment.
- Above the table, click Edit columns.
- Update the properties included as segment columns.
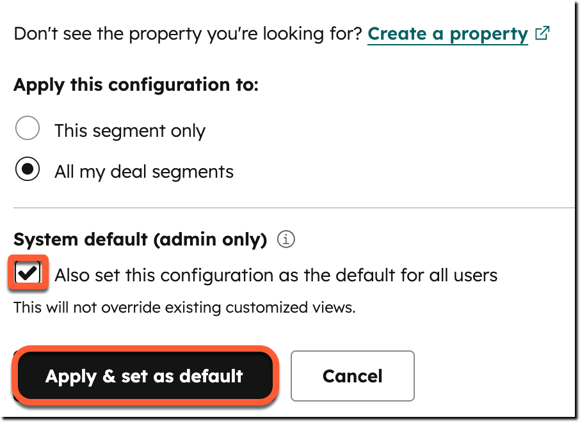
- To apply the column configuration to only the current segment, select This segment only.
- To apply the column configuration to all segments of that object, select All my [object] segments.
- To set the columns as default, select the Also set this configuration as the default for all users checkbox.
- Click Apply & set as default.