Last updated: April 3, 2024
Available with any of the following subscriptions, except where noted:
|
|
|
|
| Legacy Marketing Hub Basic |
In this article, learn about the default modules that HubSpot provides for use in your templates and pages. Each type of module can be customized with styling and content options in the inspector. You can also add a default module to an HTML template with its HubL snippet. Learn more about developing with default modules in HubSpot's developer documentation.
Add a module to your template
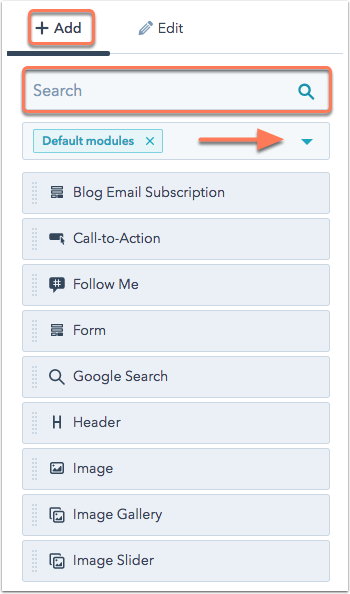
To add modules to your drag and drop templates, click + Add in the inspector in the upper right of the editor. All default modules and any saved custom modules or groups will appear here. To locate a specific module, enter its name in the search bar. You can also click the Filter by category or tags dropdown menu and select one or more filters.
When the module is selected in the editor, you can modify module styles, settings, and content in the inspector. In the Wrapping HTML section, click Expand to add more custom styling in the code editor.

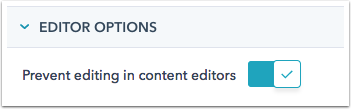
At the bottom of the inspector, you can lock the module so that users cannot modify the default content when editing a blog, email, or page. Click to toggle the Prevent editing in content editors switch on to to enable this setting.
Customize a default module
All Marketing Hub Professional and Enterprise and Content Hub Professional and Enterprise accounts have an @hubspot folder in design tools by default. This folder contains all of your themes and default modules, including drag and drop email modules. These themes and modules are read-only, but can be cloned if you want to edit them. 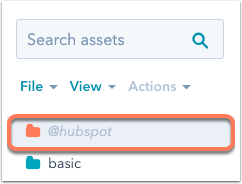
- In your HubSpot account, navigate to Content > Design Manager.
- In the finder, click the @hubspot folder.
- Right click the default module that you want to clone, then select Clone module.

- In the cloned module, edit the module source code in the central editing panel.
- To save your changes, in the upper right, click Publish changes. The module will then be available for use when building templates.
Types of default modules
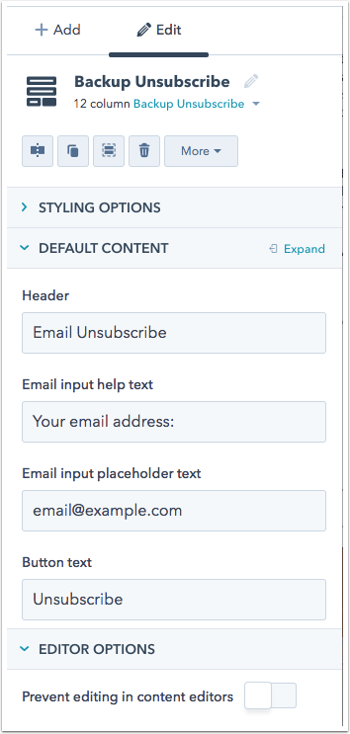
Backup unsubscribe
The backup unsubscribe template is displayed to email recipients who click an unsubscribe link if HubSpot is unable to determine their email address. You can customize the help text that appears on your backup unsubscribe page in the Default Content section of this module.
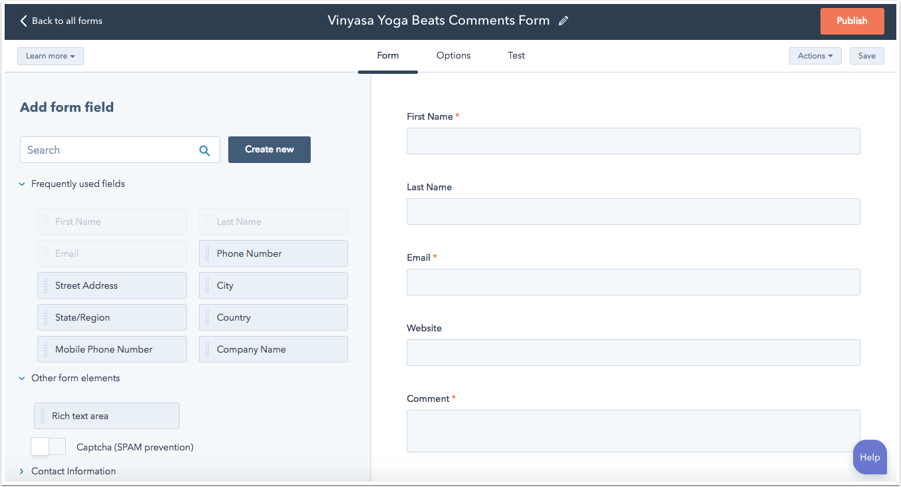
Blog comments
Please note: the blog comments module is not available for page or email templates.
The blog comments module adds a comment section to a blog post template. You can customize the blog comments form in your forms tool. The form will be named based on the title of your blog.
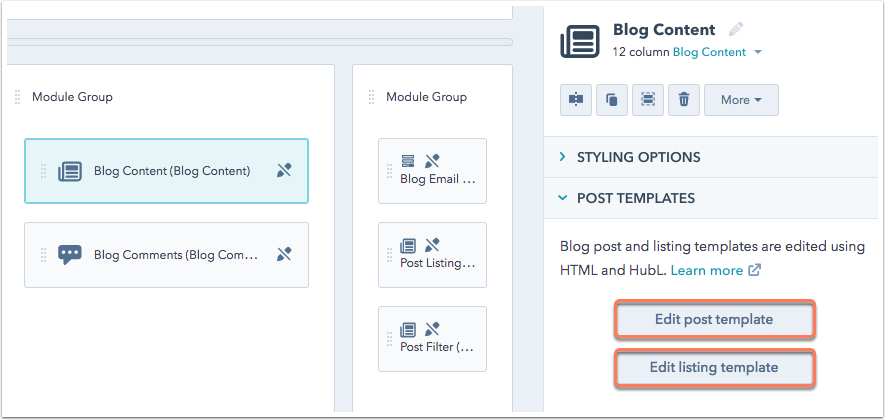
Blog content
Please note: the blog content module is not available for page or email templates.
The blog content module contains the HTML/HubL markup for your blog posts and blog listing pages. You can edit the markup of your posts by clicking Edit Post Template and edit the markup of your listing page by clicking Edit Listing Template. Learn more about blog content module markup.
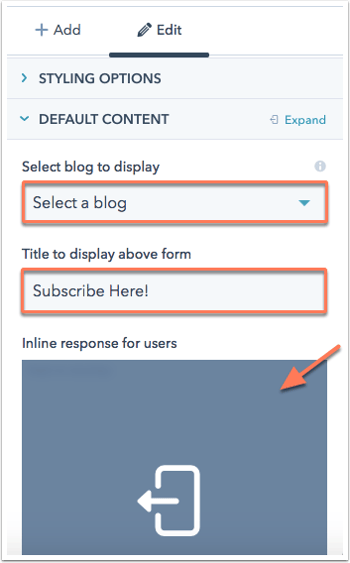
Blog email subscription
Please note: the blog email subscription module is not available for email templates.
The blog email subscription module lets visitors subscribe to your blog digest emails by filling out a form. This module is populated by your blog subscriber form, which can be customized in your forms tool.
Click the Select blog to display dropdown menu and select the blog your visitors are subscribing to. In the Title to display above form text box, customize the text that appears in the title above the form. Hover over the existing inline response and click the expand icon to customize the text that appears after a visitor submits the form.
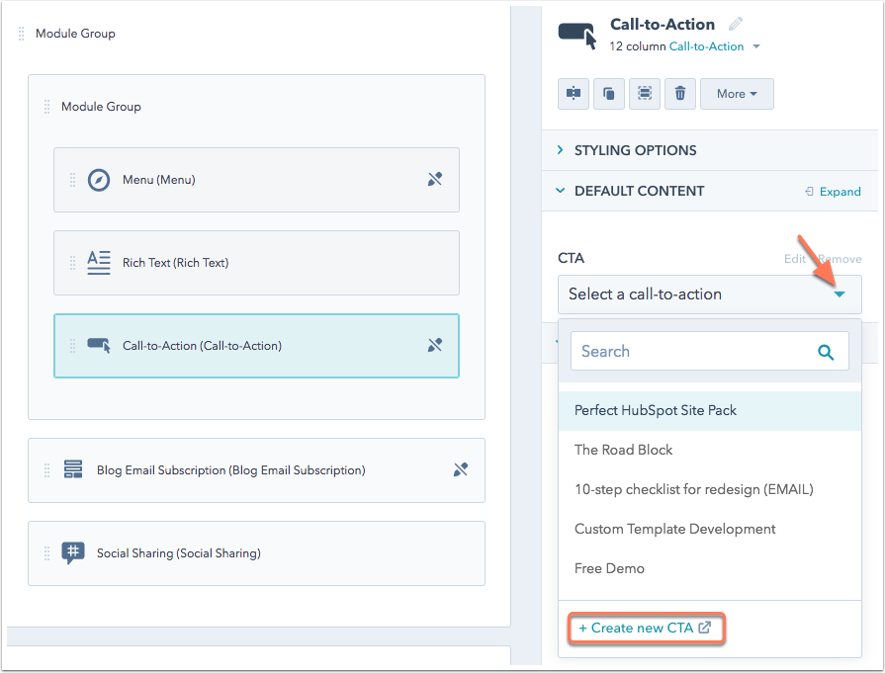
Call-to-action
A call-to-action (CTA) module places a CTA in its own module within your layout. You can also insert a CTA in a rich text module.
In the inspector, click the CTA
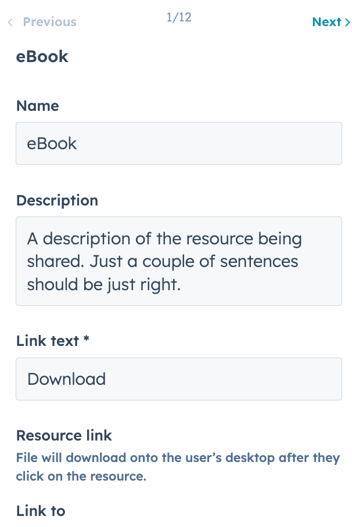
Content library
You can use the content library module to set up a library of resources for your visitors to access. For the library, you can set the resource layout, icons, fonts, and colors. For each resource, you can set a name, description, link or file, and display image.
Follow me
Please note: the follow me module is not available for email templates.
You can use the follow me
When you add a follow me module, you can customize the module header that appears above the social icons.
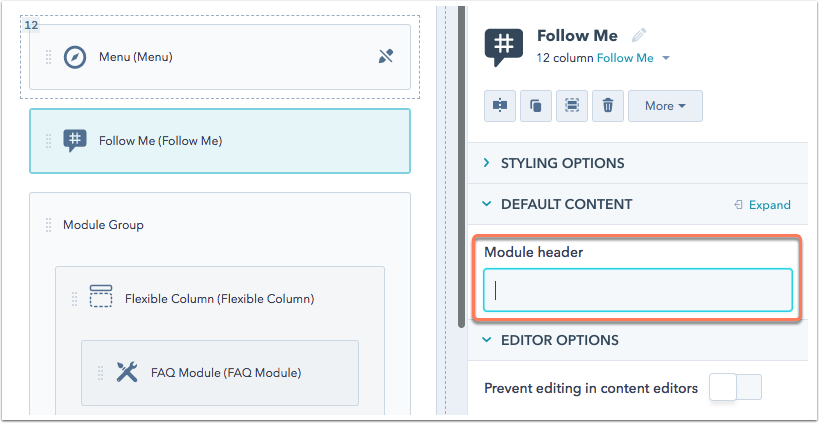
You can specify which social media networks appear in this module in the Follow Me section of your social settings.
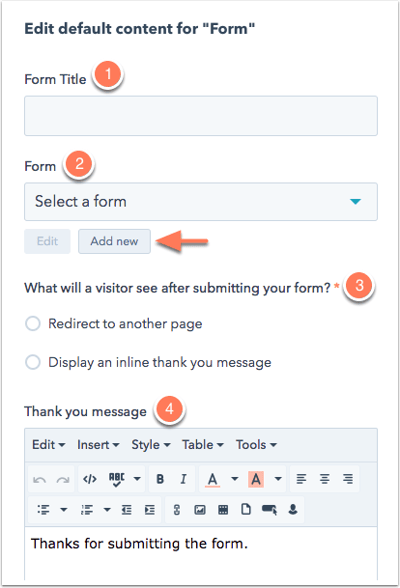
Form
Please note: the form module is not available for email templates.
The form module lets you add a form to your page or blog to capture contact information from your website visitors.
For this module, you can customize the following settings:
- Form title: enter the title for your form that will display on the page or blog.
- Form: select an existing HubSpot form to appear on the page, or add a new form.
- What will a visitor see after submitting your form?: select whether to redirect a person who submits the form to another page or display an inline thank you message on the same page.
- Thank you message: customize your inline thank you message.
- Send form notifications to specified email addresses instead of the form defaults: send form notification emails to specific addresses. This will override any notification recipients set in the forms tool.
- Add to workflow: add visitors that submit the form to a workflow (Marketing Hub Professional or Enterprise only).
- Send a follow-up email: send up to three follow-up emails to visitors who submit the form.

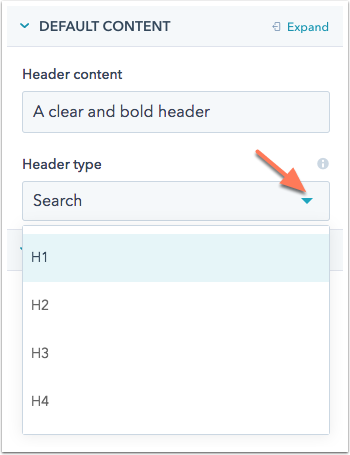
Heading
A header module displays a line of text in a heading HTML tag. Enter default header text in the Header content box. Click the Header type dropdown menu to select the heading tag (H1-H4).
Image
An image module adds a single image to a piece of content. Learn more about editing options for image modules.
Image gallery
An image gallery module adds a series of rotating images to a single module. Learn more about the image gallery module's customizable settings.
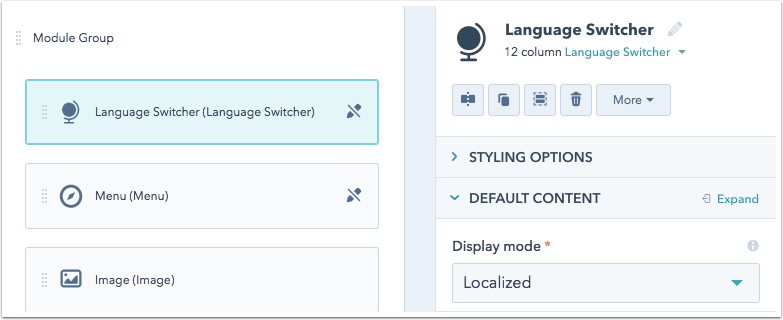
Language switcher
Please note: the language switcher module is not available for email templates.
The language switcher module allows visitors to switch between translated versions of a page or blog. Click the Display mode dropdown menu to customize how the names of your translated languages will appear:
-
Pagelang: the name of each language will appear in the language of the current page. For example, if you're viewing the English version of a page with a French translation, when you click the language switcher, you'll see English and French as the language names. - Localized: the name of each language will appear in that language. For example, if you're viewing the English version of a page with a French translation, when you click the language switcher, you'll see English and Français as the language names.
- Hybrid: a combination of the two. For example, if you're viewing the English version of a page with a French translation, when you click the language switcher, you'll see English and French (Français) as the language names.
This module will only appear on live pages with more than one published translation. Learn more about working with multi-language content in HubSpot.
Logo
The Logo module pulls in your company logo automatically from your website settings. To use a different logo, click to toggle the Override default logo for this page switch on to upload a new image for this page only. To change the default logo for all content in your website settings, click Edit default logo in this domain.
Your logo module will automatically link to the URL specified in your brand kit. To override this default and link to a different page, enter a unique Link URL.
Logo grid
With the logo grid module, you can arrange multiple logos of different dimensions in a consistent grid. You can customize background color, aspect ratio, size of grid, size of spacing, and and max logo height.
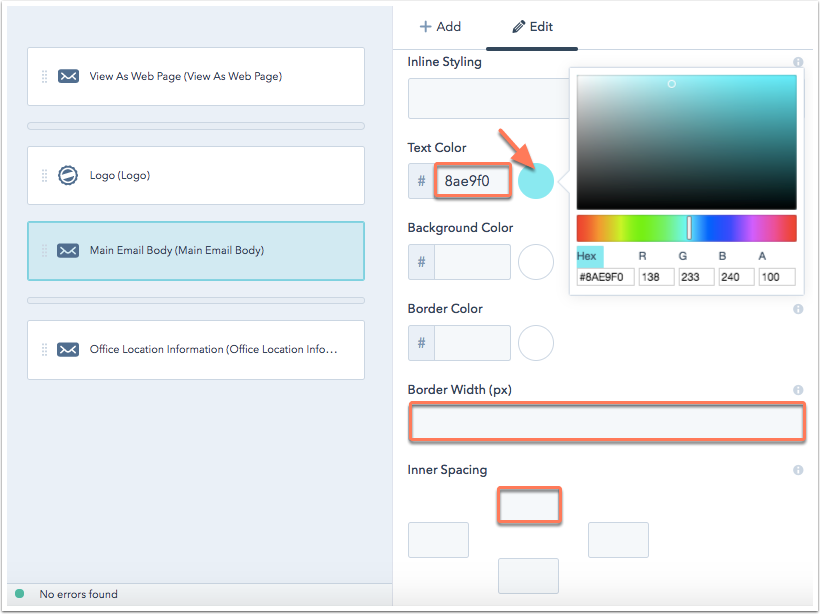
Main email body
The main email body module is a standard rich text module that is included by default in every email template. You can customize the default content for the email body on a specific template.
In addition to the standard styling options, this module can be customized with default colors, borders, and spacing. Click the color bubble and select a color from the color picker, or enter a hexadecimal value in the text field to set default colors. Enter pixel values in the Border width and Inner spacing text fields to set default spacing.
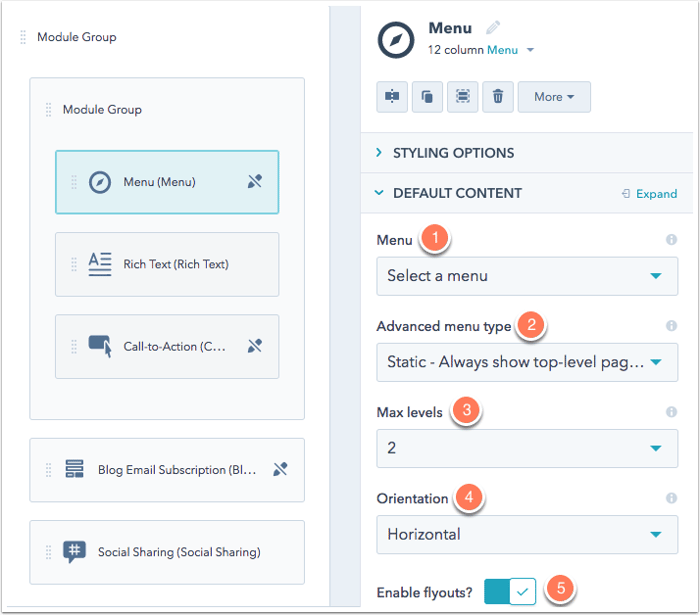
Menu
The menu module adds navigation to your content and templates. Menus are created and managed directly in your website settings.
Within the design tools, you can customize the following features of your menu module:
- Menu: select one of your existing menus from your settings.
- Advanced menu type: select how menu items should appear on your site:
- Static - Always show top-level pages in
menu: keep your menu consistent across all pages. - Dynamic by section - Show pages in
menu that are related tosection being viewed: display menu items relative to the top level menu item being viewed. - Dynamic by page - Show pages in
menu that are related topage being viewed: display menu items related to the specific page being viewed. - Breadcrumb style path menu (uses horizontal flow): display menu items horizontally in a relative path across the top of your site.
- Static - Always show top-level pages in
- Max levels: select the maximum number of child menu items that can display.
- Orientation: select whether menu items display horizontally or vertically.
- Enable flyouts: select this checkbox to show child menu items when you hover over the parent. Clear this checkbox to always show child menu items.
Modules
Modules created in the code editor allow you to use HTML, CSS, Javascript, & HubL to add advanced functionality to your templates, while still allowing your users to edit module content in the content editor without changing the code. These components will be labeled with a module icon in the finder and inspector. Learn more about working with custom coded modules in our developer documentation.
Office location information
The office location module includes required tokens that must be included in an email template in order to legally send marketing emails. While you can edit the styling of this module, you will not be able to save an email template without an office location information module or the required
In addition to the standard styling options, this module can be customized with default colors, borders, and spacing. Click the color bubble and select a color from the color picker, or enter a hexadecimal value in the text field to set default colors. Enter pixel values in the Border width and Inner spacing text fields to set default spacing.

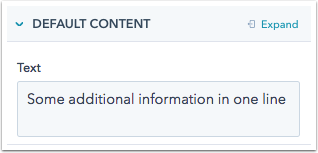
One line of text
The one line of text module allows users to edit a single line of text in the content editor.
Page footer
The page footer module displays copyright information with the current year and your company name. The company name is pulled in automatically from the Footer section of your email settings.
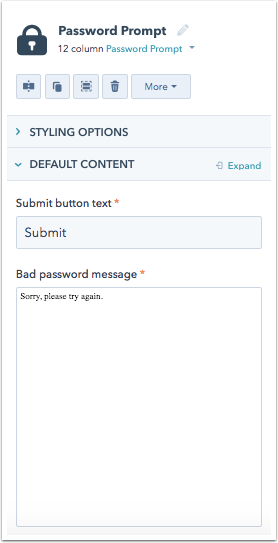
Password prompt
The password prompt module is available on password prompt system templates. If a page is password protected, the password prompt page will display before a user can access the page. You can customize the submit button text and the text to display if an incorrect password is entered.
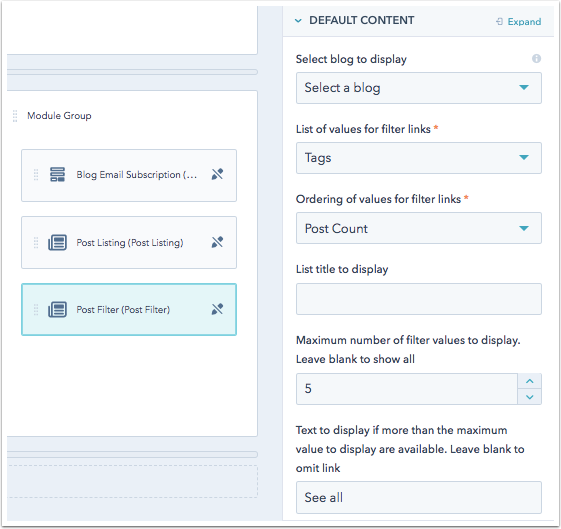
Post filter
Please note: the blog email subscription module is not available for email templates.
The post filter module displays a list of blog articles from a specific topic, month, or author.
You can customize the following settings for this module in the Default Content section:
- Select a blog to display: select which blog's posts are used.
- List of values for filter links: select whether the module is filtered by tag, month, or author.
- Ordering of values for filter links: select whether values will be organized alphabetically or by number of posts.
- List title to display: enter a title to appear above the posts.
- Maximum number of filter values to display: enter the maximum number of posts for a specific filter. Leave this field blank to show all posts.
- Text link to display if more posts values are present than are allowed to display: enter the text that will appear if there are more available posts in a category. The default text is See all.
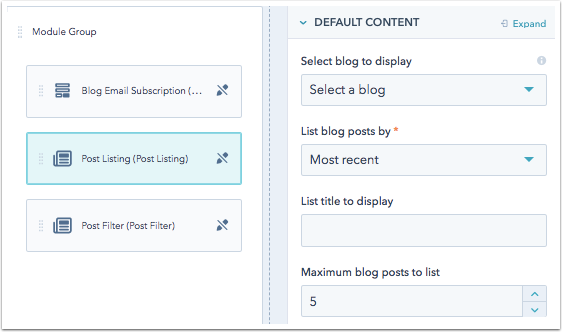
Post listing
Please note: the blog email subscription module is not available for email templates.
The post listing module to used to display a list of blog posts from a HubSpot blog. You can set the module to display the most recent posts or those most popular during the past month, six months, year, or across all time.
You can customize the following content defaults in the inspector:
- Select blog to display: select the blog for which you'd like to display post titles
- List blog posts by: select how you will organize the posts
- List title to display: enter a title to appear above the posts.
- Maximum number of blog posts to list: enter a maximum number of posts that will appear in this module.
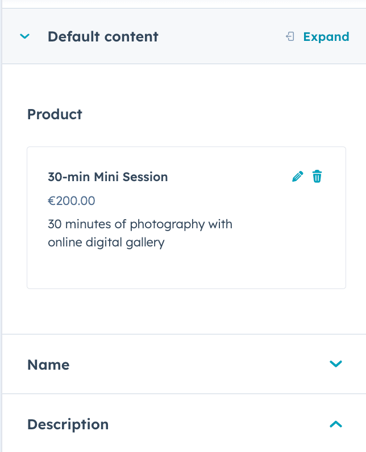
Product
Using the product module, you can display products from your product library on pages and posts. The products' default information is displayed, but you can choose to override it on a page by page level.
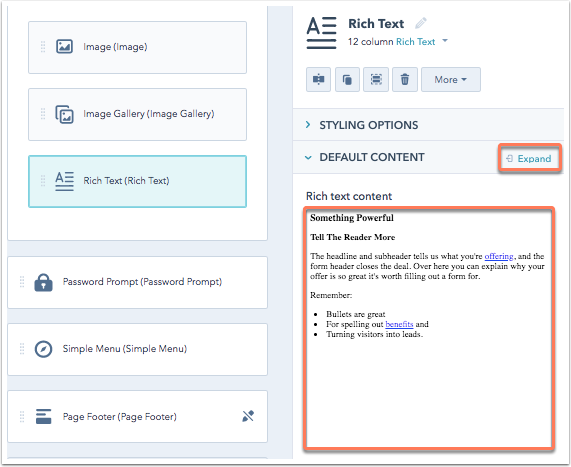
Rich text
The rich text module is the most common content module used across HubSpot content tools. It supports editing options for different components, such as text, images, and CTAs.
To add default content for this module, click Expand or click the preview content to open a rich text editor.
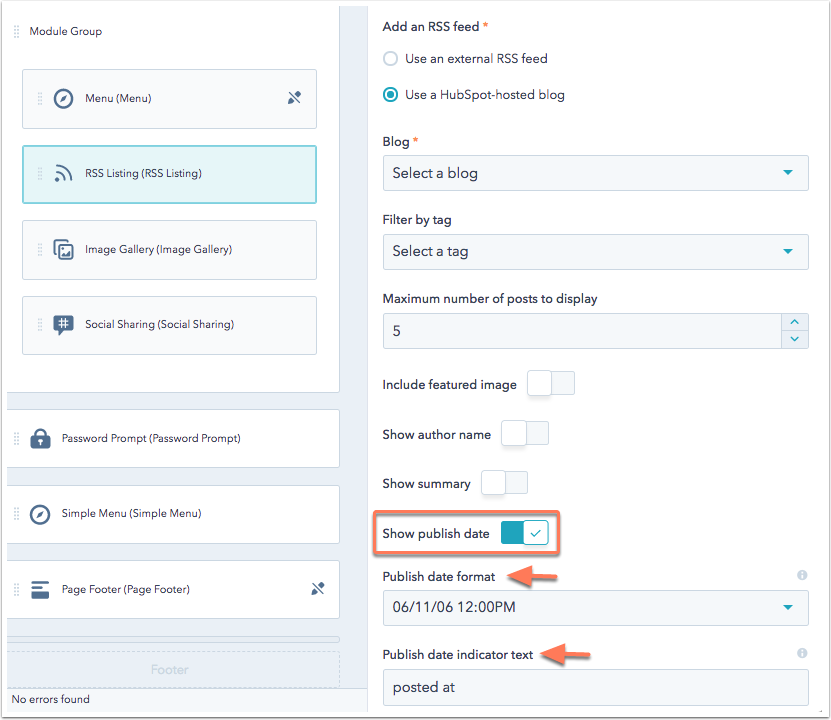
RSS listing
Please note: the RSS listing module is not available for email templates. Use an RSS email instead.
You can use an RSS listing module to display post summaries for a HubSpot blog or external RSS feed.
RSS listing modules can display a specific blog or tag. Click to toggle the corresponding switch on to indicate whether a featured image, author name, summary, or publish date should be shown with each post.
After enabling these settings, you can customize the following details:
- Show author name: enter the Author attribution text to show above each author name. By default, this module will include by as the attribution text.
- Show summary: enter the summary length in characters of each blog summary. You can also customize the Summary clickthrough text, which is the link blog visitors click to read your full post. By default, this text will be labeled Read more.
- Show publish date: select the Publish date formatto customize how the date and time are formatted for each post. You can also customize the publish date indicator text. By default, this text will read posted at.
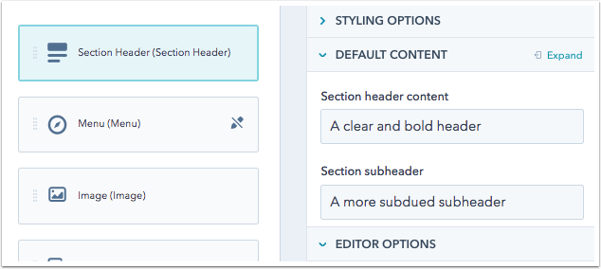
Section heading
The section header module lets you display an h1 heading tag with a paragraph subtitle. This module is ideal for titling the primary section of a page.
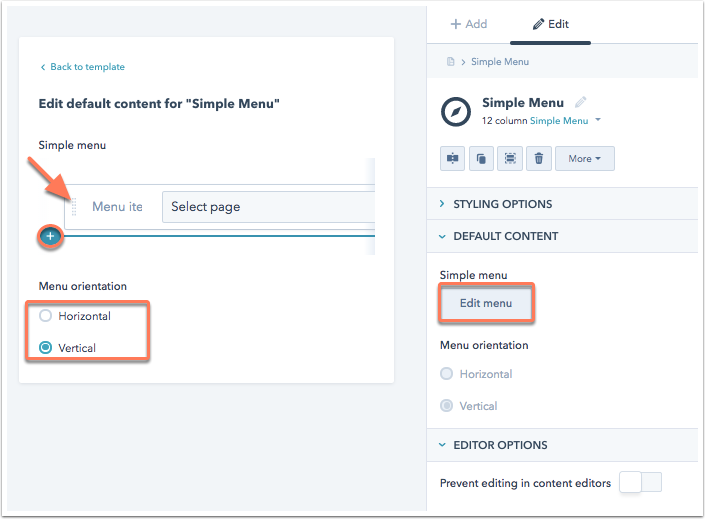
Simple menu
Simple menu modules allow users to create page specific menus in the content editor. This module gives you the flexibility to build a simple menu for a specific template. In the inspector, click Edit menu to add menu items, links, and select the menu orientation. Editing the menu orientation setting adds a class of hs-menu-flow-horizontal or hs-menu-flow-vertical to the menu wrapper container, which can then be used for styling in your CSS. Learn more about classes added by module settings in our developer documentation.
Social sharing
The social sharing module lets visitors easily share your content across social media channels and email. Click to toggle the Enabled? switch next to a specific social network to include it on your page or email.
The sharing link will automatically populate with the required HubL tags to share your content. In emails, the module will use the web version URL of that email in the share link.
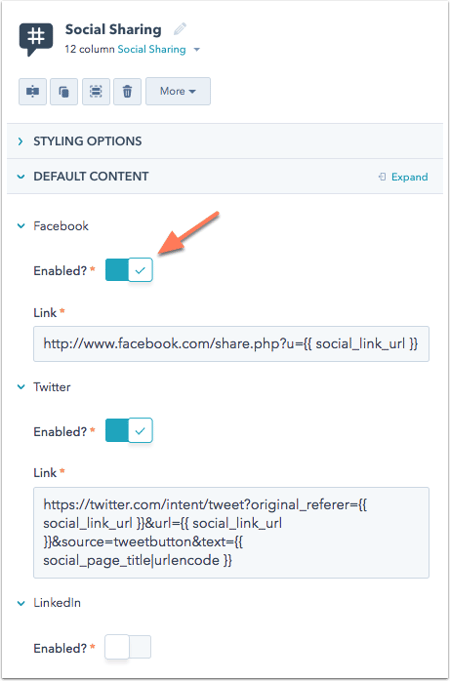
Please note: the social sharing module uses default icons for each social network. If you'd like to use your own custom social icons, you can create a customized version of the module.
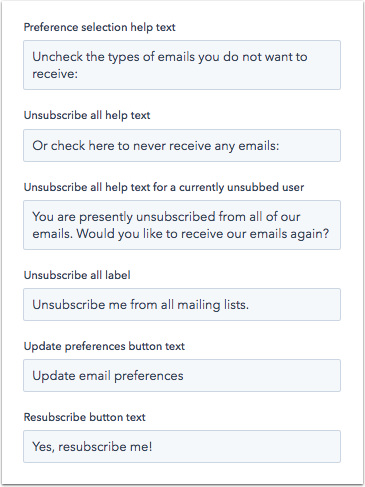
Subscription preferences
Subscription preferences modules are only available on subscription preferences system templates.
These modules let you customize the page an email recipient sees when they manage their subscription preferences or unsubscribe from email communications.
Subscription update confirmation
The subscription update confirmation module is a rich text module that is available on subscription update confirmation system templates. It allows you to customize what displays when an email recipient updates their subscription settings.

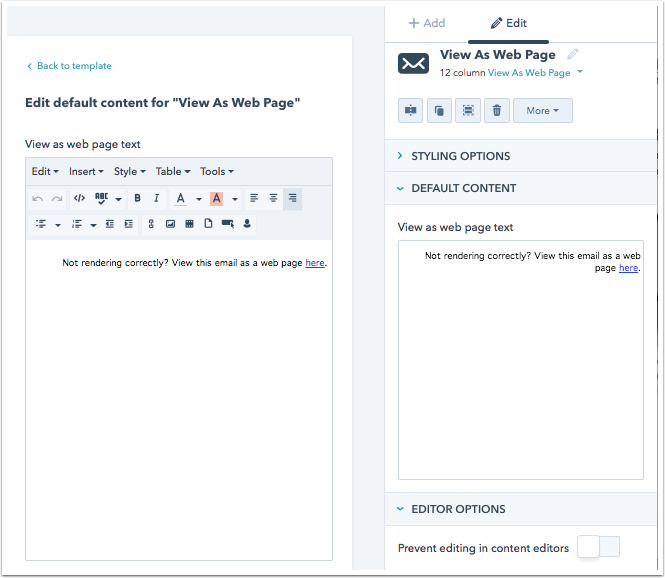
View as web page
The view as web page module gives email recipients the option to open the web page version of an email.
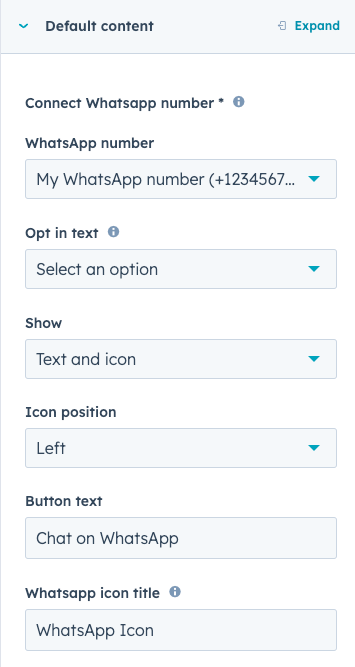
WhatsApp Link
Please note: this module is available for Marketing Hub and Service Hub Professional and Enterprise accounts only.
Use the WhatsApp link module to add a way for website visitors to connect with you directly over WhatsApp. This module can be added to website pages, blog posts, and blog listing pages. To use this module, you'll need to connect your WhatsApp channel to your conversations inbox.
The button styling, such as color and spacing, can be customized within the Styles tab of the page editor, and you can configure the following elements:
- WhatsApp number: select a connected WhatsApp number.
- Opt in text: select the opt-in and opt-out text.
- Show: select whether the button displays text, an icon, or both.
- Icon position: select whether the icon appears on the left or right of the text.
- Button text: enter the text that appears on the button.
- WhatsApp icon title: for accessibility, enter the icon description for screen readers.