
Last updated: September 16, 2026
Available with any of the following subscriptions, except where noted:
-
 Marketing Hub
Professional, Enterprise
Marketing Hub
Professional, Enterprise
-
 Content Hub
Professional, Enterprise
Content Hub
Professional, Enterprise
Create and manage personalized variants and targeted pages in the personalization tool. Create personalized variants to show tailored versions of a website page, landing page, or CTA to different audiences, or create targeted pages to generate individual landing pages with unique URL links for specific contacts or companies.
Please note: you can manage AI feature access in your AI settings and configure what data is shared. Review HubSpot's AI Trust FAQs and AI Model Cards for detailed information on AI security controls, data use, and compliance.
Please note: if you're a Super Admin, you can opt your account into the Personalized variants and Targeted pages beta.
Subscription required A Marketing Hub and Content Hub Professional or Enterprise subscription is required to create personalized variants and targeted pages.
Permissions required Additional permissions are required depending on the type of content you're editing or publishing:
- Edit and Publish permission is required to edit and publish pages.
- Edit and Publish permission is required to edit and publish CTAs.
Create and manage personalized variants
Create and manage personalized variants from the Manage tab. Each variant stays connected to its default asset, so all versions of a page or CTA are created, managed, and measured in one place.
To create variants directly in the page or CTA editor, learn more about creating personalized variants in asset editors.
Create personalized variants
- In your HubSpot account, click More, then navigate to Marketing > Personalization. If More doesn't appear in your account, navigate to Marketing > Personalization directly.
- On the Manage tab, click the Create dropdown menu and select Personalized variant.
- In the right panel, select the content type (e.g., CTA).
- Click Next.
- Click Create manually or Create with AI.
- Enter a name for the personalized content.
- Click the Existing [content type] dropdown menu and select an existing asset.
- Click the Audience type dropdown menu and select an option:
- Contact: personalize content for a specific contact.
- Company: personalize content for a specific company.
- Segment: personalize content for a specific segment of contacts or website visitors.
- If you selected Segment, click the Segment type (e.g., Contact list) dropdown menu and select an existing segment.
- If you chose to Create with AI there will be additional required fields:
- Enter a prompt to describe the content changes you'd like to include for the generated variant in the Prompt field.
- Click the Image generation dropdown menu and select Generate images with AI or Use images from the default asset.
- When finished, click Create or Generate.
Add variants to existing personalized content
Add additional variants to target multiple audiences from the same base asset. For example, create a different variant for each segment for the same page or call-to-action (CTA).
Please note: up to 10 personalized variants can be created using an existing marketing asset.
-
In your HubSpot account, click More, then navigate to Marketing > Personalization. If More doesn't appear in your account, navigate to Marketing > Personalization directly.
-
On the Manage tab, click the content type in the left menu (e.g., Website pages).
-
Click the name of the personalized content.
-
In the upper right, click Add variant.
- Repeat these steps until you have the desired amount of variants or you reach the limit.
Edit personalized variants
Edit personalized variants to update priority, audience criteria, or content. Content edits are made in the editor for the corresponding asset type.
- In your HubSpot account, click More, then navigate to Marketing > Personalization. If More doesn't appear in your account, navigate to Marketing > Personalization directly.
- Click the name of the personalized content.
- To change the priority of a variant, click Prioritize in the top right. In the right panel, drag the variant into position and then click Save.
- To edit the content of a variant, click Edit on the variant card.
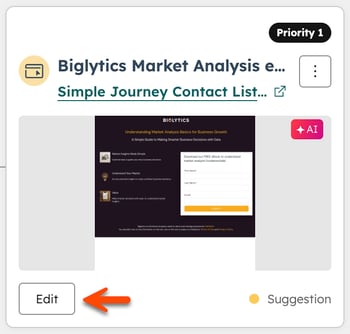
-
- To change the audience criteria, click the three vertical dots icon and select Change segment. In the dialog box, update the segment type and segment, then click Save.
- To delete a variant, click the three vertical dots icon and select Delete. In the dialog box, click Delete to confirm. If this is the only variant for the page or CTA, all variant settings will be removed.
Publish personalized variants
- In your HubSpot account, click More, then navigate to Marketing > Personalization. If More doesn't appear in your account, navigate to Marketing > Personalization directly.
- On the Manage tab, click the content type in the left menu (e.g., Landing pages).
- Click the name of the personalized content.
- Click Edit on the variant card.
- In the asset editor, click the variant control dropdown menu on the top left to switch between the different variants.
- When finished, click Publish in the top right.
Create targeted pages
Targeted pages generate individual landing pages with unique URL links for specific contacts or companies. Starting from a reusable template, HubSpot’s AI uses your HubSpot data to create one or many pages, to share through email, sequences, or ads.
Create a template
Templates define the structure and instructions HubSpot’s AI uses when generating targeted pages. Default templates are available, or create a custom template for more control over the output.
-
In your HubSpot account, click More, then navigate to Marketing > Personalization. If More doesn't appear in your account, navigate to Marketing > Personalization directly.
-
Click the Templates tab.
-
In the upper right, click Add template.
-
In the Choose audience type section, select Company or Contact.
-
In the Choose source page section, select a source:
-
HubSpot landing page: use an existing landing page’s structure and design as the template reference.
-
HubSpot website page: use an existing website page’s structure and design as the template reference.
-
External URL: enter an external page URL for HubSpot’s AI to use as a styling and layout reference.
-
-
In the Add instructions section, enter instructions for how HubSpot’s AI should personalize the page. To start from a preset:
-
If you selected Company as your audience type, select Break into an Account, Expand an Existing Account, or Engage a Buying Committee, then edit the instructions to fit your needs.
-
If you selected Contact as your audience type, select Follow Up After a Call, then edit the instructions to fit your needs.
-
-
In the preview panel, click the Choose a [contact or company] dropdown menu and select a contact or company. Click Test to preview the output for a specific company or contact. Refine your instructions as needed.
- When finished, click Save template.
Create targeted pages
Create targeted pages from the Manage tab in the personalization tool, or by entering a prompt directly in Breeze Assistant.
For example, in Breeze Assistant, enter Create personalized pages for my target accounts.
To create targeted pages using the personalization tool:
-
In your HubSpot account, click More, then navigate to Marketing > Personalization. If More doesn't appear in your account, navigate to Marketing > Personalization directly.
-
In the upper right, click the Create dropdown menu and select Targeted pages.
-
In Breeze Assistant, select the template to use.
-
In the chat box, enter @mention the specific target companies or contacts individually or company or contact segments you want to personalize the content for.
-
Click the send icon.
-
Click Yes, start generating to generate the pages.
-
Breeze Assistant will provide an estimate for generating the pages. A message will appear in the chat when the page is complete.
- Once the page is generated, click Edit the landing page to continue customizing the page.
Publish targeted pages
- In the content editor, click Publish in the top right. To publish multiple pages at once, click the Publish dropdown menu and select Publish all.
- Copy the unique URL for each published page to share through email, sequences or ads.
