- Knowledge Base
- AI
- AI
- Use Breeze Assistant
Use Breeze Assistant
Last updated: January 14, 2026
Available with any of the following subscriptions, except where noted:
-
Additional subscriptions required for certain features
Breeze Assistant is a conversational assistant you can use to help you complete your sales, marketing, and service goals. Use Breeze Assistant to refine or generate content, prepare for meetings, summarize data, and perform other tasks in HubSpot.
This article covers using Breeze Assistant on a desktop. To install Breeze Assistant mobile app scan the QR code below or follow the steps outlined in Breeze Assistant mobile app documentation:

Before you get started
Before you begin working with this feature, make sure to fully understand what steps should be taken ahead of time, as well as the limitations of the feature and potential considerations of using it.
Please note: Please avoid sharing any sensitive information in your enabled data inputs for AI features, including your prompts. Admins can configure generative AI features in account management settings. For information on how HubSpot AI uses your data to provide trustworthy AI, with you in control of your data, you can refer to our HubSpot AI Trust FAQs.
Please note: Breeze features use artificial intelligence and machine learning models. To understand HubSpot’s approach to AI, data usage, and security, learn more about HubSpot's AI Model Cards and HubSpot's AI Cloud Infrastructure FAQs.
Understand requirements
- To use Breeze Assistant, turn on Give users access to Breeze Assistant in your AI settings.
- To use features that depend on connected accounts, apps, or custom assistants, confirm they are set up on the desktop first. For example:
- To prepare for meetings, confirm your calendar is connected.
- To use apps, connect apps to Breeze Assistant. Learn more about using Breeze Assistant with connected apps.
- To use custom assistants, create or customize assistants.
- User permissions determine which actions can be performed with Breeze Assistant.
Understand limitations & considerations
- Breeze Assistant content generation is limited to 30 times each minute and 1,000 times each day.
- Connected app (e.g., Gmail) searches don't support natural language filters. For example, when searching Gmail, use the Gmail search query m:john is:unread
Use Breeze Assistant
- In the top navigation bar, click Breeze Assistant in the top right.
- To send a chat, enter a prompt and then click the breezeSendIcon send icon in the bottom right.
- To connect apps with Breeze Assistant, click the Apps dropdown menu and select the checkbox next to each app you'd like to include in your prompt. If you've never installed an app for Breeze Assistant, you'll be directed to the Breeze Marketplace. Learn more about using Breeze Assistant with connected apps.
- To search all apps, toggle the Use all apps as sources switch on.
- To save the selected apps for future chats with Breeze Assistant so that those apps are searched first, toggle the Keep selection for future chats switch on.

- To include a PDF with your prompt, click the attach attachment icon and select an option.
- To upload a PDF, select Upload from computer, then select a PDF.
- To add a PDF from the files tool, select Choose file, then click a PDF.
- To begin a new chat, click the description new chat icon in the top right.
- To view previous chats, click theverticalMenumenu icon in the top right and select Chats.
- To use a prompt template or a favorite prompt, click theverticalMenumenu icon in the top right and select Prompt library, then select a prompt. Enter any additional information, then click the breezeSendIcon send icon.
- To save your prompt as a favorite, hover over your message, then click the favorite star icon.
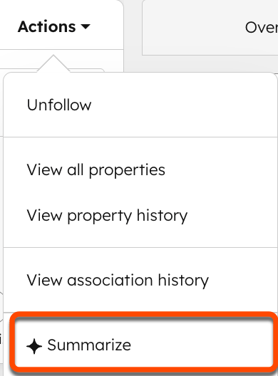
- In your response, there may be additional actions you can take, such as summarizing an associated activity. Click an action (e.g., Summarize) to send the prompt.
- To copy a response, click the clipboardIcon Copy message icon below the message.
- To provide feedback about a Breeze Assistant response:
- If the answer was what you expected, click the thumbsUpIcon thumbs up icon.
- If the answer wasn’t what you expected, click the thumbsDownIcon thumbs down icon.
- If you've connected your calendar, you can prepare for upcoming meetings by clicking the Prepare button under the meeting name:

- To hide the chat, click the X in the top right.
Manage Breeze Assistant memories
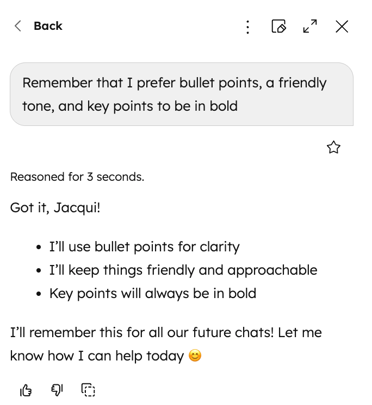
Breeze Assistant can remember important information about a user, like their name, job title, tone, writing style, and recurring instructions. This will help Breeze Assistant give more personalized help over time.
- In the top navigation bar, click Breeze Assistant in the top right.
- Enter details that you want added or removed from Breeze Assistant's memories, then click the breezeSendIcon send icon. For example, you could instruct Breeze Assistant to remember that you prefer bullet points or forget that you use a friendly tone.

- To view existing memories, click theverticalMenumenu icon and select Memories in the top right.
- To delete a memory, click the delete delete icon next to that memory.
Refine content
Use Breeze Assistant to refine your writing by generating content based on existing text.
- Navigate to your content:
- Website Pages: In your HubSpot account, navigate to Content > Website Pages.
- Landing Pages: In your HubSpot account, navigate to Content > Landing Pages.
- Blog: In your HubSpot account, navigate to Content > Blog.
- Knowledge Base: In your HubSpot account, navigate to Content > Knowledge Base.
- Email: In your HubSpot account, navigate to Marketing > Marketing Email.
- CTAs: In your HubSpot account, navigate to Marketing > Lead Capture > CTAs. In the top left, click the dropdown menu and select CTAs
- SMS: navigate to Marketing > SMS. In the top right, click Create message.
- Click the name of your content.
- In the editor, click a rich text section of the content. For knowledge base articles, click the article body.
- Highlight the text you want to generate content for, then click Refine and select a highlight command.
- Apply brand voice: rewrites the highlighted text to apply your account’s brand voice. Learn more about setting up a brand voice.
- Rewrite: generates a different wording of the highlighted text.
- Expand: elaborates on the content of the highlighted text.
- Summarize: condenses the highlighted text.
- Change tone: rewrites the highlighted text in a particular tone that you select: Friendly, Professional, Witty, Heartfelt, or Educational.
- Something else…: rewrites the highlighted text based on prompts entered into Breeze Assistant.
- Once content has been generated, click Replace to use the content or Refine to add additional information.
Generate new content
Generate new content based on prompts in pages, blog posts, marketing emails, CTAs, and SMS messages.
- Navigate to your content:
- Website Pages: In your HubSpot account, navigate to Content > Website Pages.
- Landing Pages: In your HubSpot account, navigate to Content > Landing Pages.
- Blog: In your HubSpot account, navigate to Content > Blog.
- CTAs: in your HubSpot account, navigate to Marketing > Lead Capture > CTAs. In the top left, click the dropdown menu and select CTAs.
- SMS: navigate to Marketing > SMS. In the top right, click Create message.
- Click the name of your content
- In the content editor, click a rich text section of your content.
- Type / to bring up the menu, then select a slash command
-
- Generate heading: generate a section heading based on your prompt (not available in SMS messages)
- Generate image: generate an image based on your prompt (not available in SMS messages)
- Generate paragraph: generate a paragraph based on your prompt (not available in SMS messages)
- Generate subsection: generate a section of your content based on your prompt (not available in marketing emails or SMS messages).
- Generate message (SMS messages only): generate an SMS message.
- In Breeze Assistant, enter a description of the content to generate. Best practices for creating an effective prompt include:
- Be as specific as possible.
- Use simple, straightforward language to avoid confusion or ambiguity.
- Provide examples or additional information to help Breeze Assistant better understand the context and tone of your request.
- Experiment with different types of prompts if you aren’t getting the output you want.
- Once content has been generated, click Insert to use the content or Refine to add additional information.
Generate quotes
Generate quotes with Breeze Assistant. Breeze Assistant evaluates your prompt to select the right template, pulls in relevant deal or company information, and generates a drafted quote for you to review.
Subscription required A Commerce Hub Professional or Enterprise subscription is required to use Breeze Assistant to generate quotes.
Seats required An assigned Commerce Hub seat is required to use Breeze Assistant to generate quotes.
- In the top navigation bar, click Breeze Assistant in the top right.
- Enter your prompt. Provide as much detail as possible, including the template and line items. If no template is specified, Breeze Assistant uses your most recently used template. For example:
Create a quote for CompanyXYZ using My Quote Template. Set the term to 12 months.
Create a quote for Example Deal using My Quote Template. Include the Installation line items.
- Click the breezeSendIcon send icon.
- Breeze Assistant will generate a quote preview based on the prompt you provided. To edit additional quote details, enter a prompt and then click the breezeSendIcon send icon. For example:
Apply a 15% discount to all line items.
Update the term to 5 months.
- After confirming the quote details in the preview, enter Proceed to create quote and then click the breezeSendIcon send icon
- Breeze Assistant will generate the drafted quote. Click Go to quote to continue building your quote in the quote editor.
Summarize data
Use Breeze Assistant to generate summaries of your performance for marketing emails, reports, and feedback surveys, among other tools.
Summarize marketing email performance
- In your HubSpot account, navigate to Marketing > Email.
- Hover over a sent marketing email, then click the Actions dropdown menu and select Summarize performance.
Summarize reports
- In your HubSpot account, navigate to Reporting > Reports.
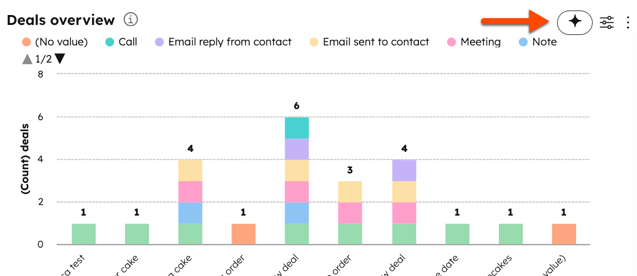
- Hover over the breezeSingleStar Breeze icon on your Reports dashboard.

- Breeze Assistant will show you the main takeaways from the report.
- To ask follow up questions, enter a message, then click the breezeSendIcon send icon.
Summarize survey responses
Seats required An assigned Service Hub seat is required to summarize feedback survey responses.
- In your HubSpot account, navigate to Service > Feedback Surveys.
- Hover over the survey and click the breezeSingleStar Breeze icon. The summary can only be generated after receiving at least three submissions.

- To ask follow up questions, enter a message, then tap the send icon. For example: Summarize average rating for Ticket owner Leslie Knope.
Review product updates with Breeze Assistant
Breeze Assistant can answer questions about product updates and give concise summaries. Instead of reviewing full release notes, users can ask natural-language questions and get a high-level overview of recent changes, along with links to relevant product updates when more detail is needed.
- In the top navigation bar, click Breeze Assistant in the top right.
- Enter a prompt and then click the breezeSendIcon send icon in the bottom right. For example, enter the following prompt:
What new features were released this week?
- Review the product update information. Breeze Assistant's response might include:
- Summaries of the recent releases
- Filtered information that reflects the user's available tools
- Links to relevant tabs on the Product Updates page for deeper review.
Example use cases
The following examples are based on common sales, marketing, and CRM database management goals. Learn more about use cases when using Breeze Assistant with connected apps.
- Create a new record: you're on a call with a company interested in buying your product. During the meeting, you can quickly create a new deal with relevant information using the Add deal prompt. Once created, you can then assign yourself to the deal or update additional details with Breeze Assistant (e.g., Assign [deal] to me), or edit property values in HubSpot.
- Create and review notes: you're the note-taker during a company meeting. Instead of navigating to each contact to add notes about them, you can create notes with the Add note to a contact prompt. After the meeting, you can use the Review notes prompt to retrieve the logged notes.
- List records with specific criteria: you're a sales manager and want to monitor which deals are set to close in the next month. You can send a message Find deals with a close date in August 2024 to retrieve a list of deals with close dates in the next month.
- Summarize a record: your CRM includes a company with many activities, but you'd like to see an overview of logged notes rather than scrolling through all activities on the record. You can enter the prompt Summarize company [Company domain name] to retrieve certain company property values and summaries of the company's activities. Learn more about what's included in a record summary.

- Summarize feedback survey responses: if you have a Service Hub seat, you can summarize feedback survey responses to analyze key themes and feedback across objects like companies, deals, and tickets, helping reduce manual work and speed up decision-making. The summary can only be generated after receiving at least three submissions.
- Generate a blog post: you're writing a blog post about how to grow your social media following. You can use the Generate blog post prompt to help you get started with a draft written based on your company and audience. If you've connected your account to HubSpot, you can create a blog draft in HubSpot with the content.
- Generate an image: you're a marketer looking for images to include in blog and social media content for a skate park fundraiser for a dog shelter. You can use the Generate image prompt to generate an image of a child with a dog. After generating an image, click Save image to save your image directly to the files tool.
- Draft a sales email: you're a sales representative who wants email templates for different scenarios. You can use the various sales email prompts to help you generate emails to prospects in different lifecycle stages. Some sales email prompts include personalized initial outreach email, email to reactivate lead, and email to thought leader.
- Create a workflow: you're a sales manager and want to assign new leads to your sales reps. You can generate a workflow, including enrollment triggers and action, to automate this process. You can use the When [this happens], then [do this] structure when entering your prompt.
- Summarize workflow data: you're trying to determine why something may have occured in your workflow. For example, you can query why a record may or may not have been enrolled in a workflow, the actions executed for that record, and more.
- Compare different apps: you're deciding between two different apps in the HubSpot app marketplace. You can enter a prompt to compare the apps, then use high-level information such as integration features, pricing and subscription requirements, ratings, and more to make your decision.
- Research a company: you're researching a prospect and want to learn more about their technology usage and keep track of news related to them. You can use the Research technology and Research company news prompts to gather the information.