- Knowledge Base
- Marketing
- Campaigns
- Manage your campaign properties
Manage your campaign properties
Last updated: October 22, 2025
Available with any of the following subscriptions, except where noted:
-
Marketing Hub Professional, Enterprise
Create custom campaign properties to store information and manage your campaigns in a way that best fits your team. You can also use campaign properties to organize, group, and report on campaign data.
Please note: you must have Edit property settings permissions to create or edit campaign properties.
Create or edit campaign properties
To create a campaign property:
-
In your HubSpot account, click the settings settings icon in the top navigation bar.
-
In the left sidebar menu, navigate to Properties.
- Click the Select an object dropdown menu, then select Campaign properties.
- To create a property, in the upper right, click Create property. Then, continue setting up a your property.
- To edit an existing property, click a property’s name in the table. Learn more about editing existing properties.

Use campaign properties when creating a campaign
After creating a campaign property, you can add the property to your campaign form to collect information when users create or edit a campaign. You can also set properties as Required to ensure that all necessary information is collected.
To use a campaign property when creating a campaign:
- In your HubSpot account, navigate to Marketing > Campaigns.
- In the upper right, click Create campaign.
- In the right panel, select Start from scratch. At the bottom, click Next.
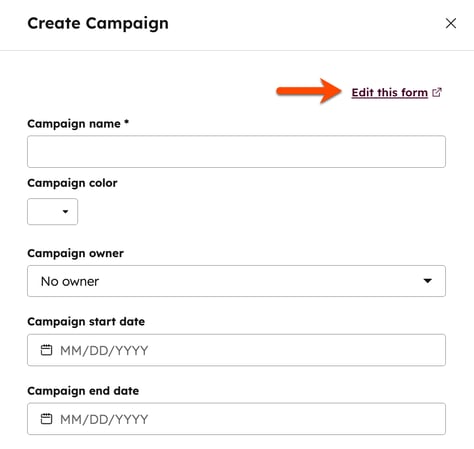
- In the top right, click Edit this form.

- In the left panel, select the checkboxes next to the campaign properties that you'd like to add as a field in the campaign form.
- In the right panel, reorder, set a campaign property as required, or delete the property from the campaign form:
- To reorder the form fields, click and drag the dragHandle drag handle next to the property.
- To set a property as required, click the Required checkbox. If the field is not completed, the user will not be able to create the campaign.
- To remove a property from the form, click the delete delete icon.

Manage the campaign properties in your campaigns table
You can select which properties display as columns, and further filter the campaigns table using these properties. After, you can save the configured table as a view, then export the specified campaign details. Learn more about how to view and filter records.
To display a campaign property as a column in the campaigns table:- In your HubSpot account, navigate to Marketing > Campaigns.
- In the top right, click Actions and select Edit columns.
- In the dialog box, select the checkboxes next to the properties that you'd like to include in the table.
- To reorder the columns in the table, click and drag the dragHandle drag handle next to the property.
- To remove all columns displayed, click Remove all columns. All columns except for the Campaign name column will be removed.
- To restore the default columns, click Reset default view.
- After setting up your columns, click Save.
