- Knowledge Base
- CRM
- Inbox
- Create contacts in your conversations inbox
Create contacts in your conversations inbox
Last updated: January 29, 2024
Available with any of the following subscriptions, except where noted:
There are two ways to create contacts directly from your conversations inbox:
- Create a contact manually: ask for a visitor's contact information while chatting, and create the contact manually in your inbox.
- Email capture setting: after initiating a conversation, visitors will be prompted to enter an email address so you can follow up via email if they close out of the chat widget before you can reply.
Create contacts manually
While chatting with a visitor, you can ask for their contact information and create a contact record for them directly from the inbox.
Please note: if you're using Facebook's chat plugin on your website to chat with visitors, visitors that send a message as a guest without logging in to Facebook Messenger will appear as unknown visitors in the inbox. You'll need to manually enter their information to create a contact record in HubSpot following the steps below.
- In your HubSpot account, navigate to CRM > Inbox.
- In the left sidebar, click a chat conversation to open it.
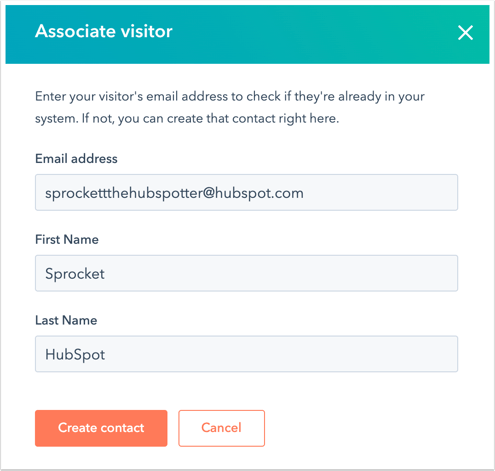
- In the right panel, click Associate visitor.

- In the dialog box, enter your visitor's email address. If a contact is found in your database with a matching email address, you can click Yes, associate to associate your visitor with the existing contact. If the visitor doesn't exist, enter their first name and last name, then click Create contact.

If you've connected a Facebook Business Page to HubSpot but are using Facebook's built-in messenger widget to chat with visitors, visitors that send a message as a guest without signing into Messenger will appear as unknown visitors in the inbox. You'll need to manually enter their information to create a contact record in HubSpot.
Create contacts with the 'Email capture' setting
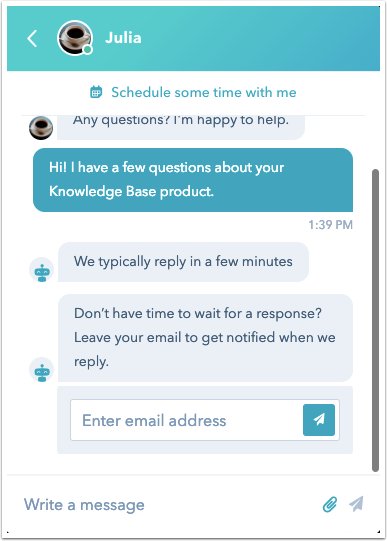
With the Email capture setting, visitors can enter their email address while waiting for a reply. You can customize this prompt message:
- In your HubSpot account, navigate to Service > Chatflows.
- Hover over the chatflow you want to customize the email capture message for and click Edit.
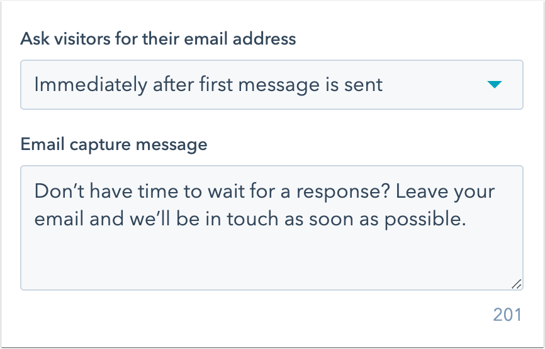
- On the Build tab, click the Ask visitors for their email address dropdown menu and select one of the following options to determine when visitors will prompted for their email:
- Immediately after first message is sent
- If no team member responds after 1 minute
- Do not ask for email address
- In the Email capture message field, enter your message.
- Click Save.

- With the Email capture setting enabled, a visitor will see a prompt to enter their email address either right after the chat is sent or after a minute with no response. If they enter their email address and click the send icon send, they'll be created as a contact.

Please note: if the chat launcher is set to display an away message, a default email capture message will display instead of the custom Email capture message in your settings.
Automatically create a contact
Visitors cannot be added to your HubSpot contacts database automatically simply by starting a chat. They're still associated with an anonymous tracking cookie until you receive either an email address from them or manually add them as a contact.
If a visitor leaves your site before they're added as a contact, they will still have a unique cookie associated with their browser. If a visitor you have previously chatted with later returns to your site in the same cookied browser, the chat widget will load their conversation history.
If the same visitor returns to your site after deleting their browser cookies or on a different device, the cookie will not be the same and their conversation history will not be loaded.