- Knowledge Base
- Content
- Design Manager
- Structure and customize template layouts
Structure and customize template layouts
Last updated: February 11, 2025
Available with any of the following subscriptions, except where noted:
-
Marketing Hub Professional, Enterprise
-
Content Hub Professional, Enterprise
- Legacy Marketing Hub Basic
Learn how to set up and customize your existing drag and drop template, and work with modules, groups, and columns as the building blocks of your template.
Structure your template
By using the layout editor in the design manager, you can quickly build your content layout without having to write any HTML.
- In your HubSpot account, navigate to Content > Design Manager.
- In the finder, click a template to edit it.
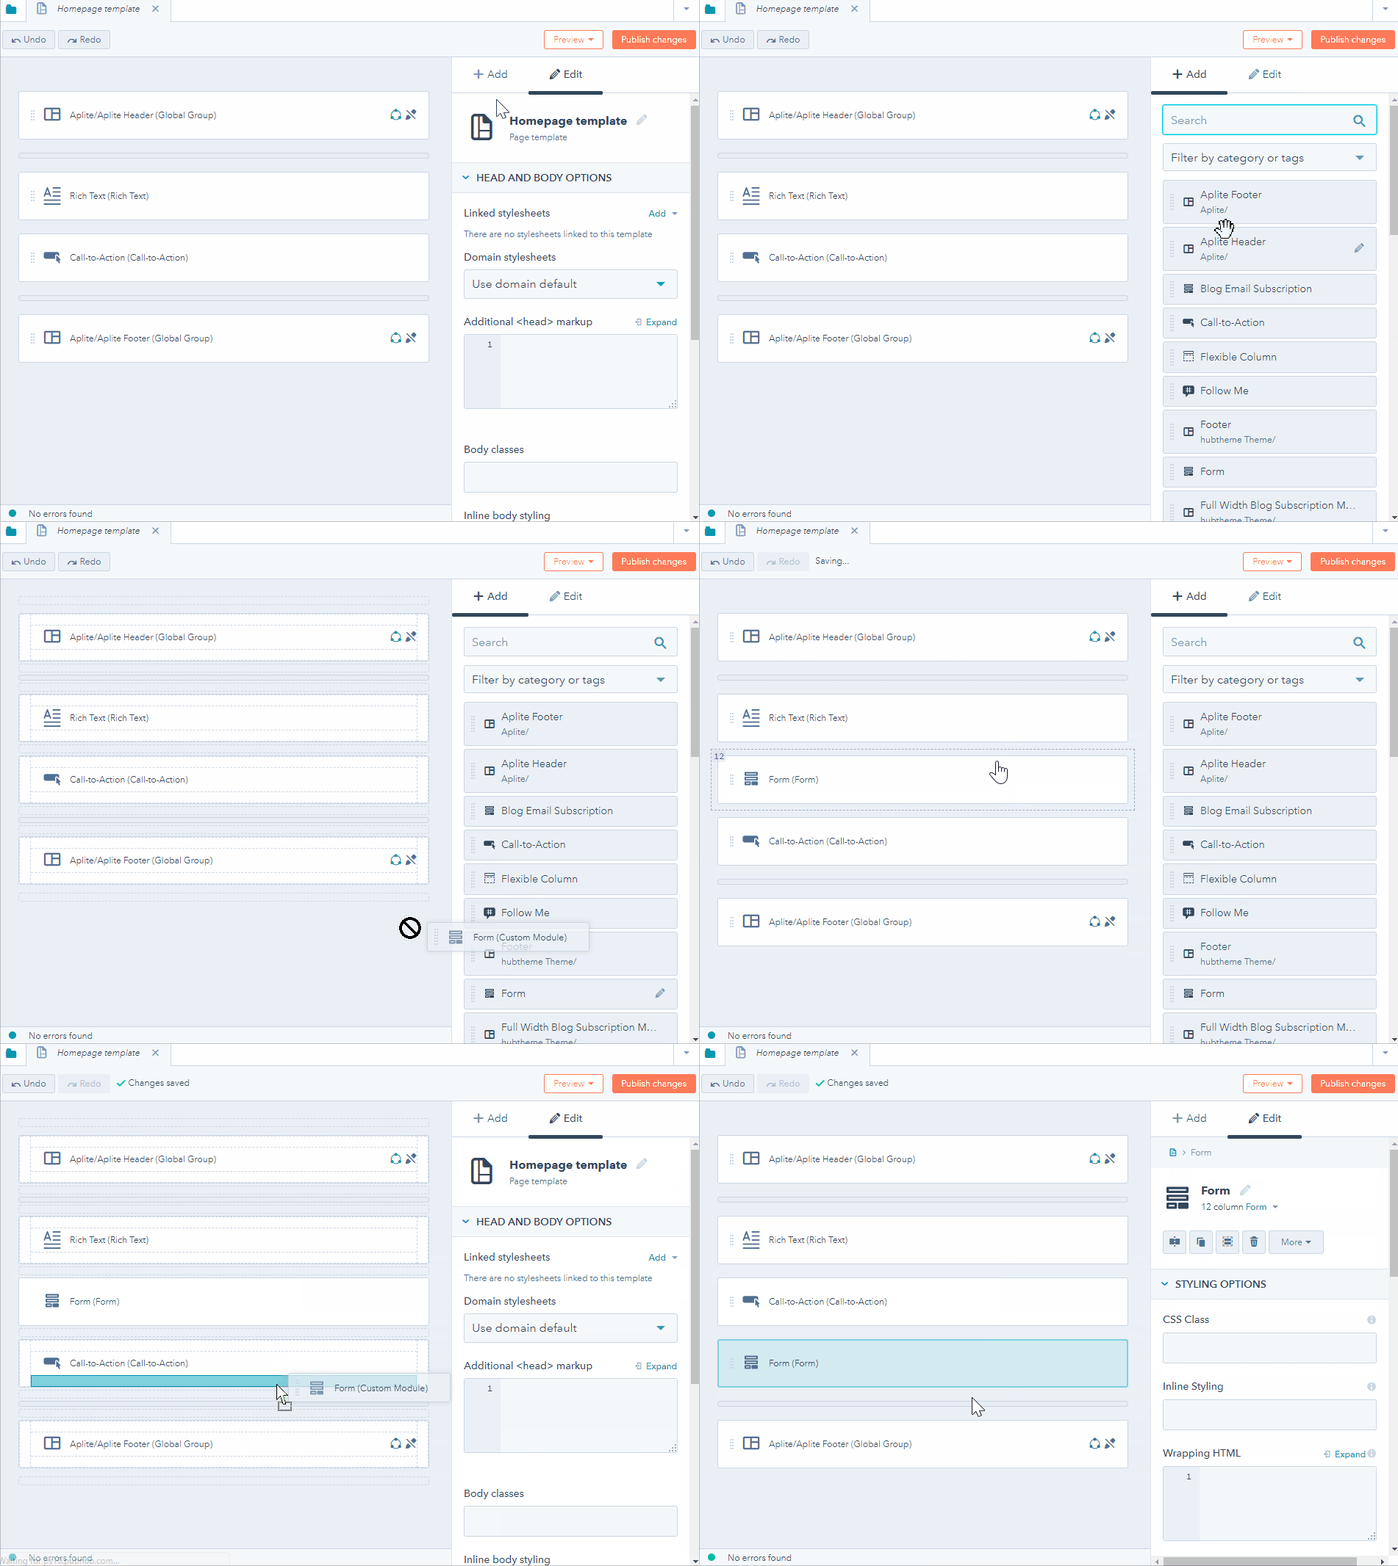
Add and drag modules
To add a module to a layout, click + Add at the top of the layout inspector. Search for or select a module, then drag it to the location you want the module to render in the layout. Dragging modules on top of other modules will either create columns or group the modules.
Change column widths
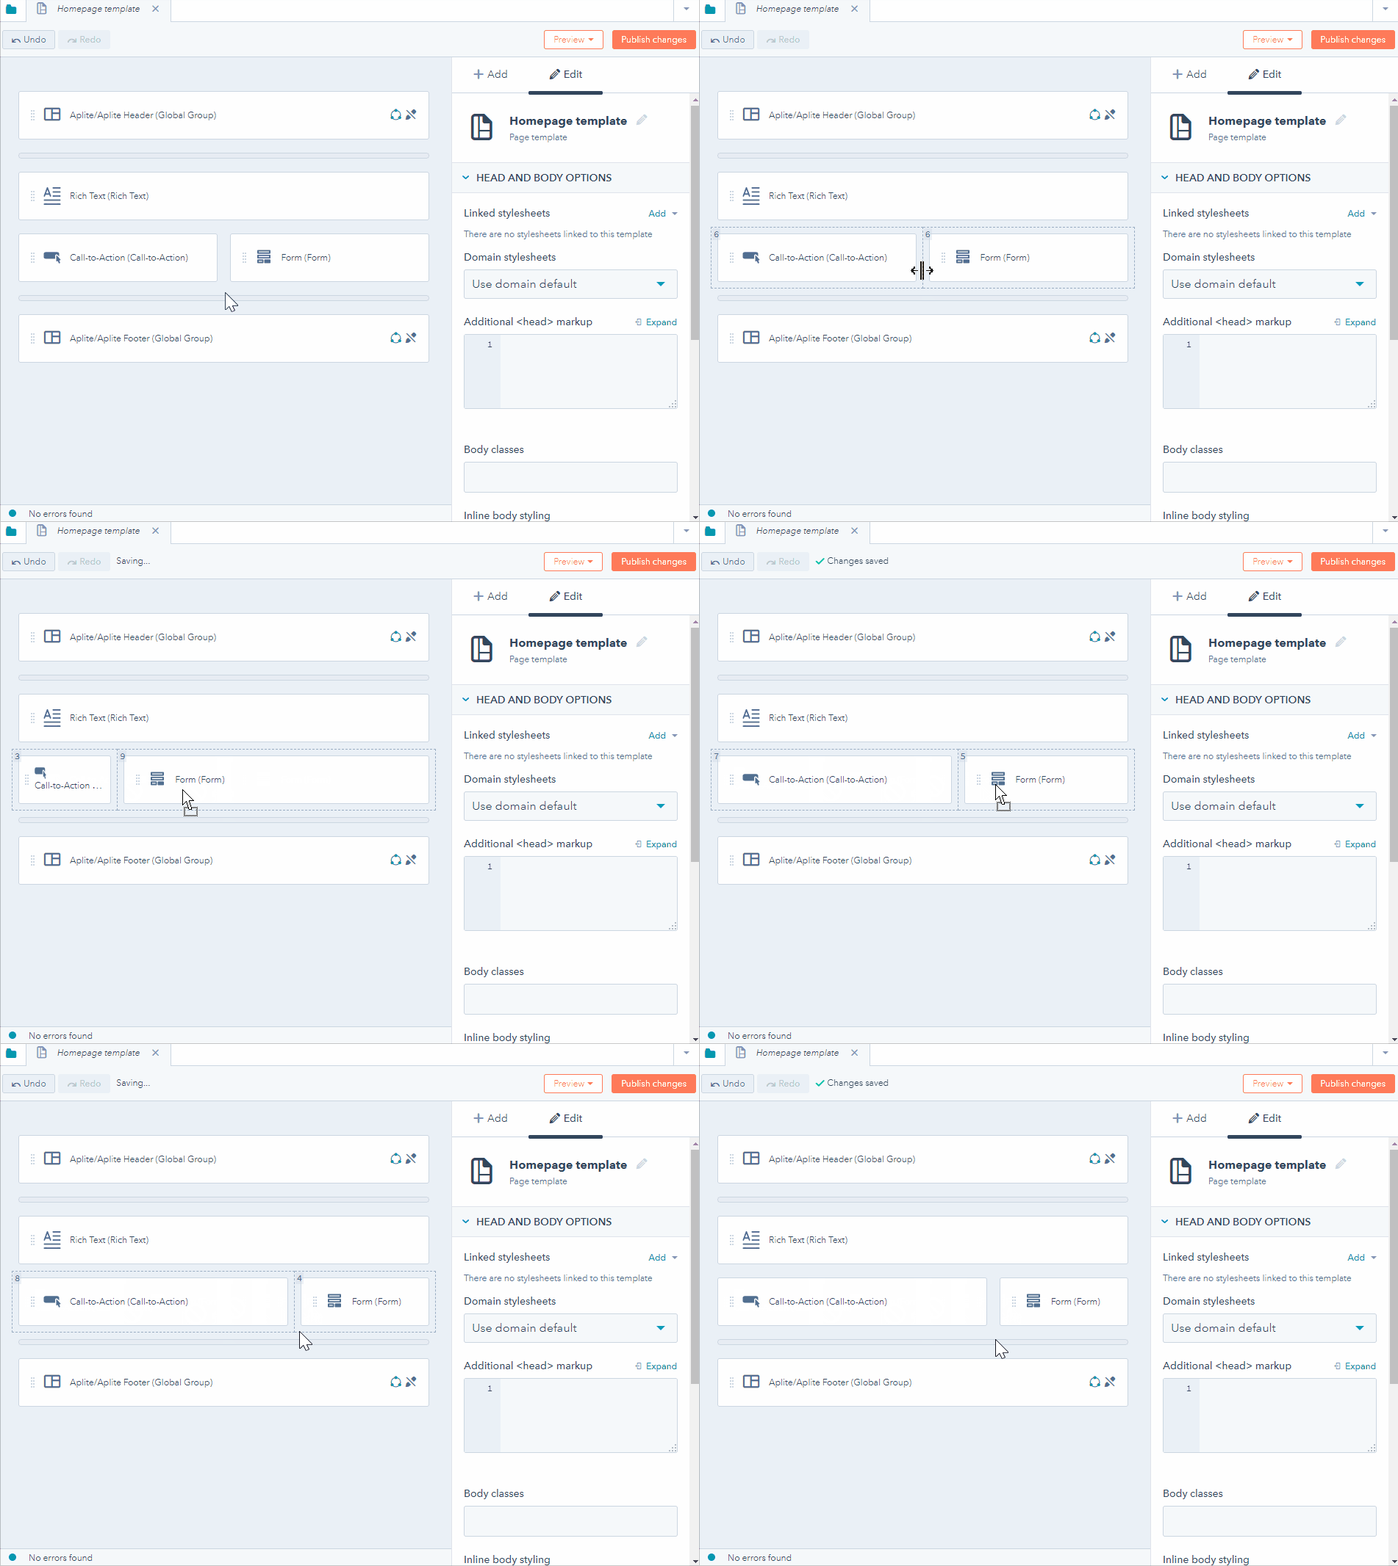
To change the width of a column, hover between the modules and click and drag horizontally.
Group modules
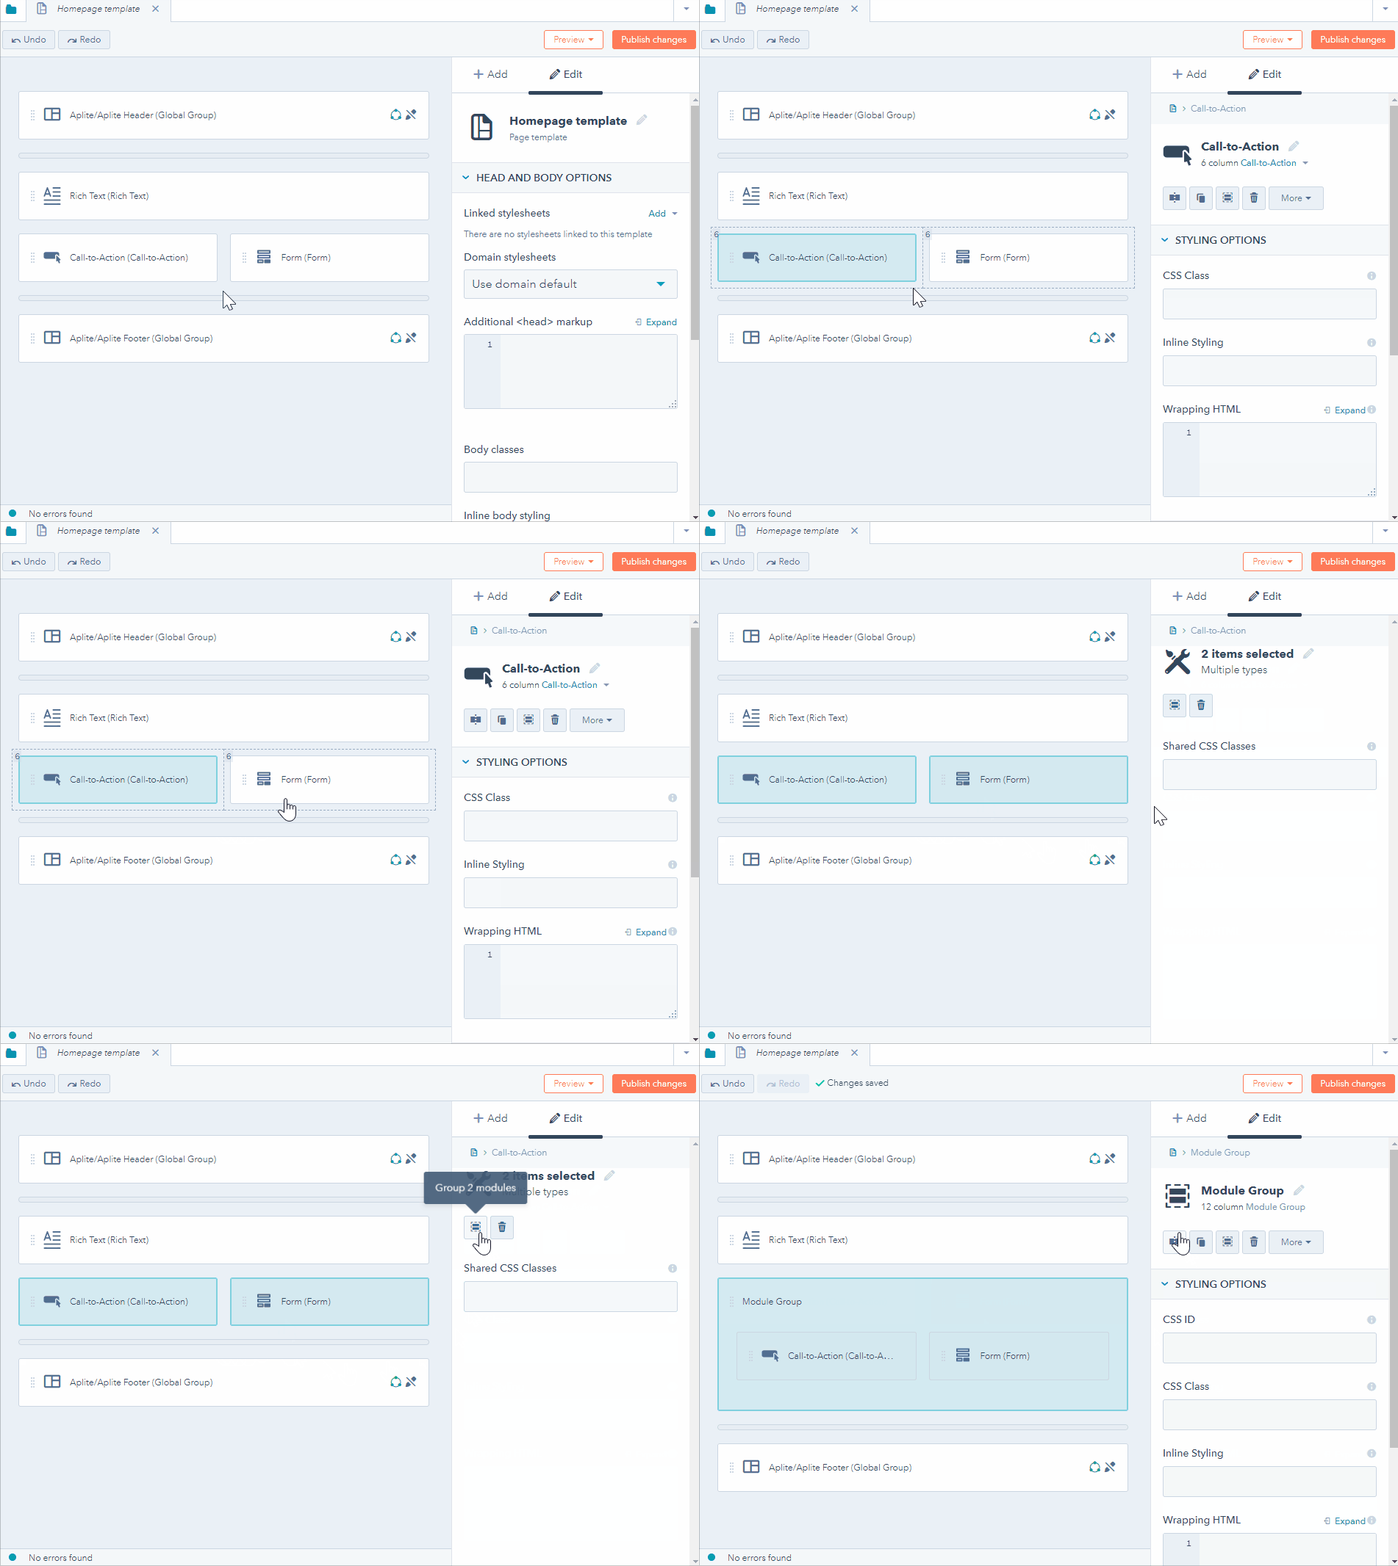
Module groups are units of modules that make up different sections of a page.
To group two modules, click the first module, then press and hold the Control/Command key and select the second module. Repeat this step if you are grouping more than two modules. Next, click the group icon groupModule in the module inspector.
Please note: modules groups cannot cross a section separator or contain a partially selected group of modules.
Split modules horizontally
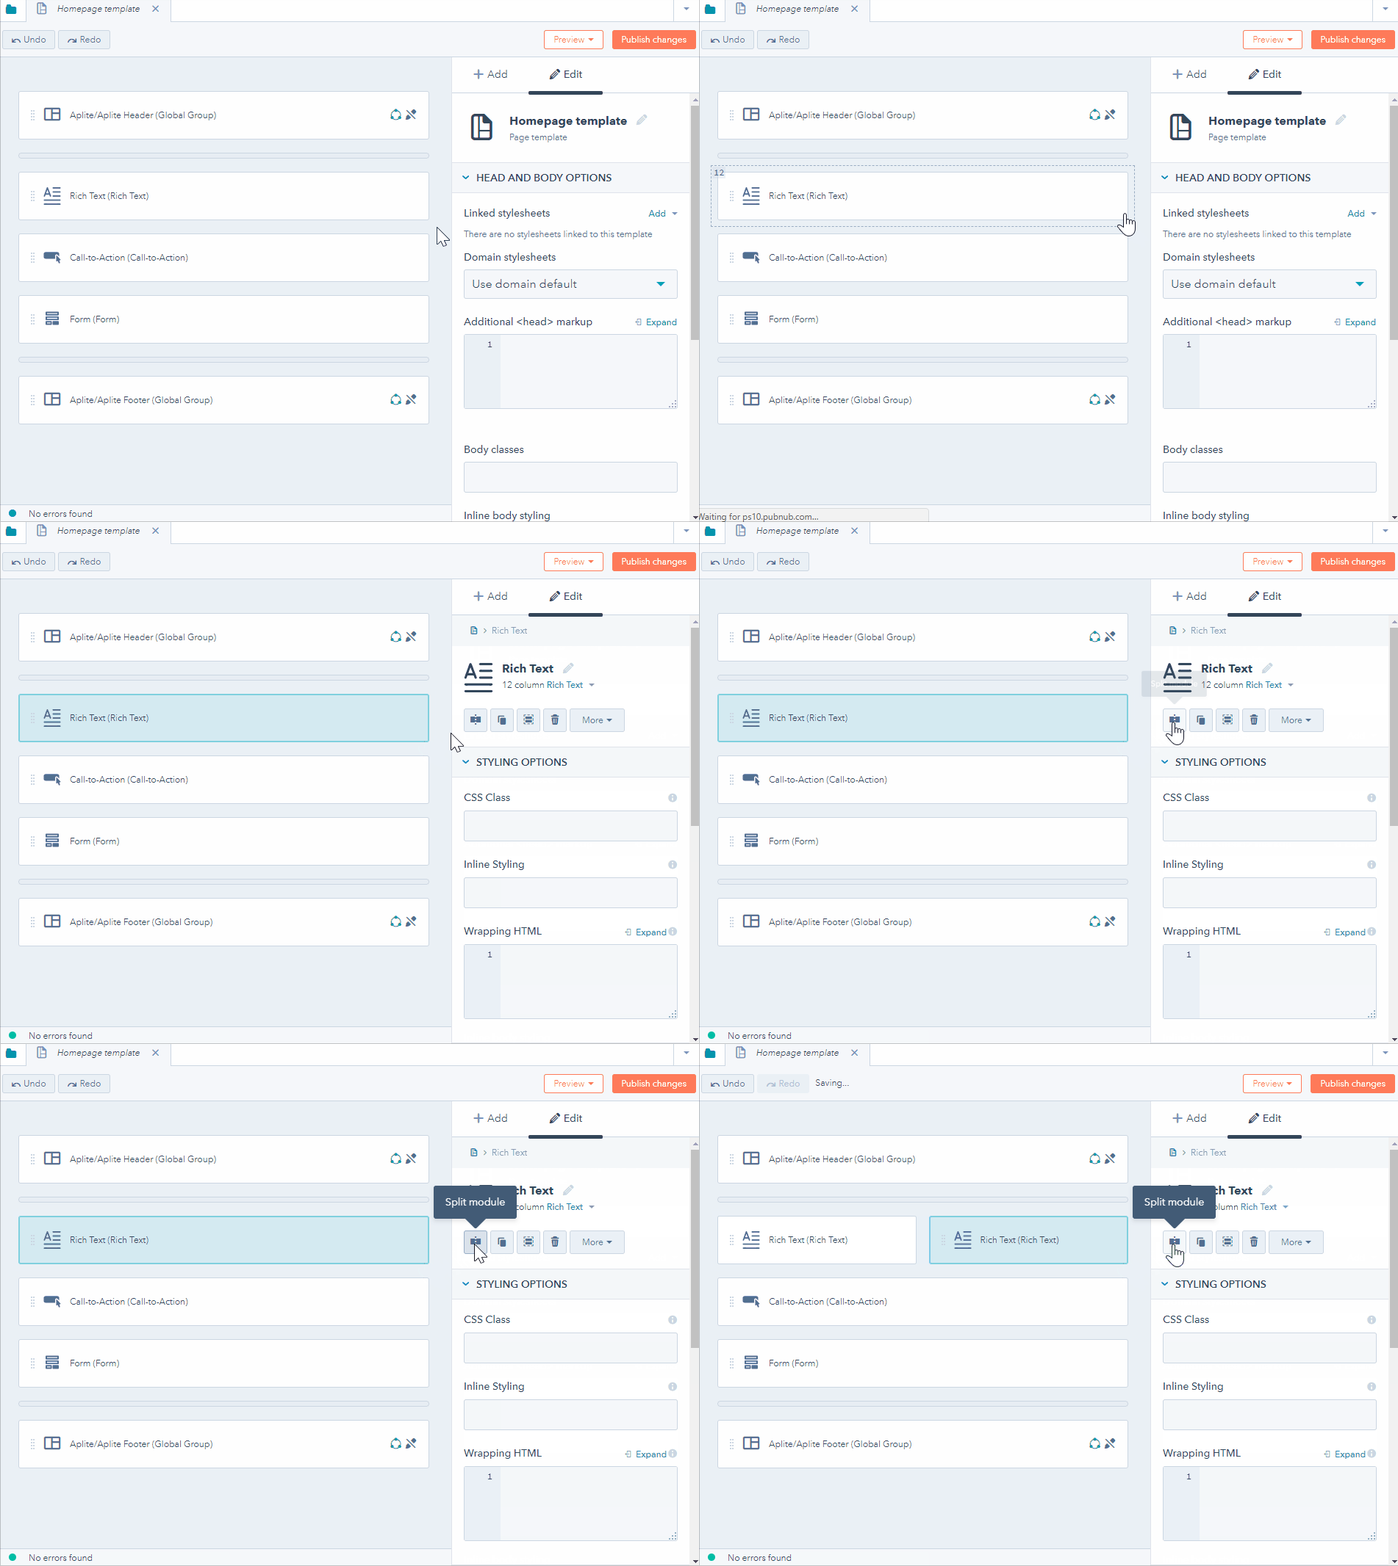
Splitting a module breaks the module in half, creating two modules. To split a module, click the module, then click the split module icon splitModule in the module inspector. Alternatively, you can right-click the module in the layout and select Split module.
Center modules
With horizontal spacers, you can center modules and groups on the page, or add blank space on either side of them. To add a horizontal spacer, click + Add at the top of the layout inspector. Locate Horizontal Spacer, then drag and drop it into the template.
To change the size of a horizontal spacer, change the width of the column separating it from other modules. To center a module or group, add horizontal spacers on each side.

Add a flexible column
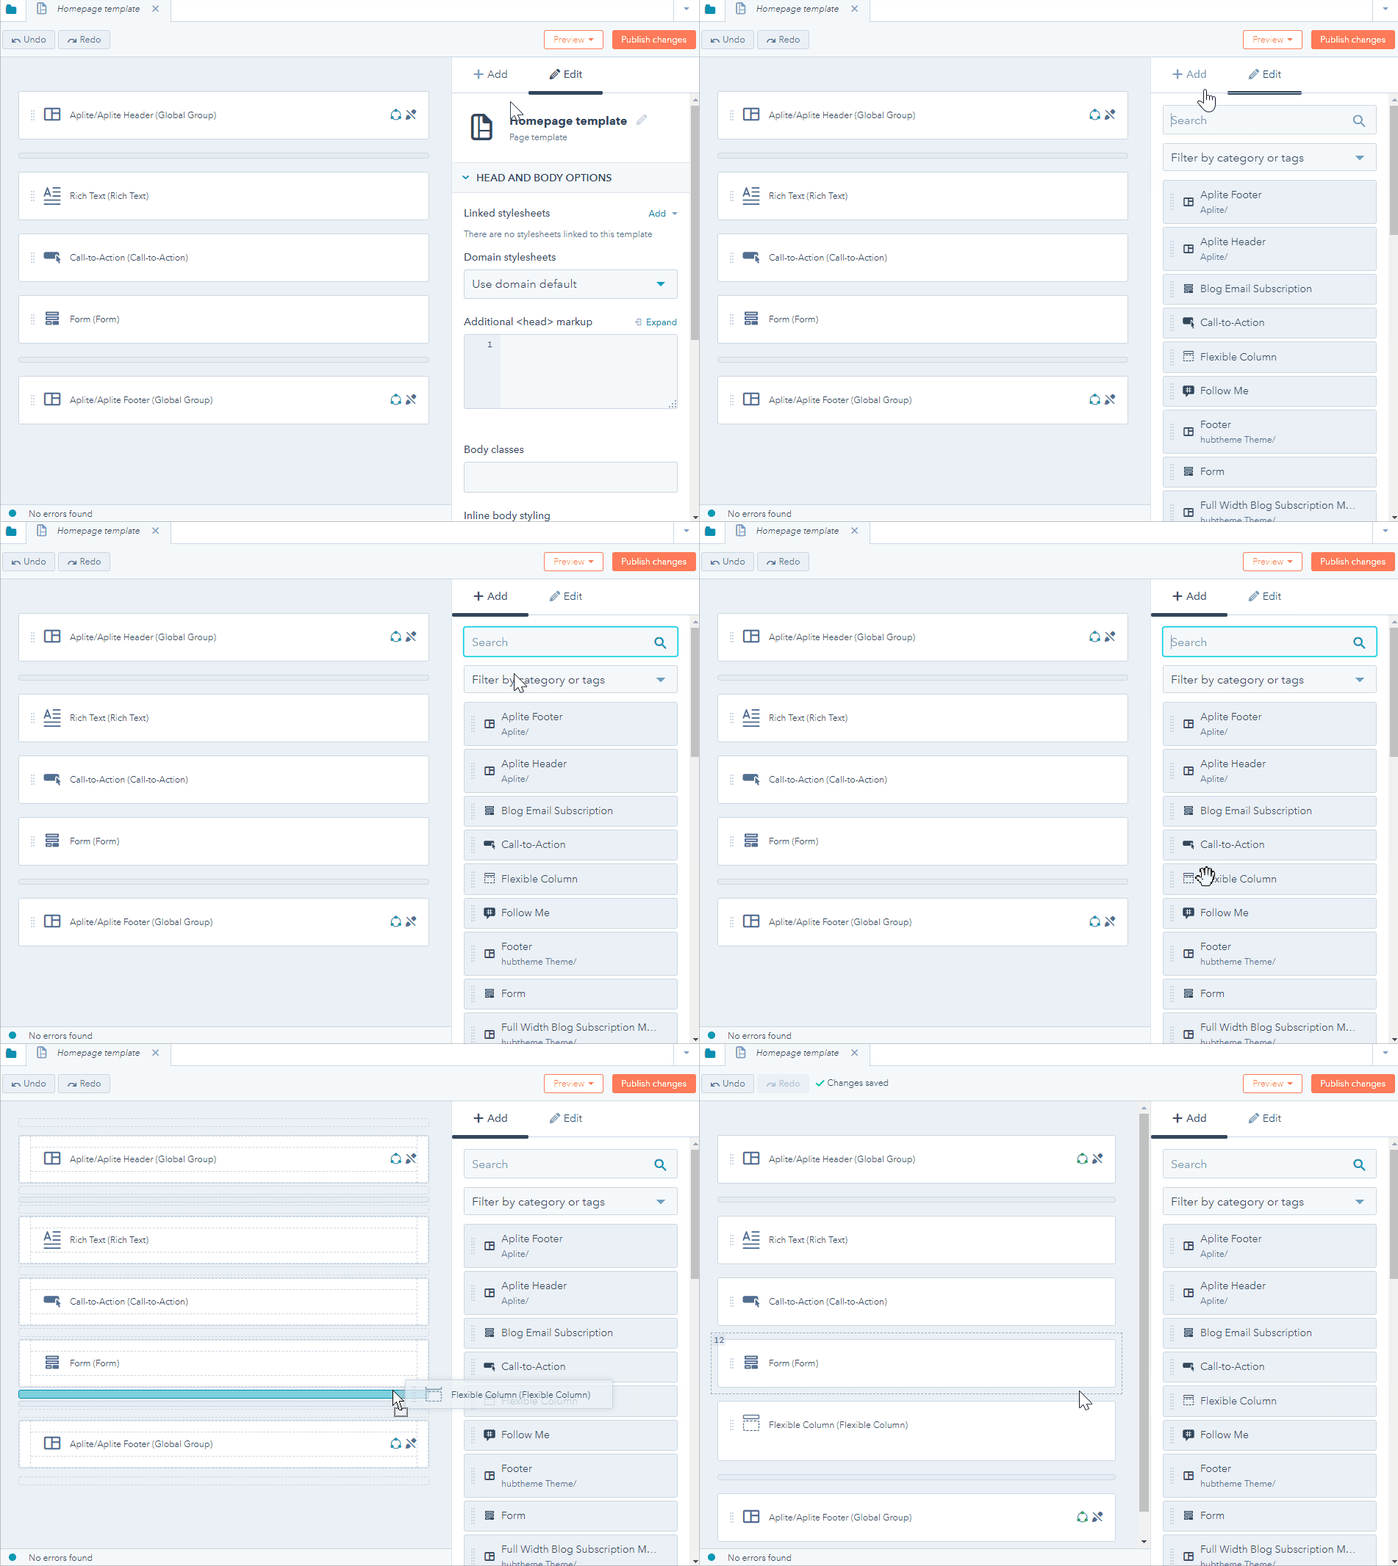
Flexible columns are designed to make content management at the page-level easier for content creators. When a flexible column is added to a HubSpot page template, users will be given the option to add, remove, and re-order modules within the individual page editor. This feature allows designers to create fewer templates, while still allowing marketers the flexibility to customize each page to fit their needs.
To add a flexible column, click + Add at the top of the layout inspector. Locate Flexible Column, then drag and drop it into the template.
- Flexible columns can only be added to page templates, and cannot be added to email or blog templates.
- Modules added to flexible columns cannot have CSS classes, inline styling, or the wrapping HTML associated with them. Styling options need to be added to the flexible column itself.
Customize your template
Once you've structured the general layout of your template, you can swap out modules and make other template customizations.
Edit module options
You can edit a module's options by clicking the module in the layout editor. In the module inspector on the right, you'll see the module's editable options. These options generally include styling, default content, and editor options, and may differ depending on the specific type of module. Learn more about editing module CSS and default content and settings.

Swap module
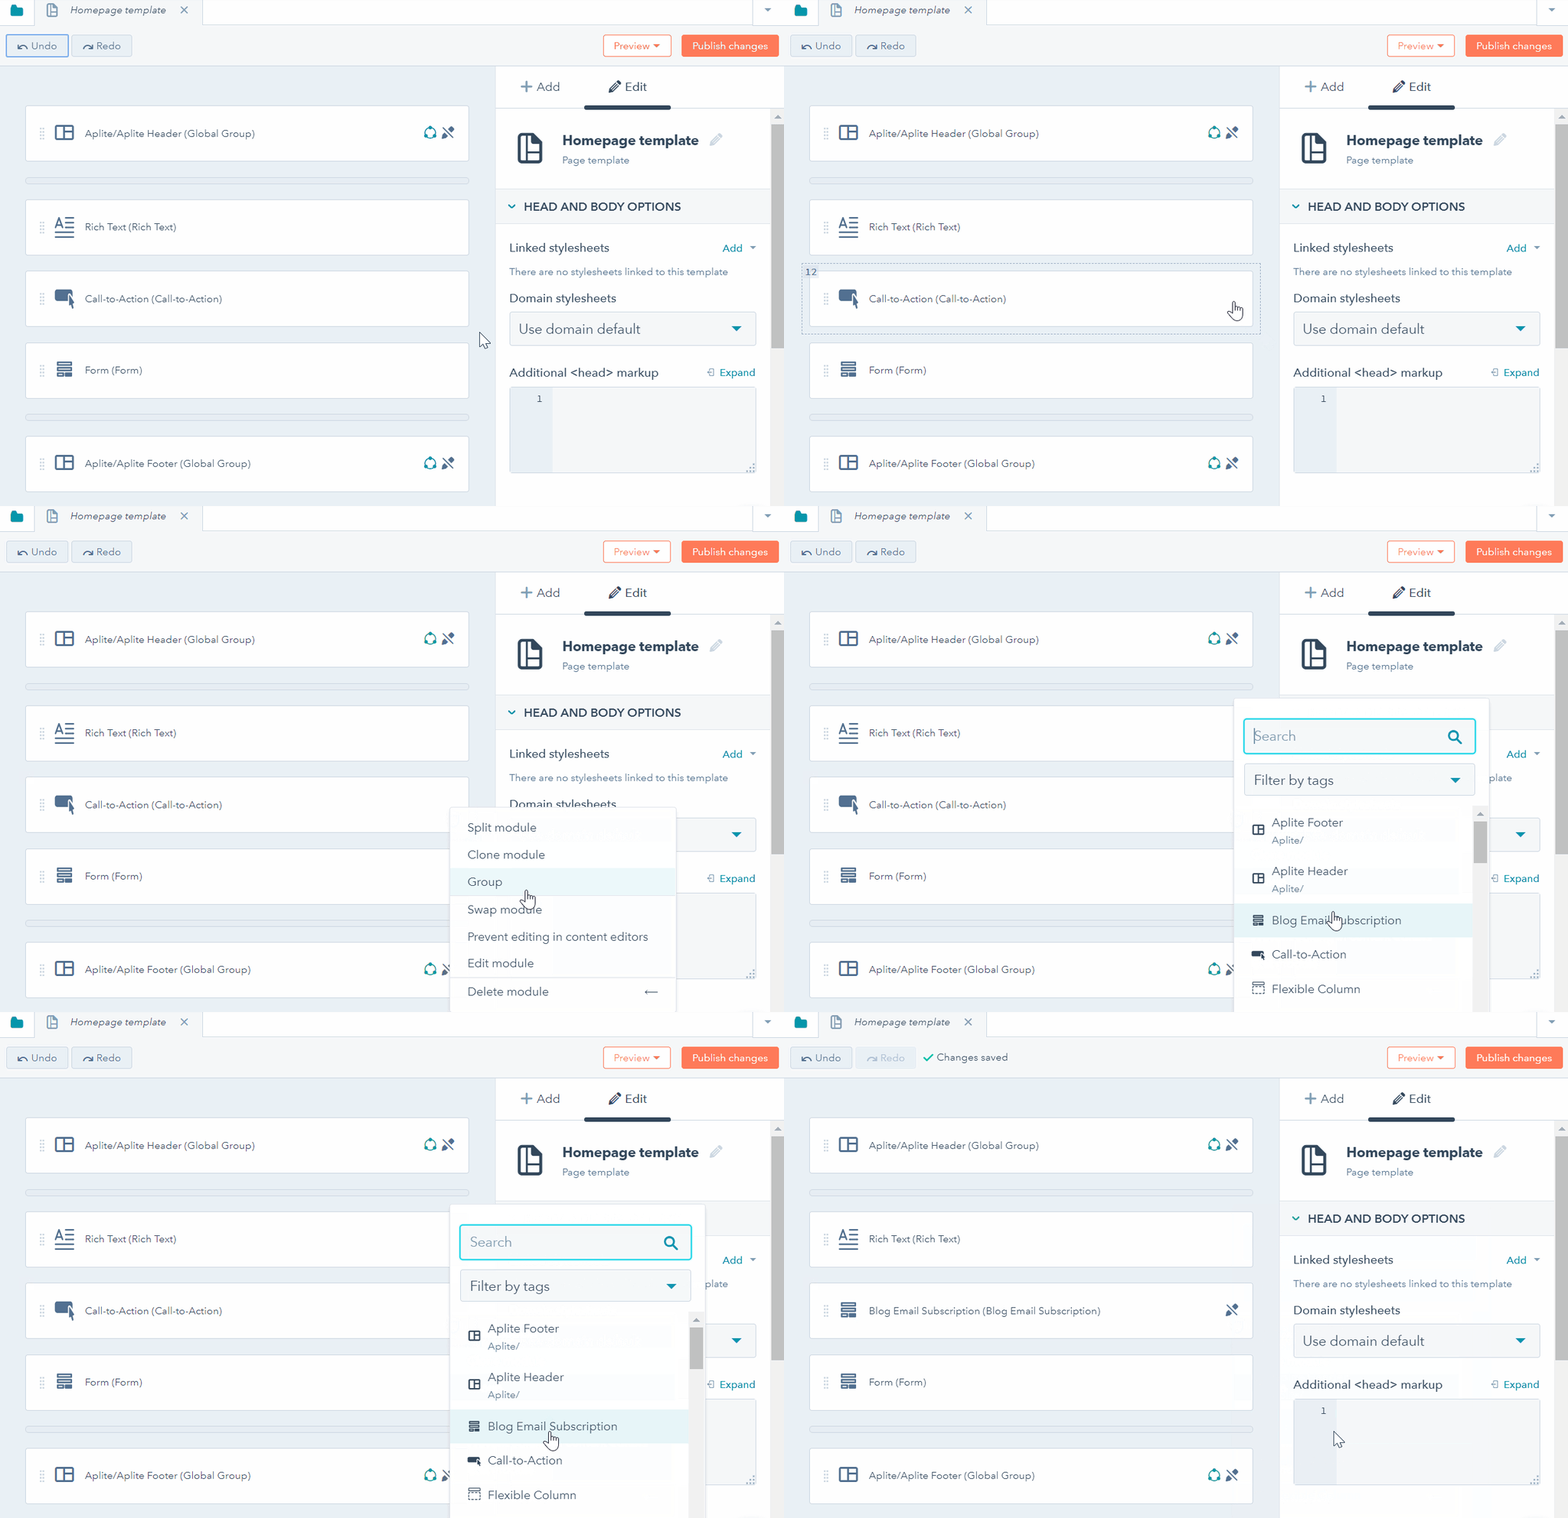
After you've added a module to your template, you can choose to swap it out for another module. Right-click the module in the layout editor, then click Swap module. In the dropdown menu that appears, select the module to replace the original module with.
Convert to global module
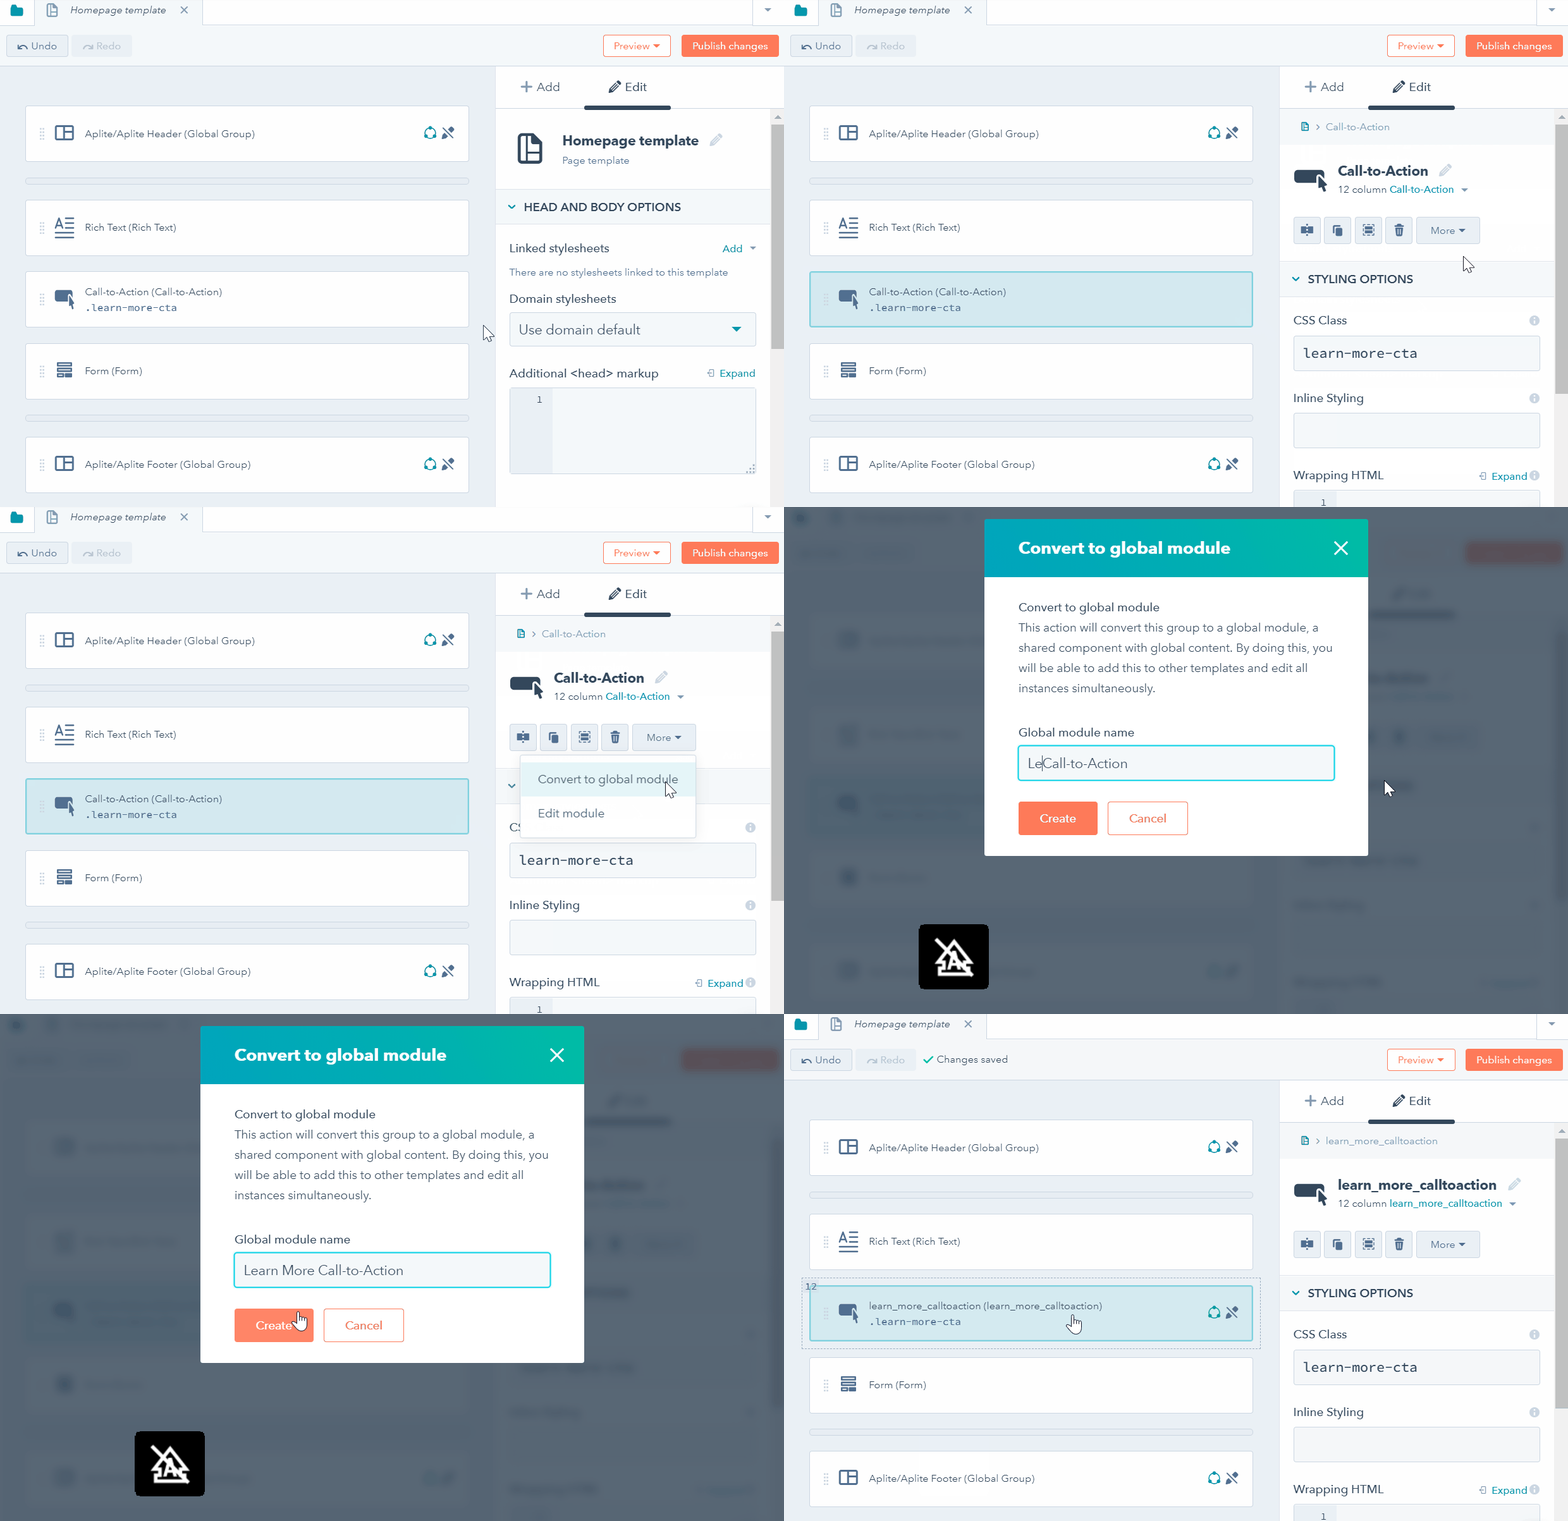
You can convert a module in your template to a global module, which can be used in multiple templates. This is useful when you've styled the module in a certain way, and/or have default content in the module that you'd like to reuse in other templates.
- Click the module in the layout editor.
- In the module inspector, click the More dropdown menu and select Convert to global module.
- In the dialog box, enter the global module name, then click Create.
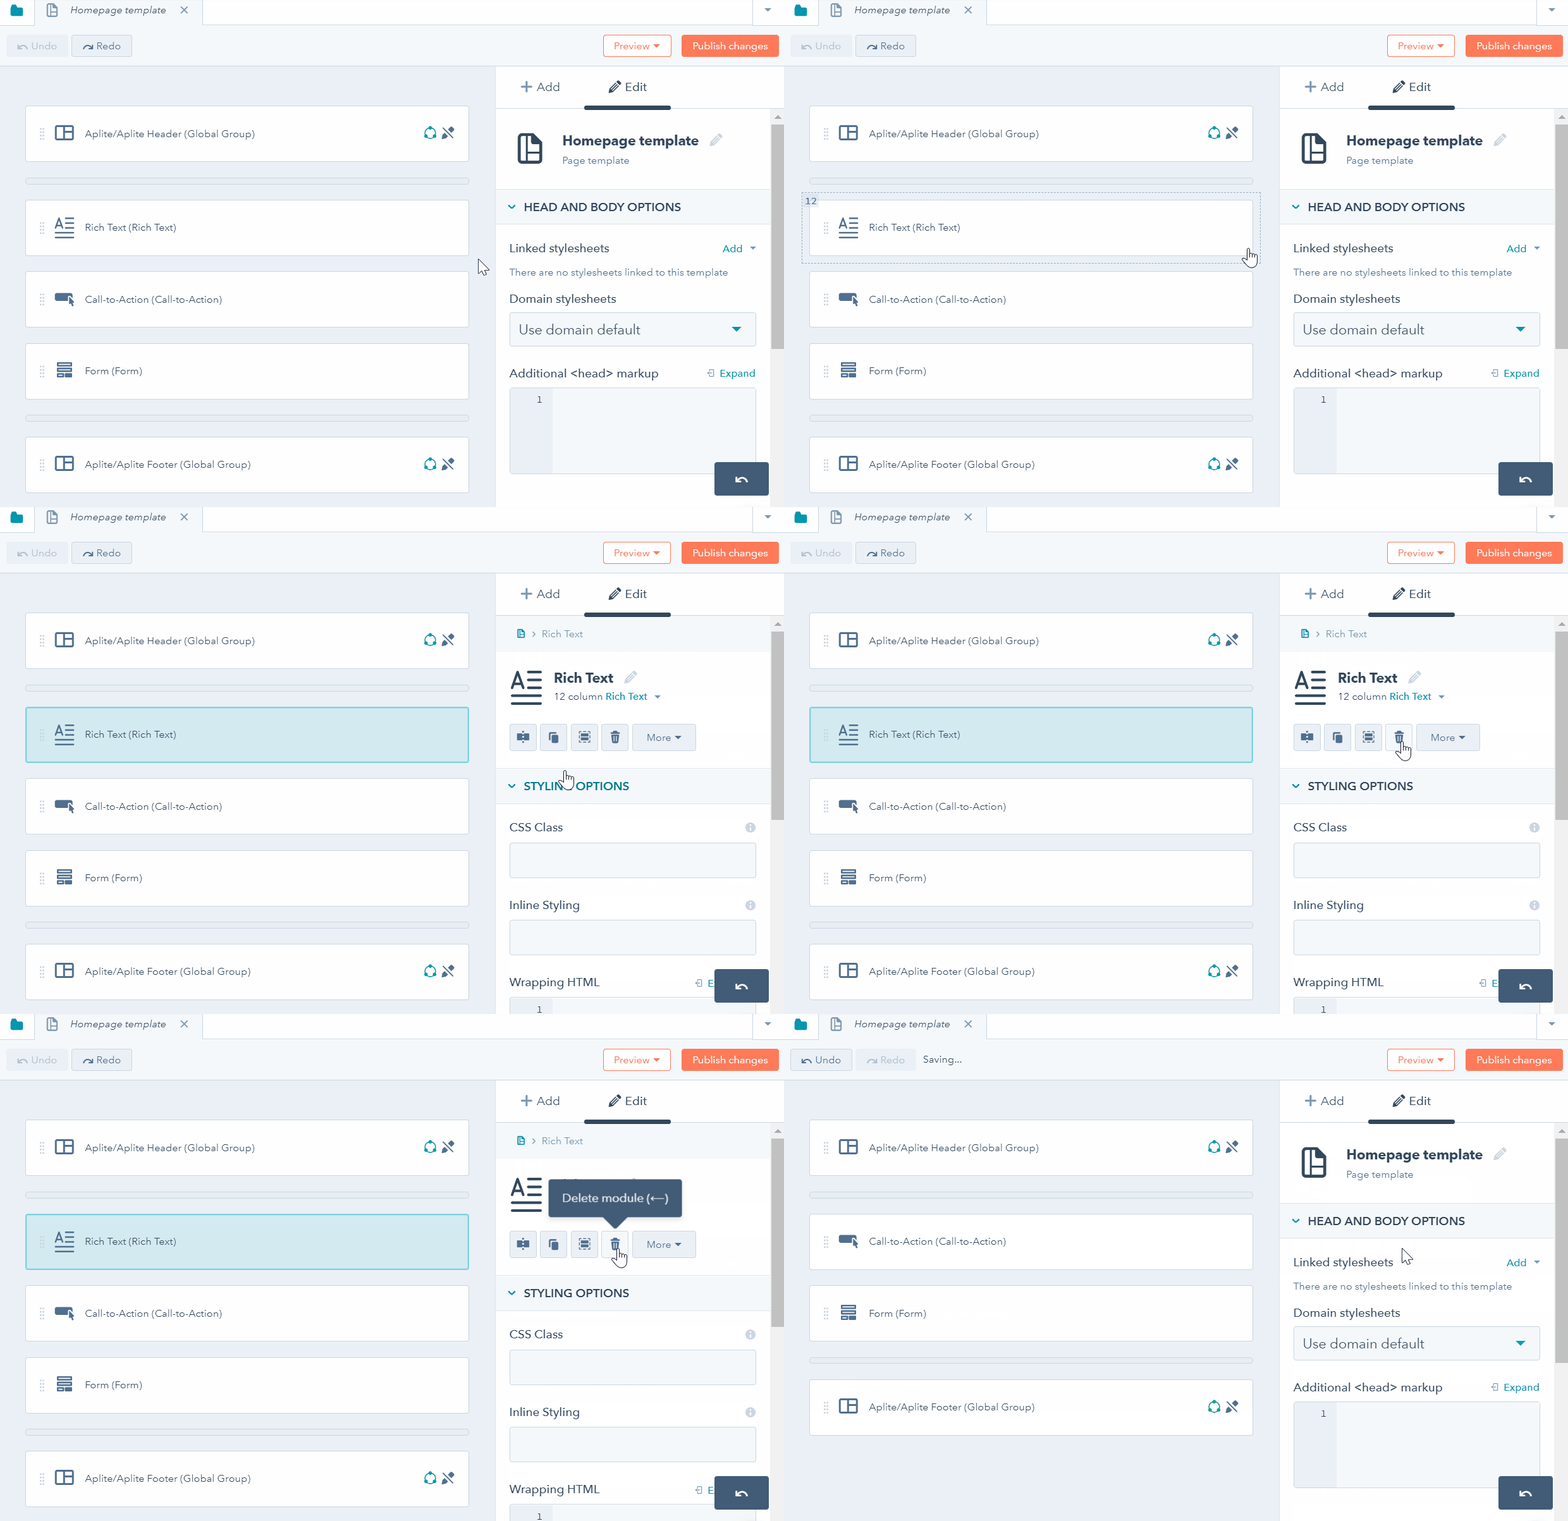
Delete module
To delete a module, click the module in the layout editor, then click the trash can icon delete in the module inspector. Alternatively, you can right-click the module and select Delete module.
Manage your template in the finder
In addition to your module options, there are several actions you can take specific to your template.
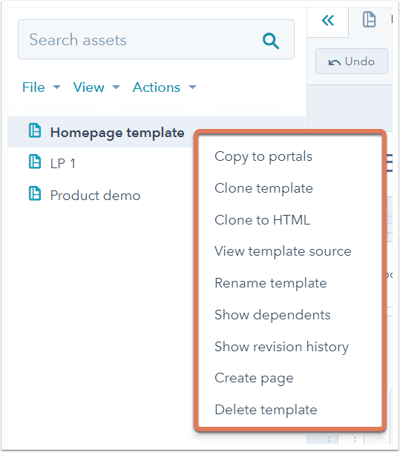
- In the upper right of the template, click the folder icon folder.
- Right-click the name of the template. In the dropdown menu, you can customize the following options:
- Copy to portals: copy the template to another portal where you are also a user. Templates purchased from the Marketplace will not be able to be copied to other portals.
- Clone template: this creates an exact duplicate of your template, and is useful when you want to create a variation of an existing template.
- Clone to HTML: this creates a separate HTML version of your template. This is helpful if you need more control over your markup, or you want to learn more about how templates are coded.
- View template source: view the template's source code HTML. Unlike the Clone to HTML option, this does not create a separate HTML version of your template.
- Rename template: edit your template's internal name.
- Show dependents: view all pages, emails, or blogs currently using the template.
- Show revision history: view your template's revision history and choose to revert your template to a previously published version.
- Create email/page: create an email or landing page/website page directly from the template.
- Delete template: this deletes the template. Once deleted, a template will remain available for 30 days, after which it will be permanently deleted. To restore the template, you will need to contact customer support.
- These options can also be accessed from the File and Actions dropdown menus above.
