- Knowledge Base
- Marketing
- Files
- Upload and manage files in the HubSpot mobile app
Upload and manage files in the HubSpot mobile app
Last updated: November 17, 2025
Available with any of the following subscriptions, except where noted:
Upload files directly to your HubSpot file manager from your mobile device using HubSpot's mobile app. Once uploaded, your images, fonts, audio files, PDFs, and other files will be hosted on HubSpot's content delivery network servers. You can also attach files to content when logging activities or composing one-to-one emails in your HubSpot mobile app.
Please note: Files uploaded to the files tool are hosted on a public CDN file URL by default. HubSpot does not support the management of sensitive information. For more information, please see our Terms of Service.
Before you get started
Before uploading your files, please note the following:
- Before uploading a file, review the file tool's supported file types and sizes.
-
By default, files uploaded to the files tool are hosted on a public file URL. If you don't want your files to be visible to search engines, learn how to customize the visibility of your file URL.
- It is not possible to track views from the files tool. When a visitor accesses a file, whether as a download or a URL, it will not count toward any page view metrics.
Upload files
To upload a file:- Open the HubSpot app on your device.
- At the top, tap the menu icon.
- In the Marketing section, tap Files.
- In the bottom right, tap + Add.

- Tap Upload files.
- At the bottom, select the source for your file:
- To select a photo from your device's stored photos, tap Choose photo.
- To select a video from your device's stored photos, tap Choose video.
- To capture a photo or video directly from your device to the files tool, tap Take photo or video.
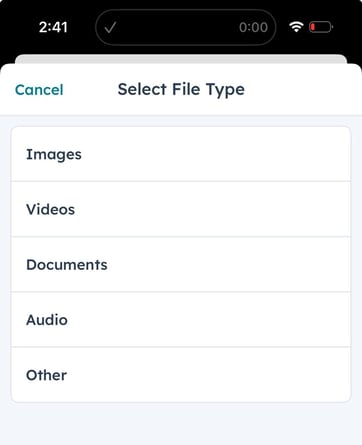
- To select a file from your device, tap Choose file. You can upload the following file types:
- To cancel a file upload, in the top left, click Cancel. You cannot cancel a completed upload. If you've incorrectly uploaded a file, you can delete the file from the file manager.
- To upload another file, in the top right, click the + add icon.
- After the file has been successfully uploaded, it will appear in the Done section. In the top left, click Done to return to the file manager.

Manage files
To manage your files from the HubSpot mobile app:
- Open the HubSpot app on your device.
- At the top, tap the menu icon.
- In the Marketing section, tap Files.
- To filter your files, in the top left, tap All file types, then select Images, Videos, Documents, Images, or Videos.

- To sort your files, in the top left, tap Sorted by, then select Most recent, Name, File size, or File type.
- To search for a specific file, at the top, enter your search term in the search bar.
- To review a file's details, tap the verticalMenumore icon next to the file.
- To preview the file, click Preview.
- To share the file through other applications on your device such as Slack or Telegram, click Share.
- To change the file visibility, click Change file visibility. Select Public, Public - no index, or Private.
- To delete the file, click Move to trash. Learn more about deleting and restoring your deleted files.
Create folders
You can create folders to organize your files in the app or upload files directly to these folders.
To create a folder from the HubSpot mobile app:
- Open the HubSpot app on your device.
- At the top, tap the menu icon.
- In the Marketing section, tap Files.
- In the bottom right, tap + Add.
- Tap Create folder.
 .
.
- In the dialog box, enter your folder name, then tap Create.
- To add a file to the folder, tap the folder name, then in the top right, tap Add.
- Continue uploading your files. By default, when uploading files, the file visibility will be set to Public. This can be later updated directly within the mobile app.
After creating your folder and uploading your files, the folder and files will appear in the files tool on both the mobile app and on desktop.