- Knowledge Base
- Account & Setup
- Integrations
- Authenticate your apps for HubSpot data sync
Authenticate your apps for HubSpot data sync
Last updated: November 5, 2025
Available with any of the following subscriptions, except where noted:
When using HubSpot sync to sync data between your external apps and HubSpot there may be additional authentication needed.
Acumatica CRM
To connect HubSpot and Acumatica CRM, HubSpot requires the following:
- Your Acumatica CRM domain and database name. This can be found in the URL of your login page. For example, your URL is domain.com/database. The database name can be left empty if your URL structure is subdomain.domain.com.
- Your OAuth Client ID and Shared Secret value. To obtain these:
- In Acumatica, click More items > Integration > Connected Applications.
- In the Client Name field, enter a client name.
- Click the OAuth 2.0 Flow dropdown menu and select Authorization Code.
- On the Secrets tab, click Add Shared Secret.
- In the pop-up, enter a description and note down the string provided in the Value field.

- On the Redirect URIS tab, click + and enter https://oauth-redirect.hubspot.com/callback/acumaticacrm as a redirect URI.
- Click the Save icon.
- The generated Client ID is needed to connect HubSpot and Acumatica CRM.
Airtable
HubSpot sync requires your table in Airtable to have:
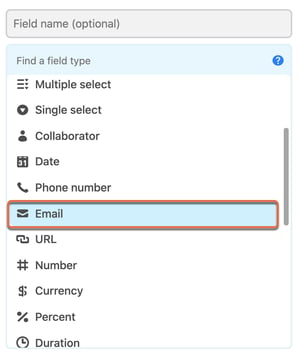
- An Email field set to email format (only required when syncing contact records, not company records).

- A Last modified time field. It is recommended to give this field a recognizable name and to hide the field. In the Fields and Formatting tabs, keep the default field settings; All editable fields and Include a time field. Ensure the field type is Last modified time.

- Text fields in Airtable should be formatted as a Single line text field to sync to a HubSpot property.
Learn more about customizing your field types in Airtable.
Bubble
To connect HubSpot and your Bubble app, HubSpot requires your Bubble app's Data API root URL and Private Key. To obtain these values:
- In Bubble, navigate to the app you want to connect to HubSpot.
- Click Settings then click the API tab.
- Select the Enable Data API checkbox.
- Select the User checkbox.
- Select the "Use field display instead of ID" for key names checkbox.
- Click Generate a new API token.
- Copy the Data API root URL and Private Key values.

Mindbody
To sync data between Mindbody and HubSpot, HubSpot sync requires access to your Client ID, username, and password.
Please note: only the owner of the Mindbody account should authorize the syncing of data from Mindbody to HubSpot.
To sync with HubSpot, you'll need to give HubSpot access to your site's data:
- Navigate to your API integrations page and enter your owner credentials.
- After entering the credentials, you'll see the error The email or password you entered is incorrect. Click the Go to staff sign-in link, and log in using the owner credentials.
- In the next screen, select your Mindbody account to connect to HubSpot.
- Navigate back to your HubSpot account to finish setup.
Microsoft Business Central
To sync with HubSpot, you'll first need to upload and deploy the HubSpot extension in your Business Central account.
Please note: on-premise self-hosted versions of Microsoft Business Central are not supported at this time by the HubSpot integration for Microsoft Business Central.
- Log in to your Business Central account.
- On the top right, click the search icon > Extension Management, then select Manage > Upload extension.
- Upload the HubSpot extension, which you can download here.
- Click Deploy.

After you've uploaded the extension, you'll need to get your OData v4 URL to complete the setup in HubSpot.
- In your Business Central account, click the search search icon at the top of the page.
- Search for web services, then click on the Web Services link.
- Create a new customer page:
-
- Click on + New.
- Select Page as the Object Type.
- Enter 21 for the Object ID and Customer Card as the Object Name.
- Enter a name for the page.
- Select the Published checkbox.

- After you've created the page, scroll to the right to locate the OData V4 URL column, then copy the URL to the clipboard.

- Navigate back to your HubSpot account to paste your OData V4 URL in the dialog box to finish installing the integration.
SugarCRM
To sync HubSpot and SugarCRM, HubSpot requires you to do the following in your SugarCRM account:
- Disable IP validation: in your SugarCRM account, navigate to Admin > System Settings and clear the Validate user IP address option.
- Allow the HubSpot API platform: in your SugarCRM account, navigate to Admin > Configure API Platform, then add the entry
api_hubspotand click Save.
Next, HubSpot needs your Sugar domain, username, password, consumer key, and consumer secret. To find your consumer secret and key:
- Log in to your SugarCRM account.
- Under Administration, navigate to OAuth Keys.
- Create a new OAuth key.
- Create a Consumer Key name, for example "HubSpot".
- Select a Consumer Key and Consumer Secret.
- Ensure that the OAuth version is OAuth 2.0.
- Click Save.
SuiteCRM
To connect HubSpot and SuiteCRM, HubSpot needs your SuiteCRM domain (without https://), and ID, and a Secret. To obtain the ID and Secret:
- Log in to your SuiteCRM account.
- Under Admin, navigate to OAuth2 Clients and Tokens.
- In the left sidebar, click New Client Credentials Client.
- The ID will be automatically generated, while the Secret is provided by you.
- Click Save.