
Last updated: May 15, 2024
Available with any of the following subscriptions, except where noted:
|
|
|
|
|
|
|
|
Configure your workflow settings to manage when actions should execute and configure workflow-related notifications. From your workflow editor, you can also set unenrollment triggers and allow Salesforce enrollment.
Timing
To specify when a workflow should or shouldn't execute actions:
- In your HubSpot account, navigate to Automations > Workflows.
- Click the name of your workflow.
- In the workflow editor, click the Settings tab.
- In the Timing section of the right panel, configure the following:
- Run workflow: specify when records can execute workflow actions based on your account's timezone. By default, workflow actions will execute as soon as an enrolled record reaches the action. When specifying execution timeframes, do note the following:
- If a workflow does not have a pause date:
- If the record reaches an action outside the specified execution time window, the workflow will attempt to reschedule the action for the earliest available time on the next available day.
- If a workflow does not have a pause date:
- Run workflow: specify when records can execute workflow actions based on your account's timezone. By default, workflow actions will execute as soon as an enrolled record reaches the action. When specifying execution timeframes, do note the following:
-
-
- If a workflow has a pause date:
- If the record reaches an action outside the specified execution hours, the workflow will attempt to reschedule for the earliest available time on the next available day.
- If the record reaches an action during the specified execution hours, but not on a specified execution day, the workflow will attempt to reschedule for the same time on the next available day.
- To prevent workflow overload, actions are rescheduled to execute within a 15-minute window. For example, if the next available time is 9:00 AM, actions will be rescheduled between 9:00 - 9:15 AM.
- Delays and if/then branches are not rescheduled, but the following action will be. For example, a deal-based workflow is set to only execute actions Monday through Thursday, 9:00 AM to 5:00 PM. The deal enters a 2-day delay on Thursday, then exits the delay on Saturday. The next action will be rescheduled for Monday between 9:00 - 9:15 AM.
- If a workflow has a pause date:
-
Don't run workflow: pause a workflow to prevent actions from executing on specific dates. You can also set the dates to pause annually. On those dates, when a record reaches an action, it will pause until the next available date. When using pause dates, do note the following:
- Pause dates take other date settings into account when rescheduling actions. For example, a workflow is set to only execute actions on Monday - Wednesday from 9AM to 5PM. If you add a pause date that takes place on a Wednesday, the next action will be rescheduled for the next Monday at 9AM.
- Records will still enroll and enter delays and if/then branches on paused days. Once they leave the delay or if/then branch, they will pause at the next action instead.
- Schedule workflow to turn off automatically: schedule the workflow to turn off after a specific date and time. Learn more about turning off workflows.
-
Notifications (Enterprise only)
Before setting up notifications in the workflow editor, ensure that your user notifications are turned on. While Super admins in Enterprise accounts can set default notification preferences for other users, preferences set by individual users will take precedence over the defaults. Learn more about setting up user notifications in HubSpot.
- In your HubSpot account, click the settings icon in the top navigation bar.
- In the left sidebar menu, navigate to Notifications.
- At the top, click the Email tab.
- In the Email section, click to toggle the switch on to receive email notifications to your inbox.
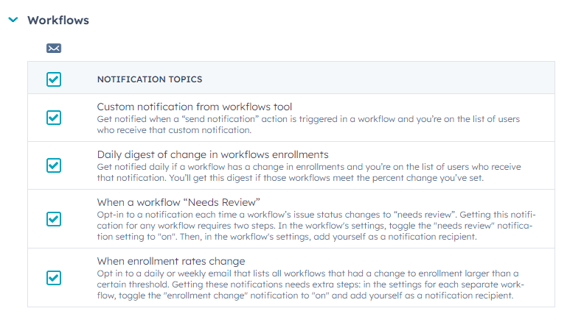
- Scroll down and click to expand the Workflows section.
- Select the checkboxes next to the relevant notification types.
Set workflow notifications
To trigger your workflow notifications:- In your HubSpot account, navigate to Automations > Workflows.
- Click the name of your workflow.
- In the workflow editor, click the Settings tab.
- In the Notifications section of the right panel, configure the following:
- Get email notifications when this workflow needs review (BETA): notify users and teams each time the workflow's status changes to Needs review.
- You will be notified the first time any issues occur in this workflow.
- After the issues are reviewed, the status will change to Reviewed.
- If any new issues occur, or if any already-reviewed issues reoccur, the status will change back to Needs review and trigger a notification again.
- Get email notifications when this workflow needs review (BETA): notify users and teams each time the workflow's status changes to Needs review.
-
- Get email notifications when enrollment passes a threshold: notify users and teams each time the workflow's enrollment increases or decreases past a specified threshold.
- Check count: choose whether to check the enrollment count weekly or daily.
- Weekly: check and send an internal email notification every Friday at 10AM if week-over-week enrollment rates for the workflow increase or decrease by the specified percentage.
- Daily: check and send an internal email notification every day at 10AM if daily enrollment rates for the workflow increase or decrease by the specified percentage.
- Increased at least: enter a percentage to trigger this notification if enrollment increases.
- If enrollment rates increase by more than this percentage, the workflow email notification will be sent.
- If this option is left blank, notification emails will not be triggered for increased enrollments in the workflow.
- Decreased by at least: enter a percentage to trigger this notification if enrollment decreases.
- If enrollment rates decrease by more than this percentage, the workflow email notification will be sent.
- If this option is left blank, notification emails will not be triggered for decreased enrollments in the workflow.
- Check count: choose whether to check the enrollment count weekly or daily.
- Get email notifications when enrollment passes a threshold: notify users and teams each time the workflow's enrollment increases or decreases past a specified threshold.
-
-
Notification recipients: if the Get email notifications when this workflow needs review or Get email notifications when enrollment passes a threshold option is toggled on, this
- Send to these users: select specific users to send the workflow notification email. Individual users must have workflow email notifications enabled in their settings to receive this email.
- Send to these teams: select specific teams to send the workflow notification email. Users in these teams must have workflow email notifications enabled in their settings to receive this email.
-
Unenrollment
In contact-based workflows, manage the enrollment of merged contacts, remove contacts that no longer meet enrollment criteria, and prevent enrollment of contacts in specific lists.
In other workflow types, you can set the criteria to unenroll active records and also prevent them from enrolling or re-enrolling.
Manage unenrollment in contact-based workflows
In the Unenrollment and suppression tab of a contact-based workflow:
- In your HubSpot account, navigate to Automations > Workflows.
- Click the name of your workflow.
- In the workflow editor, click the Edit > Edit enrollment trigger.
- In the Enrollment tab, in the Enrollment settings section, you can configure the following:
- Enroll when contacts are merged: by default, workflows will not enroll merged contacts even if the merged contact meets the enrollment criteria of the workflow. However, merged contacts can enroll in the future if they meet the enrollment triggers again and re-enrollment is enabled. For example, if the enrollment trigger is to have filled out any form, when the contacts are merged this will not, by default, enroll the contact in the workflow. However, if the contact submits a form again, they will be enrolled in the workflow.
- Allow contacts to be enrolled into this workflow from Salesforce: if you've installed the Salesforce integration and added the HubSpot Visualforce window, you can choose to enroll Salesforce leads and contacts that have synced to HubSpot into contact-based workflows. Learn more about enrolling your Salesforce leads or contacts into HubSpot workflows directly from Salesforce.
- Enroll when contacts are merged: by default, workflows will not enroll merged contacts even if the merged contact meets the enrollment criteria of the workflow. However, merged contacts can enroll in the future if they meet the enrollment triggers again and re-enrollment is enabled. For example, if the enrollment trigger is to have filled out any form, when the contacts are merged this will not, by default, enroll the contact in the workflow. However, if the contact submits a form again, they will be enrolled in the workflow.
- To manage your unenrollment settings, in the left panel, click the Unenrollment tab. Then, you can configure the following:
- Contacts are on or join a suppression list: add a list of contacts you don't want to enroll.
- If a suppression list is removed or if contacts are removed from a suppression list, those contacts will not automatically enroll in the workflow, even if they meet the workflow's enrollment triggers. They will be eligible to enroll the next time they meet the workflow's enrollment or re-enrollment criteria.
- Adding a suppression list to a workflow will do one of three things based on a contact's current enrollment status:
- Contact is not currently enrolled in the workflow and is a member of the suppression list: the contact will not be enrolled in the workflow even if they meet the enrollment triggers at a later time, and will appear in the workflow's history as being found in a suppression list and unenrolled. The contact also cannot be manually enrolled.
- Contact is currently enrolled in the workflow and is a member of the suppression list: the contact will be unenrolled when they reach the next step in the workflow.
- Contact is currently enrolled in the workflow and is not a member of the suppression list: the contact will remain in the workflow. However, if they meet the criteria of the suppression list at a later time, they will be unenrolled.
- Contacts meet a goal: unenroll contacts when the meet the specified goal. Learn more about using goals with contact-based workflows.
- Contacts are on or join a suppression list: add a list of contacts you don't want to enroll.
-
- Contact no longer meets the enrollment criteria: decide whether a contact will be removed if they no longer meet the enrollment trigger criteria while enrolled. By default, this setting is not turned on. This setting will only apply to When a filter criteria is met enrollment triggers.
- When this setting is selected, contacts who do not meet the criteria cannot be manually enrolled.
- If you have a contact currently enrolled in the workflow that did not meet the enrollment triggers before this setting was turned on, they will not be unenrolled until the contact reaches the next action (excluding branches and delays). If you would like the contact to unenroll immediately, you will need to manually unenroll them.
- If you enroll a test contact that does not meet the enrollment triggers when this setting is enabled, they will be automatically unenrolled from the workflow and will not execute any of the steps.
- Contact no longer meets the enrollment criteria: decide whether a contact will be removed if they no longer meet the enrollment trigger criteria while enrolled. By default, this setting is not turned on. This setting will only apply to When a filter criteria is met enrollment triggers.
Set unenrollment triggers for other workflow types
In other workflows types, unenrollment triggers will remove actively enrolled records from the workflow and prevent them from enrolling or re-enrolling. Use the steps below when unenrolling objects from Company, Deal, Ticket, Quote, Conversation, Feedback submission, and Contractor-based workflows.
To set unenrollment triggers:
- In your HubSpot account, navigate to Automations > Workflows.
- Click the name of your workflow.
- In the workflow editor, click the Edit > Edit enrollment trigger.
- At the top, click the Unenrollment tab.
- Click + Add criteria.
- In the left panel, set your unenrollment triggers. Then, click Apply filter. Learn more about unenrollment triggers in workflows.
- Add more unenrollment triggers as needed, then click Save.
