
Last updated: July 28, 2026
Available with any of the following subscriptions, except where noted:

Prevent new content from appearing in results by adding the URL slug to a robots.txt file. Search engines use these files to understand how to index a website's content. Content on HubSpot system domains containing hs-sites is always set as no-index in a robots.txt file.
If search engines have already indexed your content, you can add a "noindex" meta tag to the content's head HTML. This will tell search engines to stop displaying it in search results.
Please note: only content hosted on a domain connected to HubSpot can be blocked in your robots.txt file. Learn more about customizing file URLs in the files tool.
Use robot.txt files
Add content that hasn't yet been indexed by search engines to a robots.txt file to prevent it from being shown in search results.
To edit your robots.txt file in HubSpot:
-
In your HubSpot account, click the
settings icon in the top navigation bar. -
In the left sidebar menu, navigate to Content > Pages.
- Select the domain whose robots.txt file you want to edit:
- To edit the robots.txt file for all connected domains, click the Choose a domain to edit its settings dropdown menu and select Default settings for all domains (selected by default).
- To edit the robots.txt file for a specific domain, click the Choose a domain to edit its settings dropdown menu and select the domain. If necessary, click Override default settings. This will override any robots.txt default settings for this domain.
- Click the SEO & Crawlers tab.
- In the Robots.txt section, edit the content of the file. There are two parts of a robots.txt file:
- User-agent: defines the search engine or web bot that a rule applies to. By default, this will be set to include all search engines, which is shown with an asterisk (*), but you can specify specific search engines here. If you're using HubSpot's site search module, you will need to include HubSpotContentSearchBot as a separate user-agent. This will allow the search feature to crawl your pages.
- Disallow: tells a search engine not to crawl and index any files or pages using a specific URL slug. For each page you want to add to the robots.txt file, enter Disallow: /url-slug (e.g., www.hubspot.com/welcome would appear as Disallow: /welcome).
- When finished, click Save on the bottom left.
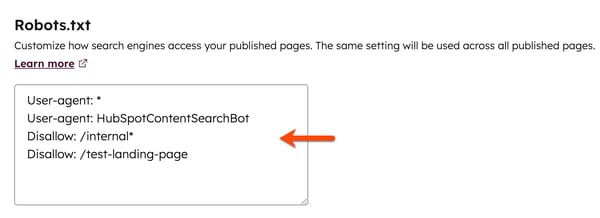
Learn more about formatting a robots.txt file in Google's developer documentation.
Use "noindex" meta tags
If content has already been indexed by search engines, you can add a "noindex" meta tag to instruct search engines to stop indexing it in the future.
Please note: this method should not be combined with the robots.txt method, as this will prevent search engines from seeing the "noindex" tag.
Add "noindex" meta tags to pages and posts
-
Navigate to your content:
- Website Pages: In your HubSpot account, click More, then navigate to Content > Website Pages. If More doesn't appear in your account, navigate to Content > Website Pages directly.
- Landing Pages: In your HubSpot account, click More, then navigate to Content > Landing Pages. If More doesn't appear in your account, navigate to Content > Landing Pages directly.
- Blog: In your HubSpot account, click More, then navigate to Content > Blog. If More doesn't appear in your account, navigate to Content > Blog directly.
- Click the name of your content.
- In the content editor, click Settings in the top right.
- In the dialog box, click Advanced on the left sidebar menu.
- In the Additional code snippets section, enter the following code to the Head HTML field:
<meta name="robots" content="noindex">.
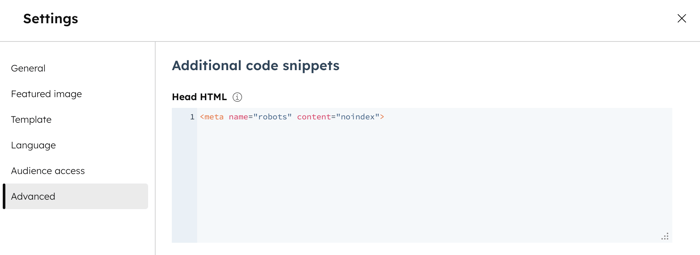
- Click X to close the settings dialog box.
- To take your changes live, click Update or Publish in the top right.
Add "noindex" meta tags to knowledge base articles
- In your HubSpot account, click More, then navigate to Service > Knowledge Base. If More doesn't appear in your account, navigate to Service > Knowledge Base directly.
- Click the name of your content.
- In the article editor, click Settings in the top right.
- In the dialog box, click Advanced Options in the left sidebar menu.
- In the Additional code snippets section, enter the following code to the Head HTML field:
<meta name="robots" content="noindex">.
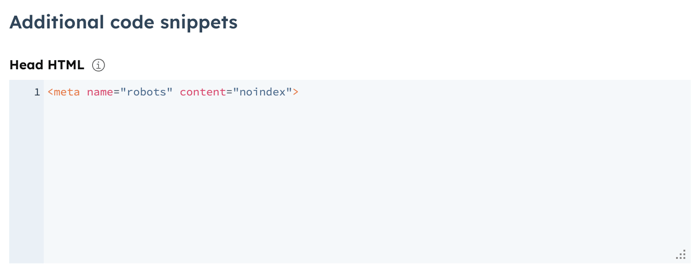
- Click X to close the settings dialog box.
- To take your changes live, click Update or Publish in the top right.
Content is still appearing in search results
After adding a noindex tag or updating your robots.txt file, search engines need time to recrawl and deindex your content. If your content continues to appear in search results, confirm the following:
- Page accessibility: the page must be publicly accessible for search engines to crawl it. Private or password-protected pages won't be crawled, which prevents the noindex tag from being read.
- Head HTML: check the Head HTML field in the page settings and the live page source to confirm the noindex tag was saved and is rendering correctly on the page.
- robots.txt conflicts: review your robots.txt file to confirm no Disallow rules are blocking search engines from accessing the page. If search engines are blocked from crawling the page, they won't be able to read the noindex tag.
To accelerate deindexing for Google search results, use Google Search Console's Removals Tool.
