Last updated: February 26, 2024
Available with any of the following subscriptions, except where noted:
|
|
|
|
| Legacy Marketing Hub Basic |
A legacy call-to-action (CTA) is a button you can use on your HubSpot content to drive prospective customers to your website, where they can then convert on a form. After creating your CTA, you can review your CTA's views and clicks. Learn more about analyzing your CTA (legacy) performance.
To create more CTA types such as buttons, banners, or pop-ups, learn how to use the new CTA editor.
Please note: it is recommended to migrate existing legacy CTAs to the new editor. Learn more about migrating CTAs (legacy).
Create a CTA (legacy)
When creating a CTA (legacy), you can design a custom button or use an image as your CTA. To begin creating a CTA (legacy):- In your HubSpot account, navigate to Marketing > Lead Capture > CTAs.
- In the top left, click the dropdown menu and select CTAs (Legacy).
- In the top right, click Create CTA.
Design a custom button
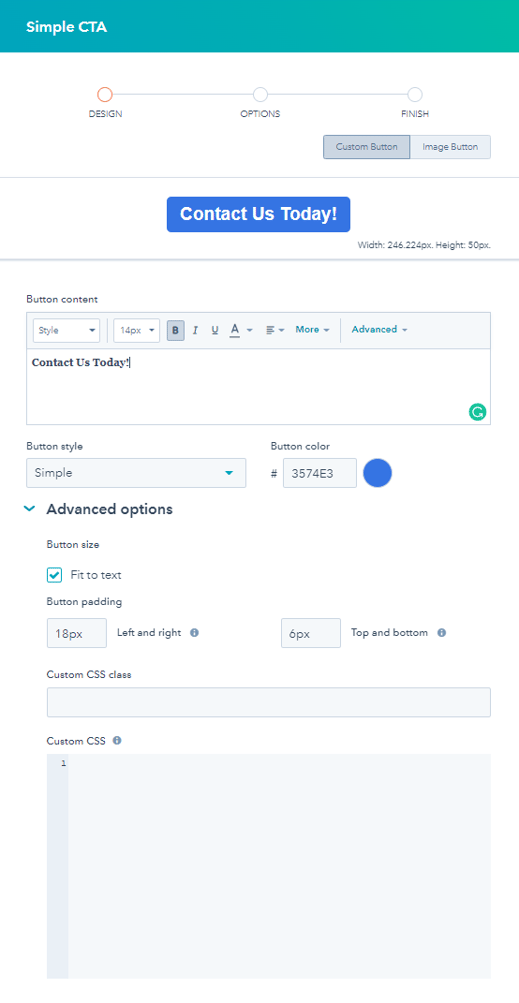
You can set up your CTA (legacy) as a custom button using the design options in the CTA editor. To design your CTA as a custom button:
- In the right panel, select Custom Button.
- Style your button with the following options:
- Button content: enter the text displayed on your CTA button. You can also add emojis. Your contacts and visitors will see the native emoji style for the device they're using (Mac, Windows, Chrome, Android, etc.).
- Button style: use the dropdown menu to select a style for your CTA button. If you want your button to look like a regular text link, select Link (No Style) from the dropdown menu.
- Button color: click the color picker or enter a custom color hex value in the Button color field.
- Advanced options: click Advanced options to customize your CTA's pixel padding and CSS styling.
- At the bottom of the right panel, click Next >.
Design an image button
Instead of designing a custom button, you can also upload an image to use as your CTA's design. To design your CTA as an image button:
- In the right panel, select Image Button.
- Upload your image and style your CTA:
- Upload: select an image file from your device.
- Browse images: select an image from your file manager. From the Insert image panel, select an image to use as a CTA button.
- Width: adjust the width of the image button. Learn more about retina optimization for uploaded images.
- Height: adjust the height of the image button.
- Alt text: enter alt text for the image.
- At the bottom of the right panel, click Next >.

Set up your CTA (legacy) options
After designing your CTA (legacy), set up your CTA's options to determine your CTA's name, where your CTA will redirect to, and any associated campaigns.
To set up your CTA options:
- In the Options page, configure the following:
- CTA internal name: enter a name for your CTA. Only users in your HubSpot account will be able to see the CTA internal name.
- URL redirect type: select an option for your CTA to redirect to.
- External website URL: link your CTA to an external page outside of HubSpot. In the Enter URL field, enter the website URL you want to direct visitors to.
- HubSpot page or blog post: link your CTA to one of your HubSpot pages or blog posts. Click the HubSpot page or blog post dropdown menu then select a page or post. The button CTA's link will be tied to the page ID and any changes in the page's URL will automatically update the button CTA's link.
-
-
- Meeting link: link your CTA to a HubSpot meeting link. Click the Choose a meeting link dropdown, then select a meeting link. To open this link in a new page, select the Open page in new window checkbox.
- File link: link your CTA to a file in your file manager. Click Browse files and choose a file, then select the Open page in new window checkbox if you want visitors who click on the button CTA to view the image in a new browser window.
- Email address: create a mailto link.
- Phone number: create a link to call the specified phone number.
-
-
- Campaign: if you want to associate your CTA (legacy) analytics with a campaign, click the dropdown menu and select a campaign.
- Click Save. Your CTA will now show at the top of the pane.
Please note:
- The CTA (legacy) tool does not support personalization tokens. Adding a personalization token to a button CTA will result in an error. In your blog posts, pages, or marketing emails, you can consider using personalization tokens with a button module instead.
- When setting up pages with content staging, CTAs (legacy) will not automatically update and remain linked to the original page. It is recommended to update existing CTAs or create new button CTAs for your new pages.

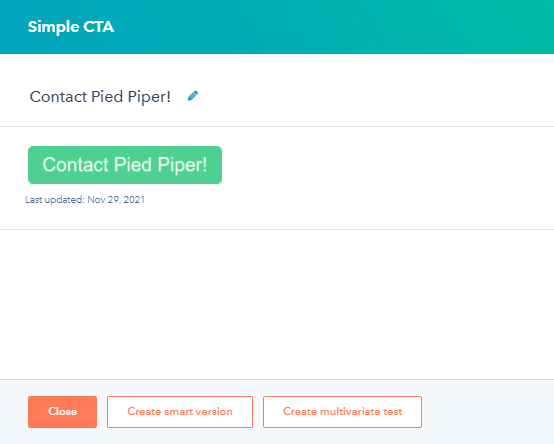
Finish creating your CTA (legacy)
After setting up your CTA's design and options, you can do the following:- To edit the CTA internal name, click the pencil icon at the top to edit the CTA's internal name.
- To finish creating your CTA, click Close.
- To create a smart button CTA, click Create smart version.
- To A/B test your button CTA, click Create multivariate test.
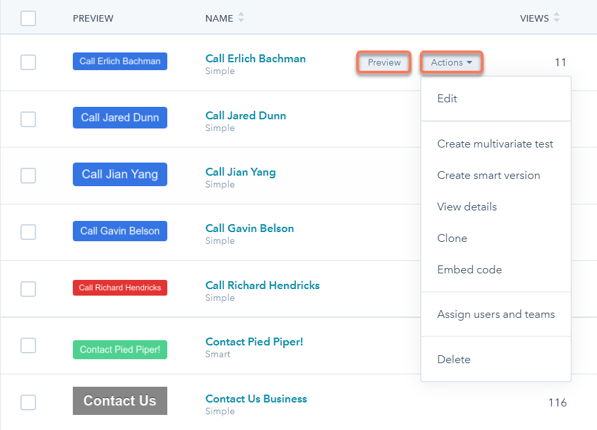
Additional CTA (legacy) actions
On the CTA (legacy) dashboard, you can analyze high-level metrics to review how your CTAs are performing and take action on any of the CTAs listed:
- To preview your CTA, hover over the CTA and click Preview to display your CTA in a preview sidebar pane.
- To take action on your CTA, click the Actions dropdown menu and choose one of the following:
- Edit: make changes to your CTA in the CTA (legacy) editor.
- Create multivariate test: create a second version of your CTA to execute an A/B test with your contacts and visitors.
- Create smart version: create a smart button CTA that displays different versions of the CTA depending on specific display rules.
- View details: review the analytics for your CTA, such the number of views, clicks, and submissions.
- Clone: create an exact copy of your CTA.
- Embed code: add your CTA to your external pages by copying and pasting the embed code.
- Delete: permanently delete your CTA.