- Knowledge Base
- Account & Setup
- Help & Resources
- Use projects
Use projects
Last updated: December 1, 2025
Available with any of the following subscriptions, except where noted:
-
Marketing Hub Professional, Enterprise
-
Sales Hub Professional, Enterprise
-
Service Hub Professional, Enterprise
-
Content Hub Professional, Enterprise
- Legacy Marketing Hub Basic
As your team grows, so does the work required to complete your projects: planning campaigns, assigning tasks, ensuring deliverables are on time, and so on. Use HubSpot's projects to plan and organize your team's work in one place with structured lists of tasks.
If you're using the projects object, learn more about the projects object.
Review project tasks
In the All tasks tab, you can review every task that's been created for all your projects. The associated project will appear below the name of each task.
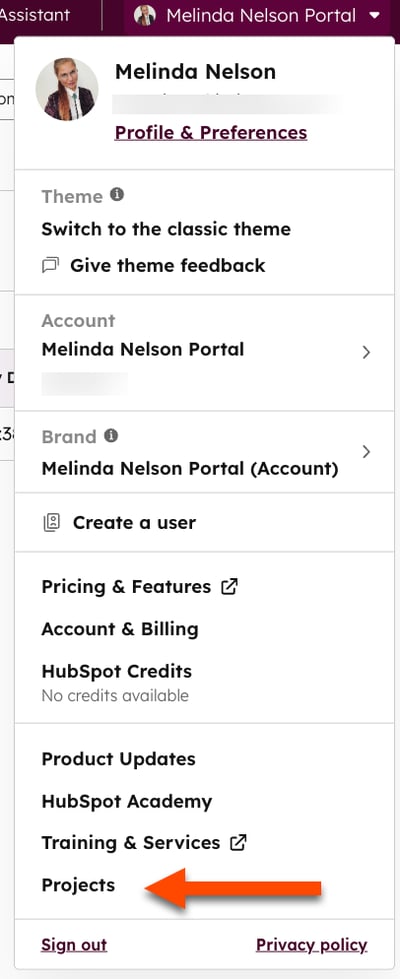
- In your HubSpot account, click your account name in the top right corner, then click Projects.
- Click the All Tasks tab.
- At the top of the table, select and apply your filters:
- Project: filter by the project associated with the project tasks.
- Assigned to: filter by the user assigned to the project.
- Status: filter by the completion status of the project tasks.
- Due: filter by the due date of the project tasks.

Review your projects
In the All Projects tab, review the project tasks and projects that you're working on, or that have been shared with you by one of your team members.
- In your HubSpot account, click your account name in the top right corner, then click Projects.
- To select a project, in the left sidebar menu, click the project name.
- To create a new project, click Create project to create a new project from scratch or click Create from template to view the project template library.
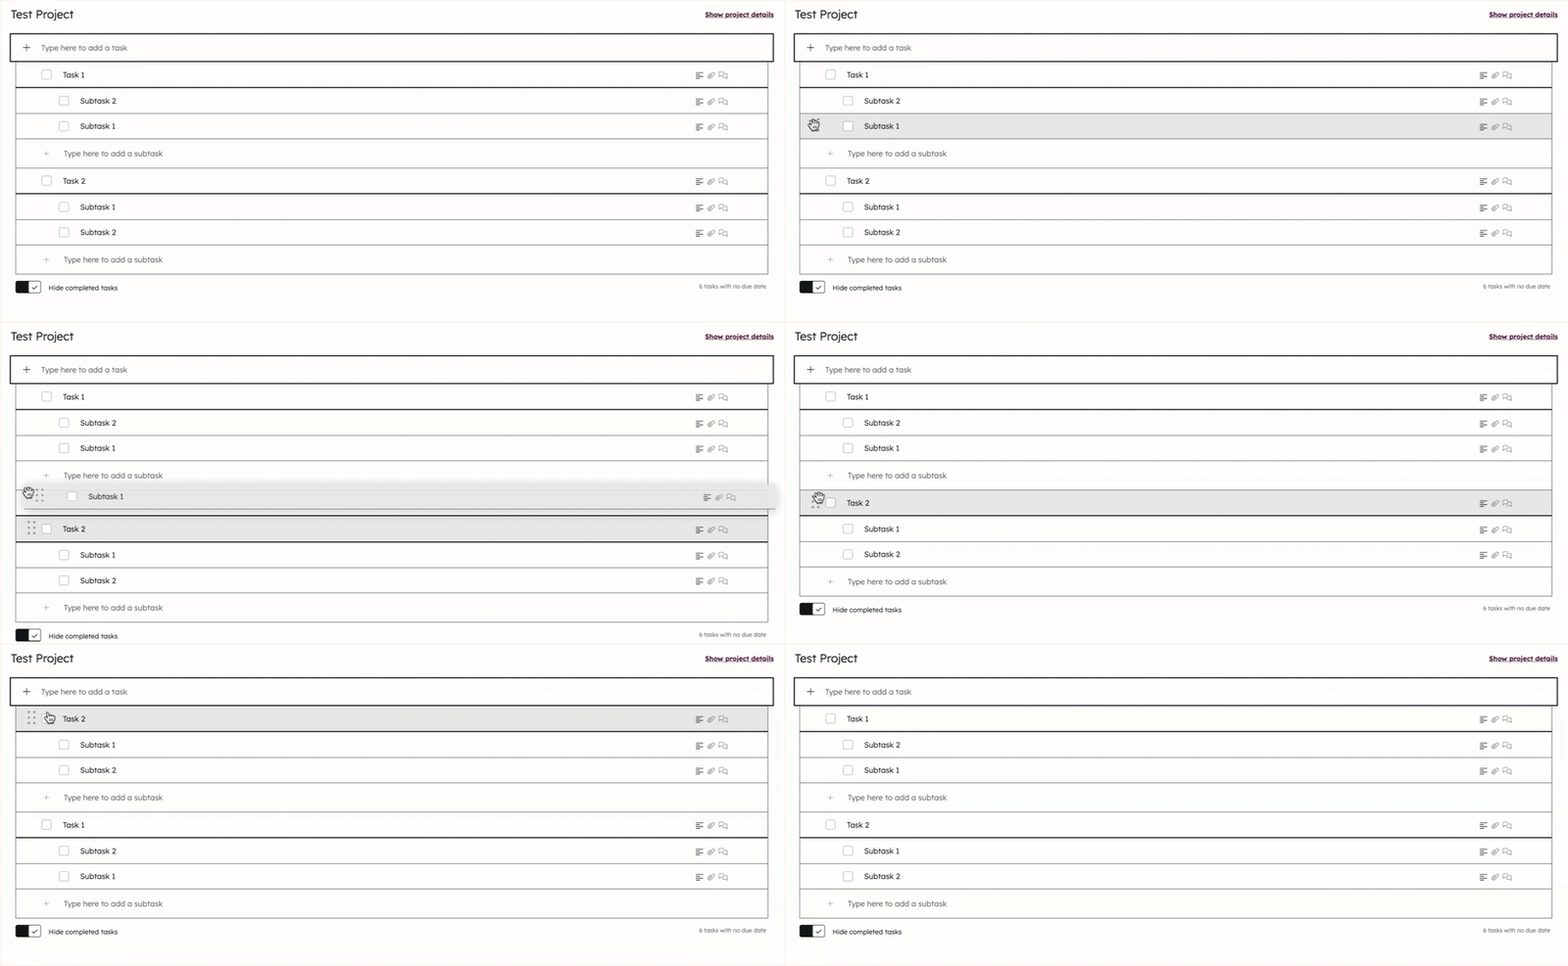
- To edit the order of your tasks in a project, click and drag a task to a new location.
- By default, all completed project tasks are hidden. To display a project's completed tasks, click to toggle the Hide completed tasks switch off.

Manage your project details
To review or edit your project details:
- In your HubSpot account, click your account name in the top right corner, then click Projects.
- In the left sidebar menu, click the project name.
- In the upper right, click Show project details.
- In the right panel, review, edit, or configure your project's details:
- Assignee: the users assigned to the project. Click the Assignee dropdown menu and select users to assign to this project. When assigning a project, you can only select users who have been given Marketing access in your account. Learn more about HubSpot user permissions.
- Due date: click the date picker and select the date that the project should be completed.
-
- Description: add project notes and @-mention other HubSpot users.
- Attachments: upload and associate your files with the project.
-
- Project actions: create a template from the project, archive, or delete the project.
- Create template from this project: create a new template, using the project's layout, for use in the future.
- Archive project: archive the project. Archived projects will only display in the Archived projects section from the left panel.
- Delete project: permanently delete the project.
- Project actions: create a template from the project, archive, or delete the project.
Manage your project tasks
To review or edit your project tasks:
- In your HubSpot account, click your account name in the top right corner, then click Projects.
- In the left sidebar menu, click the project name.
- From your project dashboard, click the task name.
- In the right panel, review, edit, or configure your project task's details:
- Task name and completion status: the name of the task and a checkbox indicating whether the task has been completed.
- Assignee: the users assigned to the task. Click the Assignee dropdown menu and select users to assign to this project. When assigning a task, you can only select users who have been given Marketing access in your account.
- Due date: click the date picker and select the date that the task should be completed.
-
- Description: add task notes and @-mention other HubSpot users.
- Attachments: upload and associate your files with the task.
- Discussion: collaborate with your team by leaving a comment and @-mentioning other HubSpot users.
- Delete task: permanently delete the project task.
Manage project templates
Use project templates to efficiently create projects from existing templates. Project templates can be kept within one account or shared across multiple accounts.
Use a project template
To use an existing project template:
- In your HubSpot account, click your account name in the top right corner, then click Projects.
- Click the Project Templates tab.
- To review a template, at the bottom of a template, click View Template.
- After selecting a project template, in the top right, click Copy to My Projects.
Create a project template
You can create a new project template from scratch or from an existing project:
- In your HubSpot account, click your account name in the top right corner, then click Projects.
- To create a new project template from scratch:
- Click the Project Templates tab.
- In the top right, click Create project template. A new template will be created in your project templates library.
- In the top left, enter your project name.
- In the top right, click Show project details. Then, configure your project template's details:
- Description: add project notes and @-mention other HubSpot users.
- Attachments: upload and associate your files with the project.
-
- In the table below, add your project tasks and task details.
- To create a new project from this template, in the top right, click Copy to my projects.
- After setting up your project template's tasks and details, the template will be saved automatically. A new template will be created in your project templates library.
- To create a new project template from an existing project:
-
- Click the All Projects tab
- Navigate to your project.
- In the top right, click Show project details.
- In the right panel, at the bottom, click the Project actions > Create template from this project. A new template will be created in your project templates library.

Share a project template with another account
After creating a template from the project, you can share your project template with other HubSpot accounts. To share your project template:
- In your HubSpot account, click your account name in the top right corner, then click Projects.
- Click the Project Templates tab.
- Locate your template, then click View template.
- In the top right, click Show project details.
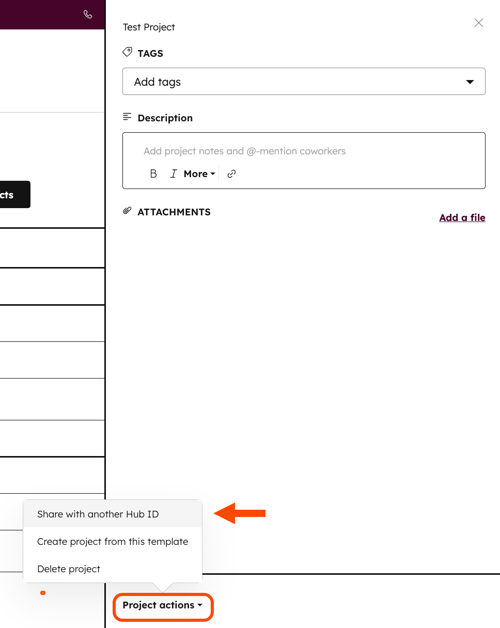
- In the right panel, at the bottom, click Project actions > Share with another Hub ID.

- In the dialog box, enter the Hub ID of the other HubSpot account and the email address of the user.
-
- To add a message when sharing your project template, click +Add a personalized message. Then, enter your message. The personalized message will be sent to all recipients.
- To share the project template with additional Hub IDs, click + Add another Hub ID. Then, enter the Hub ID of the additional HubSpot account and the email address of the user.
- Click Share Template. The specified user will receive an email prompting them to accept the template. If the user accepts the template, you'll also receive an update email stating that the invitation was successful.