- Knowledge Base
- Automation
- Workflows
- Create Todoist tasks with workflows
Create Todoist tasks with workflows
Last updated: November 4, 2025
Available with any of the following subscriptions, except where noted:
-
Marketing Hub Professional, Enterprise
-
Sales Hub Professional, Enterprise
-
Service Hub Professional, Enterprise
-
Data Hub Professional, Enterprise
-
Smart CRM Professional, Enterprise
-
Commerce Hub Professional, Enterprise
Use workflows to automate the creation of Todoist tasks to help you and your team keep track of work. Before you can create Todoist tasks with workflows, you must connect Todoist to your HubSpot account from the App Marketplace
Please note: the Create a task in Todoist workflow action is only available in contact-based, company-based, deal-based, and ticket-based workflows.
To create a Todoist task with a HubSpot workflow:- In your HubSpot account, navigate to Automation > Workflows.
- Click the name of an existing workflow, or create a new workflow.
- Click the + plus icon to add a workflow action.
- In the right panel, search for and select Create a task in Todoist.
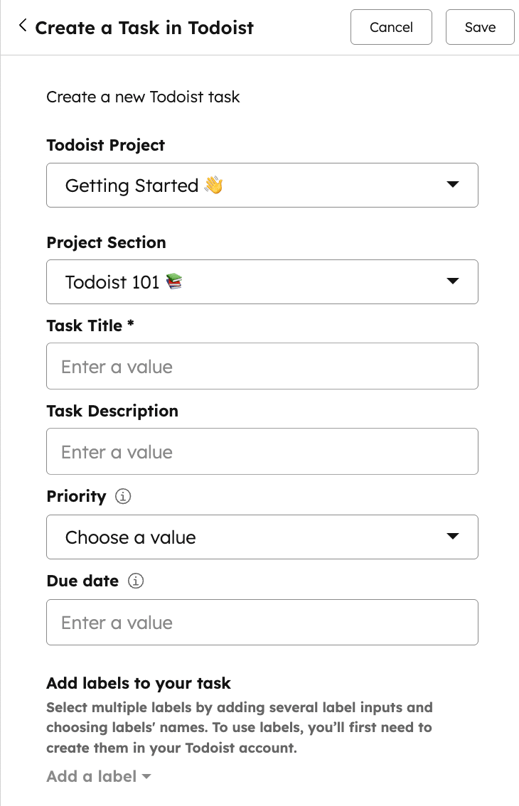
- In the right panel, set up your Todoist task action:
- Todoist project: select a Todoist project to create the task in. You can select from projects owned by or shared with the user who connected the integration.
- Project section: select a section in the Todoist project to create the task.
- Priority: select a priority for the task. If a priority is not selected, the task will be automatically set to Priority 4.
- Due date: set a due date for the task. You can also use a personalization token to insert a date value from the enrolled record.
- Task Title: enter a task title. You can also use a personalization token to insert values from the enrolled record.
- Task Descriptions: enter a task description. You can also use a personalization token to insert values from the enrolled record.
- Add labels to your task: add Todoist labels to your tasks. You cannot add new labels from HubSpot, these labels must be first created in Todoist.
- At the top, click Save.

Workflows
Thank you for your feedback, it means a lot to us.
This form is used for documentation feedback only. Learn how to get help with HubSpot.