Last updated: December 9, 2025
Available with any of the following subscriptions, except where noted:
-
 Marketing Hub
Professional, Enterprise
Marketing Hub
Professional, Enterprise
-
 Content Hub
Professional, Enterprise
Content Hub
Professional, Enterprise
Securing verified consent is important to maintaining a good sender reputation for email marketing. A re-engagement campaign is an effective way to confirm the opt-in status of contacts who previously provided your brand with verifiable consent to be sent marketing emails.
To deliver to the most engaged contacts, it's recommended to use double opt-in and run re-engagement campaigns every quarter.
Please note: you should only use a re-engagement campaign to reconfirm opt-in status for your contacts. You should not use a re-engagement campaign to gain opt-in for contacts who haven't yet provided it directly to your brand. HubSpot requires a verifiable opt-in record for any contact included in a marketing email send.
Understand re-engagement campaigns
A re-engagement campaign is a one-time email campaign that requests any contacts who haven’t already used some form of double opt-in to confirm that they would still like to receive emails.
Only the contacts who confirm their subscription status are then kept in your account. Those who don’t confirm will then be opted out of your marketing emails in HubSpot. The result is a highly engaged segment of contacts who have proven that they want to continue receiving marketing emails from your company.
You can see some examples of re-engagement campaigns on the HubSpot Community.=
Prepare for the re-engagement campaign
Before you begin your re-engagement campaign, it's recommended to do the following:
- Add notification and consent information to forms: add notification and consent information to forms so customers who fill them out know what communications they're opting into receiving.
- Set up a form for resubscription: you can create a form associated with a subscription type that customers can use to opt into a specific subscription type. Learn more about resubscription forms.
- Set up subscription types: set up subscription types so customers can opt into receiving only the types of emails they want to receive.
Create a segment of inactive contacts
Create an active segment of contacts who have not engaged with your emails recently.
- In your HubSpot account, navigate to CRM > Segments.
- In the upper right, click Create segment.
- In the top right, click Next.
- At the top of the segment editor, click the edit icon and enter a name for your segment.
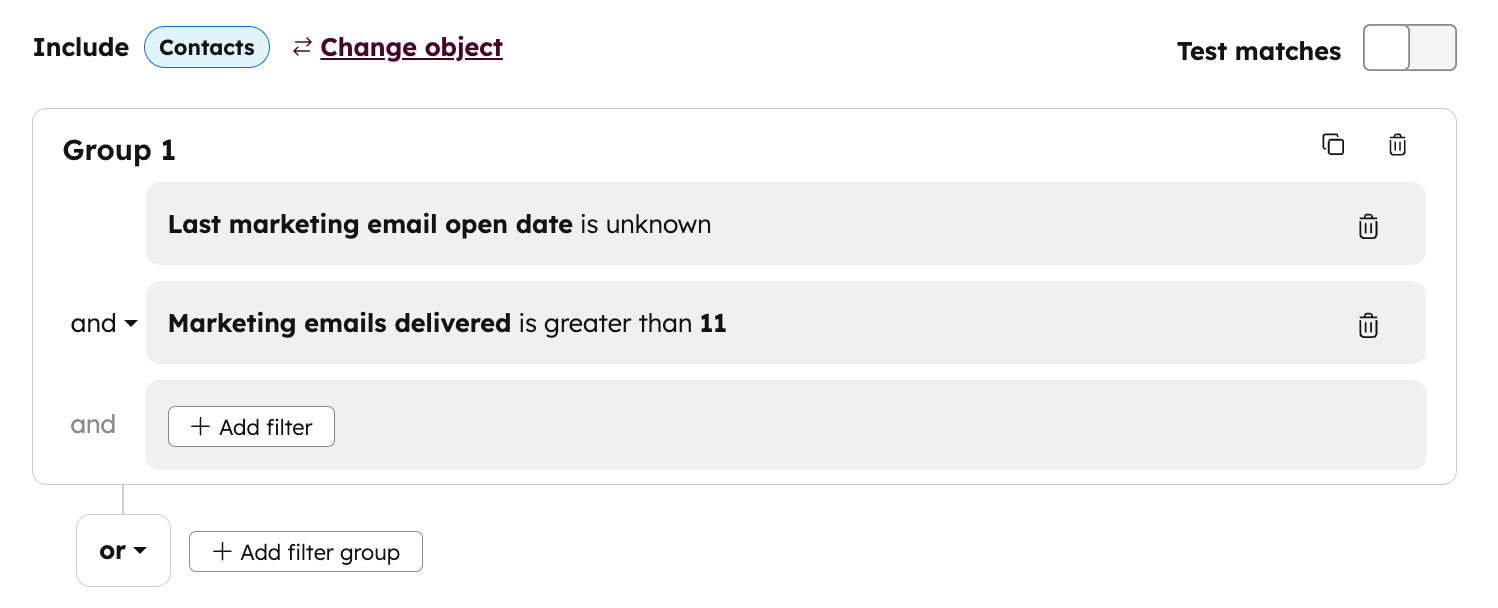
- Add the following property-based filters:
- Last marketing email open date | is unknown
- Marketing emails delivered | is greater than | 11
- In the top right, click Next.
- In the right panel, click Save and process segment.
Create a re-engagement email
Create a new email to send to your segment. This email will include a link to encourage your recipients to confirm their subscription.
- In your HubSpot account, navigate to Marketing > Email.
- In the upper right, click Create email.
- In the right panel, select Regular.
- Select a template.
- In the email editor, add a link to the email that recipients can click to stay opted in. It's recommended to direct the link to a simple thank you page where you can confirm the recipient's opted in status.
- Click the Send to section at the top of the page.
- In the sidebar editor, click the Send to dropdown menu and select the segment you created of unengaged contacts.
- Edit and send the email.
Create an opt out segment
Once you've waited a week for your contacts to receive the email and click the link if they want to resubscribe, you can make a segment of contacts who were sent the email, but didn't click the link.
- In your HubSpot account, navigate to CRM > Segments.
- In the upper right, click Create segment.
- In the top right, click Next.
- At the top of the segment editor, click the edit icon and enter a name for your segment.
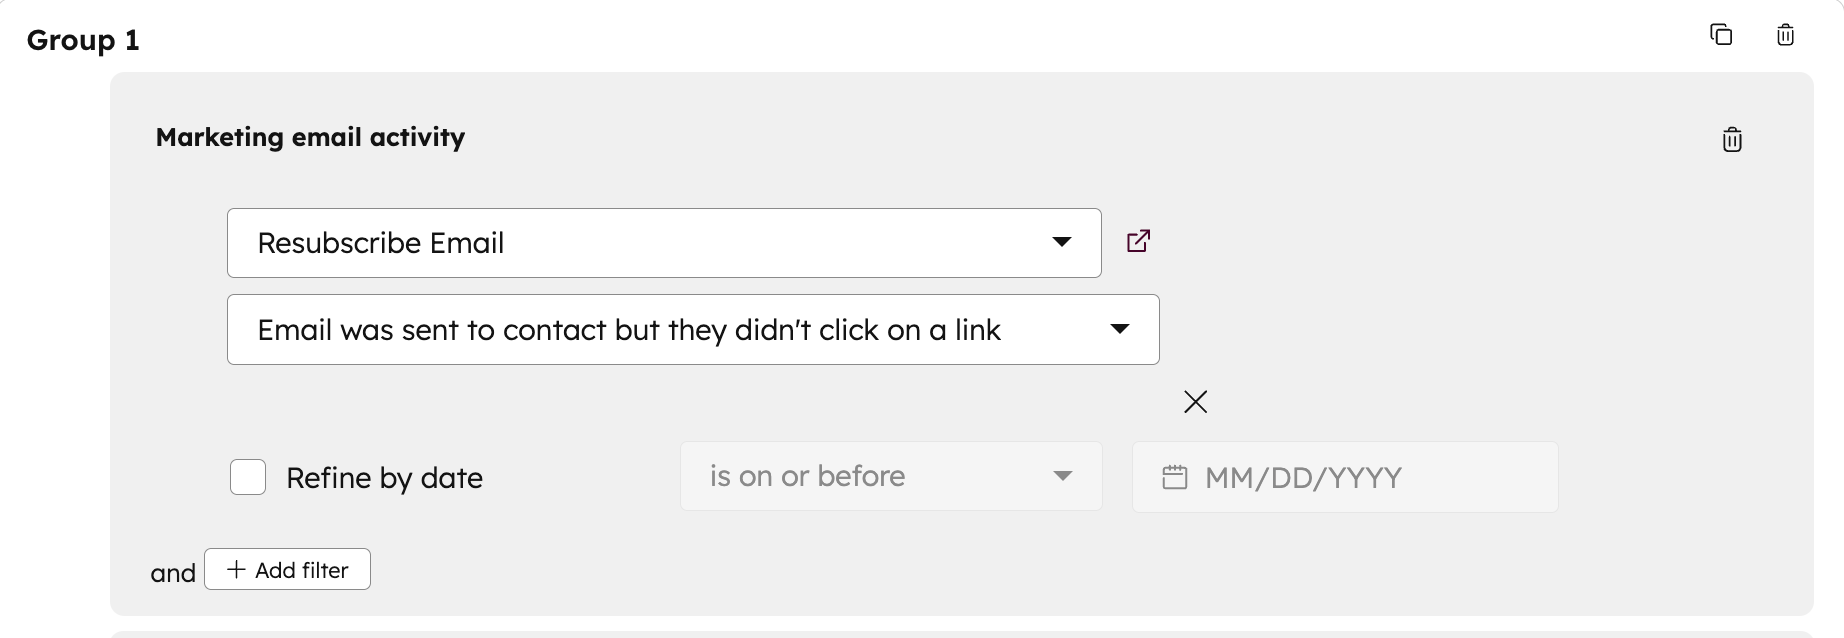
- Add the following events-based filter:
- Marketing emails | [Your re-engagement email] | Email was sent to contact but they didn't click on a link.
- In the top right, click Next.
- In the right panel, click Save and process segment.
Opt out unconfirmed contacts
- In your HubSpot account, navigate to CRM > Segments.
- Hover over the segment of contacts to opt out, then click the More dropdown menu and select Export.
- In the dialog box, select the checkbox next to any additional properties you want to include, then click Next.
- Click the File format dropdown menu and select CSV.
- Click Export.
- Import these contacts as opted out.
Moving forward, these contacts won't receive marketing emails unless they resubscribe.
