
Last updated: January 29, 2024
Available with any of the following subscriptions, except where noted:
|
|
After you’ve connected HubSpot and Microsoft Dynamics 365, you can embed HubSpot in your Microsoft Dynamics 365 app. This allows you to view information from a HubSpot contact, company or deal record directly on the Microsoft Dynamics 365 interface.
This window displays HubSpot timeline activities such as emails logged, workflows the record is enrolled in, record properties, and also includes a link to the HubSpot record.
HubSpot Embed must be turned on in both HubSpot and Microsoft Dynamics 365 to complete the installation process.
Turn on HubSpot Embed
- In your HubSpot account, navigate to Reporting & Data > Integrations.
- Click Microsoft Dynamics 365.
- Click the Feature discovery tab > click Install HubSpot Embed.
- In the dialog box, click Install.
- Review the necessary permissions, then click Accept. You will be redirected back to HubSpot.
- Once HubSpot Embed has been installed, click Close.
- After installing HubSpot Embed in HubSpot, log into your Microsoft Dynamics 365 account.
Please note: to view the HubSpot Embed window on a Microsoft Dynamics 365 record, you must be a user in both Microsoft Dynamics 365 and HubSpot, and logged in to the latter system. Users will need View records permissions in HubSpot.
Embed HubSpot into a Microsoft Dynamics 365 app
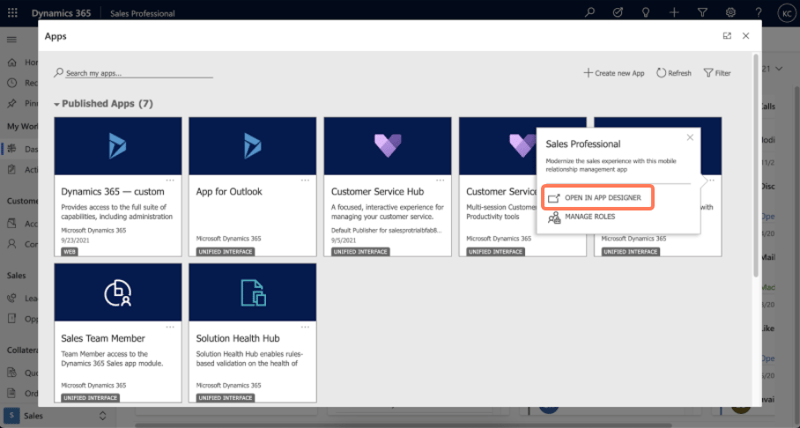
- In Microsoft Dynamics 365, navigate to the My Apps page.
- In the search bar, search for the app you want to embed HubSpot into.
- On the app you've selected, click ... and select Open in App Designer.
- Once the app is open, click ... in the upper-left corner and click Switch to classic.
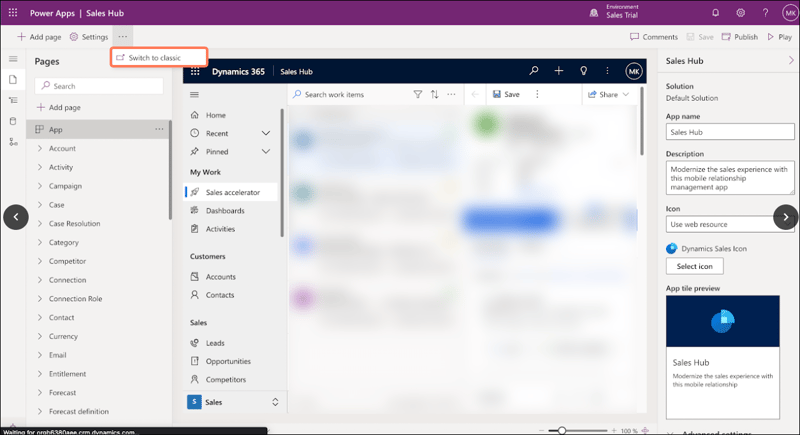
- In the Contact/Company/Opportunity section, click Forms.
- On the right side, select the form you want to embed HubSpot into.
- Click the pencil icon to open the form editor.
- In the Components section, under the Layout tab, select 1-column tab.
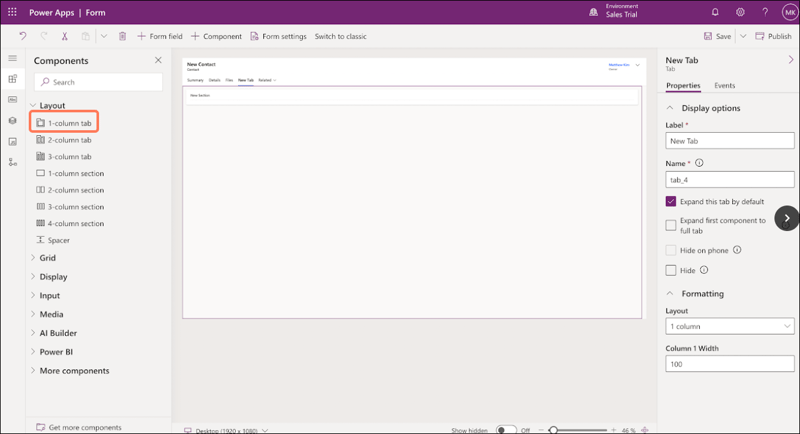
- On the right side, enter a Label and Name for the tab.
- Under the Display tab, click HTML web resource.
- In the dialog box, search for and select hubspot_HubSpotEmbed. Click Add.
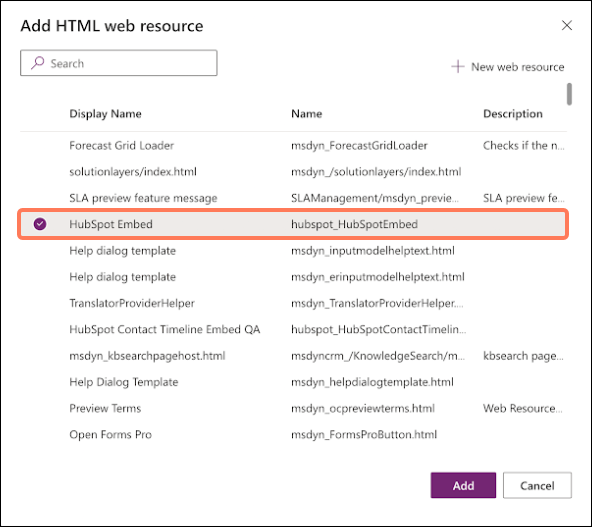
- On the right side, enter a unique name and label for the web resource.
- Click Save to save the changes or click Publish when you are ready to take the changes live.
- Once the changes are saved, navigate to a contact, company or deal record in Microsoft Dynamics 365 and click the HubSpot tab to view the HubSpot information.
Explore HubSpot Embed features
With the HubSpot Embed, you can:
- View the record's timeline and any associated objects in Microsoft Dynamics 365.
- Enroll the record in a workflow and view any previous workflow enrollments.
- View the record's properties and property history.
- Directly book meetings in HubSpot through Microsoft Dynamics 365.
- Enroll contacts in a sequence through Microsoft Dynamics 365.

