- Knowledge Base
- Account & Setup
- User Management
- Manage user preferences with presets
Manage user preferences with presets
Last updated: November 3, 2025
Available with any of the following subscriptions, except where noted:
-
Marketing Hub Professional, Enterprise
-
Sales Hub Professional, Enterprise
-
Service Hub Professional, Enterprise
-
Data Hub Professional, Enterprise
-
Content Hub Professional, Enterprise
-
Smart CRM Professional, Enterprise
-
Commerce Hub Professional, Enterprise
With presets, Super Admins can set up default preferences in their HubSpot account so that users don't have to set them up individually. For example, you can set up the default dashboard, language, and email signature for a group of users.
Users can later change their preferences individually to override presets.
Please note: Super Admins can grant other users Presets permissions to create presets.
Create a preset
To set up a preset:
- In your HubSpot account, click the settings settings icon in the top navigation bar.
- In the left sidebar menu, navigate to Users & Teams.
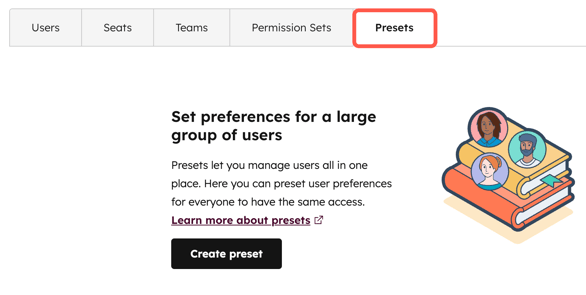
- Click the Presets tab.

- Click Create preset.
- At the top of the page, click the edit pencil icon and enter a name for your preset.
- On the Setup screen, configure the preset's default preferences and email signature:
-
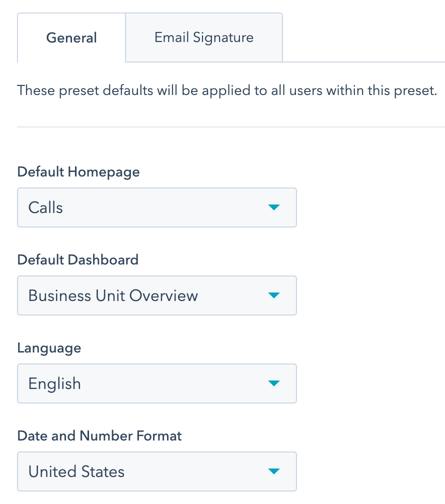
- On the General tab, use the dropdown menus to select the preset's default homepage, default dashboard, language, and date and number format.
Please note: if you are enrolled in the HubSpot Home Page public beta, HubSpot Home will be the default landing page for users, unless you choose a different option from the Default Landing Page dropdown menu (formerly Default Homepage dropdown menu).

-
- To set up the signature that will be used in one-to-one emails sent through the HubSpot CRM, click on the Email Signature tab.
- Click to toggle the Email Signature switch on to manage email signatures for all users
- Enter your email signature in the text box.
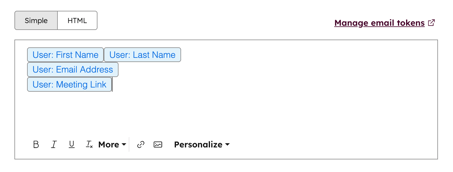
- In the Simple editor, use the formatting tools to create your email signature.
- You can use personalization tokens to populate values based on the user.
- To set up the signature that will be used in one-to-one emails sent through the HubSpot CRM, click on the Email Signature tab.

-
-
-
- In the HTML editor, use HTML to create your email signature. To see the variable names of personalization tokens in the HTML, you must first add personalization tokens in the Simple editor, then click HTML to see the variable names.
- To assign a notification profile, click the Notifications tab.
- Click the Notification profile dropdown menu, and select the notification profile for the preset.
-
-
- To select the users or teams to apply to the preset, click the Users & Teams tab at the top of the page:
-
- Click the dropdown menu and select the checkboxes next to the users or teams you want to add to the preset.
- In the upper right, click Save preset. In the right sidebar, review the preset settings, then click Save.
- To manage personalization tokens, click the Setup tab at the top of the page. Then click the Email Signature tab and Manage email tokens.
-
- On the Manage email tokens right panel, click + Add email token and type a set value in the text box. You can add up to 5 email tokens. Tokens can only have lowercase letters (a-z), numbers (0-9), and underscores. They must start with a letter.

-
- Once you have created your email tokens, click Save.
- To assign an email token to a user, on the Presets tab, hover over the preset, click the Actions dropdown menu, and select Assign Email Tokens.
- To customize users email tokens, click the checkbox next to the users you want to customize, and then click Edit.
- Under the email token value, type the name you want to populate on the email token for the user.
- Click Save.
Once a preset has been created, a user can update their personal preferences to override the preset's preferences.

Manage presets
To edit or delete a preset:
- In your HubSpot account, click the settings settings icon in the top navigation bar.
- In the left sidebar menu, navigate to Users & Teams.
- Click the Presets tab.
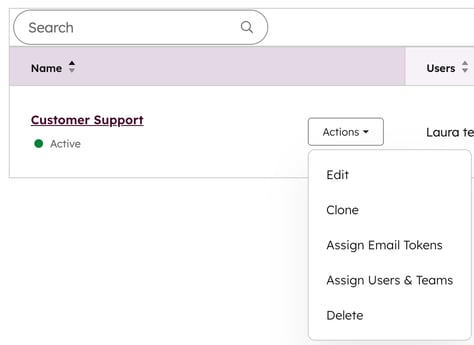
- Hover over the preset, then click the Actions dropdown menu.
-
- To edit the preset settings, select Edit, then update the preset settings.
- To clone the preset, select Clone. Then, enter a name for the new cloned preset.
- To assign email tokens, select Assign Email Tokens, then assign email tokens to users.
- To add or remove users from the preset, select Assign Users & Teams. In the right panel, add or remove users or teams from the preset, and click Save.
- To delete the preset, select Delete, then click Delete preset. Deleting a preset will not affect default settings for any users in the preset.
