- Knowledge Base
- CRM
- Records
- Customize index page quick filters
Customize index page quick filters
Last updated: December 12, 2025
Available with any of the following subscriptions, except where noted:
-
Marketing Hub Starter, Professional, Enterprise
-
Sales Hub Starter, Professional, Enterprise
-
Service Hub Starter, Professional, Enterprise
-
Data Hub Starter, Professional, Enterprise
-
Content Hub Starter, Professional, Enterprise
-
Smart CRM Professional, Enterprise
On an object index page, quick filters help you segment records by their values for commonly used properties. Each object has default quick filter properties, but you can add your own to quickly access the properties that are most important to you.
If saved to a view, the customized quick filters will appear for all users who access that view. If not saved to a view, the customized quick filters are only shown to the user currently on the view.
Customize quick filters
Add quick filters
To add quick filters:
- Navigate to your records (e.g., In your HubSpot account, navigate to CRM > Contacts.).
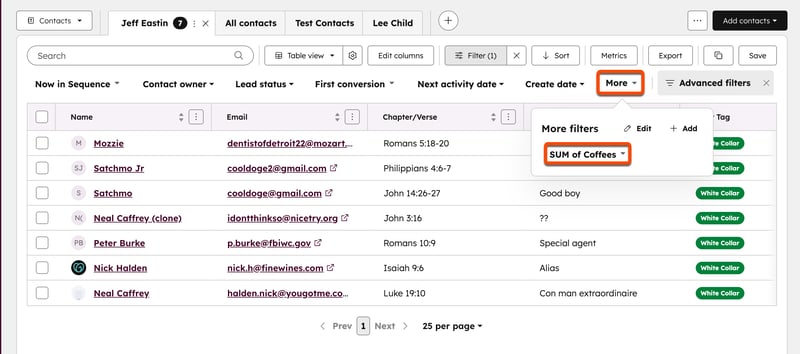
- In the toolbar section, click More.
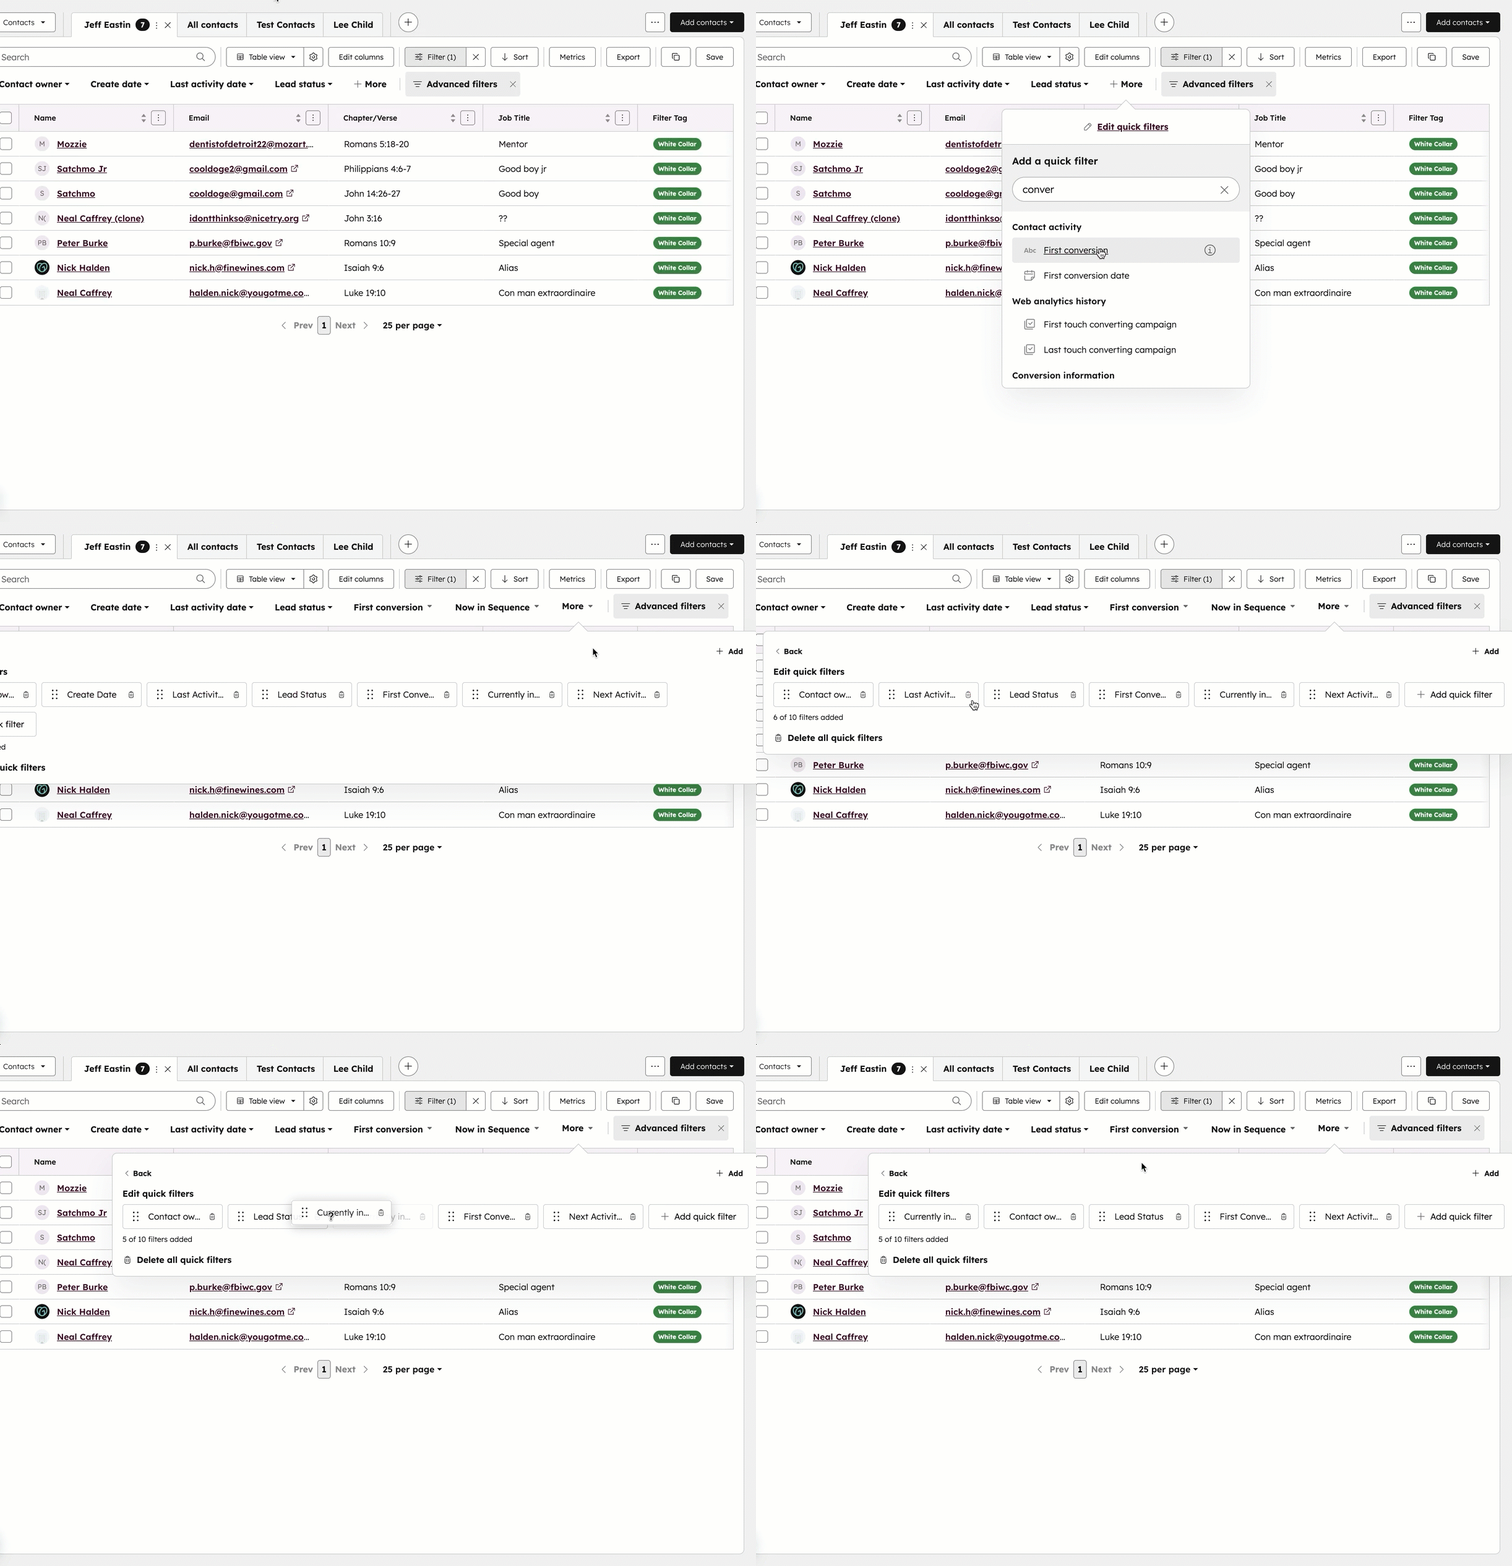
- Select the property you want to use as a filter. You can add up to ten custom quick filters. Depending on the size of your screen, the quick filters pop-up box will appear in different locations.
- To save the filters so they appear for all users who access the view moving forward, after editing the filters, click Save to save the view.

Please note: only Super Admins or the user that created the view can save its quick filters.
Edit quick filters
- Navigate to your records (e.g., In your HubSpot account, navigate to CRM > Deals.).
- In the toolbar section, click More then select Edit quick filters.
- In the pop-up box:
- Click and drag a property to reorder to the desired position.
- Click the delete Delete icon to remove a filter. All quick filters can be removed.
- Click Delete all quick filters to remove all filters at once.
- Click Add quick filter to add another property as a filter.
-
- To save the filters so they appear for all users who access the view moving forward, after editing the filters, click Save to save the view.
Use quick filters
Once you've customized your filters, you can use them to quickly segment records.
- Navigate to your records (e.g., In your HubSpot account, navigate to CRM > Companies.).
-
In the toolbar section, click the property dropdown menus. Depending on your screen size, you may need to click More, then select the property.
- Select filter criteria for the property.
- If a quick filter has criteria set, it will be highlighted. To remove the filter, click the X next to the property.

Learn more about filtering records.