- Knowledge Base
- Partners
- Partner Tools
- Create and manage POI confirmation links in your partner account
Create and manage POI confirmation links in your partner account
Last updated: February 1, 2024
Available with any of the following subscriptions, except where noted:
As a HubSpot partner, you are required to confirm your involvement when selling or servicing HubSpot software to your customers. You can create a confirmation link in your partner account that will be automatically sent to your customer as part of their checkout experience when confirming their purchase. These confirmation links are also known as proof of involvement (POI).
Automated confirmation links
To save time and make the shared selling process more efficient, a POI is automatically generated and attached to the deal when a quote is created from a shared deal. There must be a HubSpot partner attached to the quote for the POI to generate automatically.
Notifications will be sent to the HubSpot partner and HubSpot Partner Development Manager (PDM) when the POI is created, updated, and when it is rejected or confirmed by the customer. If the quote is updated, the POI will also be updated to reflect the changes made.
To find your automatically generated POIs:
- In your HubSpot account, navigate to Partner > Dashboard.
- Navigate to the Confirmation Links tab.
In some cases, you might need to manually create a POI. These cases include:
- If the automatically created link was rejected by the customer and you need create a new one.
- If the customer contacted you to change something on the quote, a new POI must be manually created.
- If there are any issues with the automatic generation.
Manually create a confirmation link
- In your HubSpot account, navigate to Partner > Dashboard.
- Navigate to the Confirmation links tab.
- In the top right, click Create confirmation link.

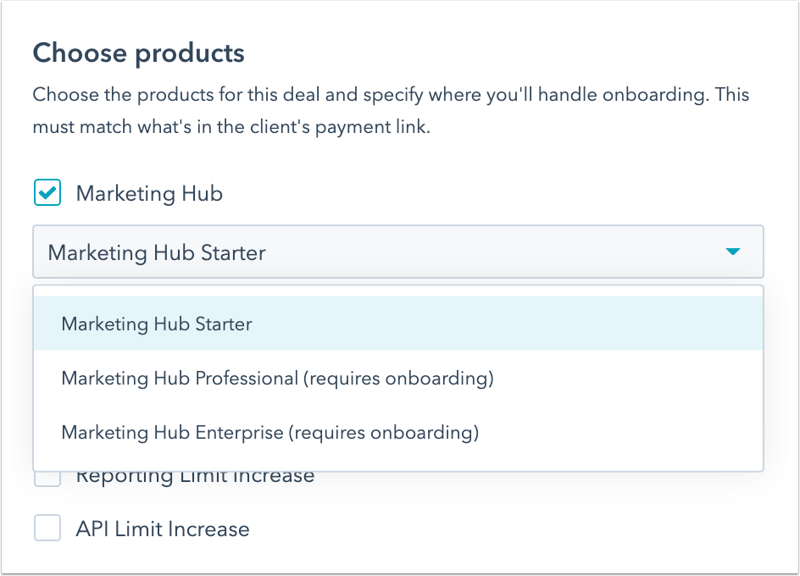
- In the right sidebar, select the checkbox next to the product type then use the dropdown menu to select the onboarding type.
Please note: all Professional and Enterprise products require onboarding.

- If you are providing onboarding, click to toggle the Providing onboarding switch on.
- Click the Estimated onboarding duration dropdown menu to select the estimated length of onboarding.

- Click Preview.
- Enter a name for your confirmation link. Click Create.
- If this confirmation link is to be used in a shared deal, you can attach it directly to the shared deal.
- Navigate to the shared deal in your portal.
- In the Proof of Involvement section, click Add.
- Select the confirmation link you want to add to the deal and click Add.
- Once the link has been added, your PDM will be able to view it on the shared deal.
- Once the confirmation link has been created, your Partner Development Manager will automatically be notified.
- To remove the confirmation link from a shared deal:
- In the Proof of Involvement section, click Actions.
- Click Remove from deal and click Delete.
- Any updates to the Proof of Involvement section will be reflect on the deal's activity timeline.
- For non-shared deals, reach out to your PDM and ask them to add the confirmation link to the appropriate deal.
- In either case above, the confirmation link will automatically be sent to your customer as part of their checkout experience when confirming their purchase
- If there is an issue with attaching the confirmation link to the checkout flow, click Copy to copy the link, then share the link with your client.
When the client has confirmed or rejected the confirmation link, you will receive an email notification. When a confirmation link is confirmed, your PDM will automatically be notified. When a confirmation link is rejected, the email will include a rejection reason.
You can also review confirmation link statuses in your partner dashboard.
Review and manage your confirmation links
Once you have created a confirmation link you can track and manage them from your confirmation links dashboard.
Review your confirmation link status
- In your HubSpot account, navigate to Partner > Dashboard.
- Navigate to the Confirmation links tab.
- In the Client & status column, you can track your confirmation links by status:
- Pending: your client has not been assigned.
- Confirmed: your client has confirmed the confirmation link that was sent.
- Rejected: your client has rejected the confirmation link. A reason for rejection will be included.
Manage your confirmation links
- In your HubSpot account, navigate to Partner > Dashboard.
- Navigate to the Confirmation links tab.
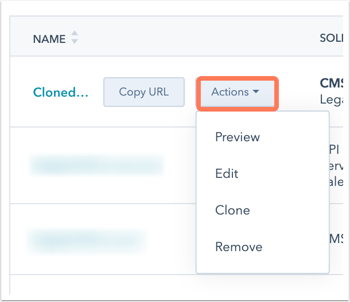
- Hover over an existing confirmation link and click the Actions dropdown menu to manage your confirmation link:
- Preview: preview your confirmation link.
- Edit: edit your Pending links. Confirmed and Rejected confirmation links cannot be edited.
- Clone: clone your confirmation link.
- Remove: permanently delete your pending confirmation link. Confirmed or rejected confirmation links cannot be deleted.

