- Knowledge Base
- Account & Setup
- Account Security
- Scan and redact Sensitive Data
BetaScan and redact Sensitive Data
Last updated: November 17, 2025
Available with any of the following subscriptions, except where noted:
-
Marketing Hub Enterprise
-
Sales Hub Enterprise
-
Service Hub Enterprise
-
Data Hub Enterprise
-
Content Hub Enterprise
-
Smart CRM Enterprise
-
Commerce Hub Enterprise
Once you’ve started storing Sensitive Data in your HubSpot account, Super Admins can scan your account to view a list of activities that may contain Sensitive Data. Then, you can review the data and permanently remove it from the account.
Being able to review and remove this data, can help maintain data hygiene and reduce compliance risks. For example, if a customer accidentally emails their credit card or ID information, you can review and remove those details.
Permissions required Super Admin permissions are required to scan and redact Sensitive Data.
Before you get started
Before you begin working with this feature, make sure to fully understand what steps should be taken ahead of time, as well as the limitations of the feature and potential consequences of using it.
Understand requirements
Sensitive Data must be turned on in your account.Understand limitations & considerations
- You can scan information from the last 60 days.
- You can scan an account once every 30 days.
Scan for Sensitive Data
If you're a Super Admin and Sensitive Data is turned on in your account, you can scan your account to detect Sensitive Data in activities from the last 60 days.
- In your HubSpot account, click the settings settings icon in the top navigation bar.
- In the left sidebar menu, navigate to Security.
- Navigate to the Sensitive Data tab.
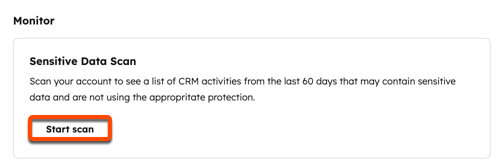
- In the Sensitive Data Scan section, click Start scan. If you've done a scan before, click Scan again.

- In the right panel, select the checkboxes next to the types of data you want to scan.
- In the Exclude keywords from your scan section, enter any keywords you'd like to exclude. Press Enter after each keyword to add it.
- In the bottom right, click Next.
- Review the information and select the checkbox to agree.
- Click Start scan.
Once the scan starts, there will be a Scan in progress banner in the Sensitive Data Scan section. You'll receive an email when the results are ready.

Review your Sensitive Data scan
If you're a Super Admin, once you've scanned your account, you can review your results and remove Sensitive Data from your account. All of the actions you take will be recorded in your audit logs.
- In your HubSpot account, click the settings settings icon in the top navigation bar.
- In the left sidebar menu, navigate to Security.
- Navigate to the Sensitive Data tab.
- In the Sensitive Data Scan section, click View results.
- Click the dropdowns a the top to filter by Activity type, Data type, and Status. To filter by record name, enter record names in the searchIcon search bar.
- To review an activity, hover over the activity and click View details.
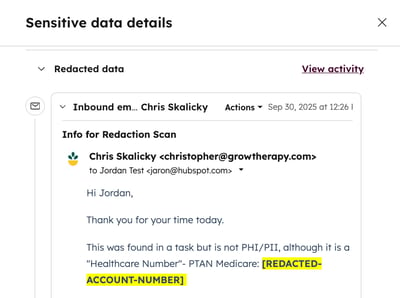
- In the right panel, review the data. Click View activity to view the full activity details.
- After reviewing, if you decide you don't need to redact the information, select the Mark as non-sensitive checkbox.
- Click Next.
- Click Next again.
- Click Confirm.
- After reviewing, if you decide you want to remove this information from your account, click Next.
- Select the checkbox next to the value you want to remove, and click Next.
- Click Confirm.
- After reviewing, if you decide you don't need to redact the information, select the Mark as non-sensitive checkbox.
Once information has been redacted, it'll be replaced with generic language. For example, a specific account number will be replaced with "REDACTED-ACCOUNT-NUMBER."