
Last updated: February 6, 2024
Available with any of the following subscriptions, except where noted:
|
|
Please note: if you're installing the Shopify integration after December 2, 2023, refer to this article for the steps to install the integration. You will not be able to analyze shopify data using the steps below.
Once you have connected Shopify to your HubSpot account, you can analyze your data in HubSpot, create an ecommerce dashboard, create abandoned cart emails, and automate your orders with workflows.
Shopify properties sync to HubSpot in the language they are set in Shopify. For example, if the properties in Shopify are in English, the properties synced to your HubSpot account will also be in English, even if your account is set to a different language.
Analyze Shopify contacts, deals and products in HubSpot
To view your Shopify contacts, deals, and products in HubSpot:
- In your HubSpot account, navigate to Reporting & Data > Integrations.
- Click Shopify.
The total number of Shopify contacts, deals, and products will appear in the Summary section:

Contacts
Shopify customers and abandoned cart contacts sync with HubSpot contacts, and are deduplicated by email address. New contacts will be created when:- The Shopify customer or abandoned cart contact was created with an email address.
- A HubSpot contact does not exist with the same email address. If a HubSpot contact already exists with the same email address, Shopify will update the existing contact if a value exists for the email property.
When customer records are deleted in Shopify, the corresponding contact records will not be deleted in HubSpot.
When contacts that were created from Shopify are deleted in HubSpot, the corresponding customer records will not be deleted in Shopify. These contacts will not be re-created in HubSpot if their records are updated in Shopify.
HubSpot contacts that are created as part of the initial import from Shopify will have an Original source drill-down 1 value of INTEGRATION_SYNC and an Original source drill-down 2 value of integrations-sync. These contacts must convert on a HubSpot form or click through on a HubSpot marketing email that links to a page with the tracking code installed before they can be tracked in HubSpot.
Contacts that are synced over and created in HubSpot after the Shopify integration is set up will have Original source drill-down 1 and Original source drill-down 2 values based on their original source type as determined by Shopify. These contacts will be tracked in HubSpot as soon as they sync over from Shopify
The following properties sync between Shopify and HubSpot contacts:
Accepts marketingCreated atFirst nameLast nameEmailPhoneNoteOrders countTagsTax exempt (checkbox)Verified email (checkbox)Street addressCityCountryState/ProvinceZip code
Please note: Shopify can store a customer's phone number in 2 sections; Customer overview and Default address. HubSpot will only sync with the phone number field in the Customer overview section.
Deals
Shopify orders sync with HubSpot deals in the eCommerce pipeline, which is automatically created when the Shopify integration is set up. Each order is associated with a product and customer when synced from Shopify, and the corresponding deal in HubSpot will be associated with a product and contact.
When an abandoned checkout is created in Shopify, the deal is synced to HubSpot with a Checkout Abandoned deal stage. Contact details for customers who have abandoned their cart in Shopify will also sync to the contact record.
If a deal is stuck in the Pending Checkout stage and Shopify does not promote it to an abandoned checkout, the deal status is cleared after 48 hours and the deal will not appear in the eCommerce pipeline. This ensures the pipeline does not contain pending deals that have not been identified as abandoned by Shopify.
If an order is deleted in Shopify, the corresponding deal in HubSpot will be set to Cancelled and the Cancelled at value to the date the order was deleted.
The following properties sync between Shopify orders and HubSpot deals:
Abandoned checkout URLBuyer accepts marketingCustomer IDCancel reasonCart tokenCancelled atCreated atCurrencyFinancial statusFulfillment statusLanding siteNameNoteOrder numberProcessing methodReferring siteSource nameSubtotal priceTaxes includedTokenTotal discountsTotal line items priceTotal priceTotal taxTotal weight
Please note: a Shopify order with an associated customer that was not created with an email address will sync over to HubSpot as a deal without an associated contact.
Products
Shopify products will be created in your HubSpot product library. The following properties sync between Shopify and HubSpot products:
TitleBody_HTMLCreated atHandleImagesProduct typePublished atPublished scopeTagsVendorPrice
You can use the line item properties in lists to segment contacts by their Shopify product purchase. Learn more about setting criteria for your lists.
If products are deleted in Shopify, the corresponding product in HubSpot will be deleted. When a product is removed from a Shopify cart, the corresponding line item is removed from the deal record in HubSpot.
Please note: Shopify product variants cannot be synced to HubSpot using this integration.
Create an ecommerce dashboard
After your Shopify store is connected to HubSpot, ecommerce reports will be added to your account. You can create a dashboard of ecommerce reports that track customer orders and customer engagement with your ecommerce store.
To create an ecommerce dashboard:
- In your HubSpot account, navigate to Reporting & Data > Dashboards.
- In the top right, click Create dashboard.
- In the left panel, navigate to Ecommerce.
- Click the Ecommerce template.
- In the right panel, review the eight pre-made reports. Clear the checkboxes next to the reports you don't want to include, then click Next.
- Enter a dashboard name and set the user access to this dashboard
- Click Create dashboard.
Automate ecommerce campaigns (Marketing Hub Professional or Enterprise only)
Create workflows to follow up with contacts who are engaging with your ecommerce campaigns. The default ecommerce workflow emails use ecommerce email templates. These templates include custom deal-specific modules, and can be modified in the design manager.
- In your HubSpot account, navigate to Reporting & Data > Integrations.
- Click Shopify and select Set up an ecommerce workflow.
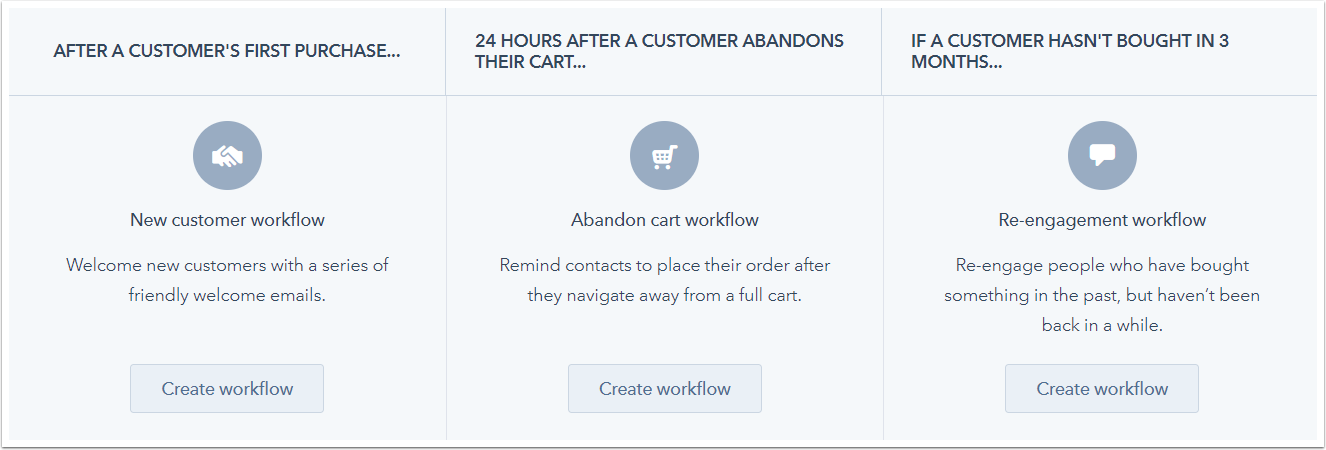
- Click Create workflow below one of the three ecommerce workflow types:
- New customer (deal-based workflow):this workflow welcomes new customers with a series of emails and will trigger when a contact makes their first purchase.
- Abandon cart (deal-based workflow): this workflow reminds your contacts to place an order and will trigger 24 hours after a customer has abandoned a cart.
- Re-engagement (contact-based workflow): this workflow sends your contacts a series of re-engagement emails and will trigger when a contact hasn’t made a purchase in a set number of days.
- In the right panel, in the Recommended section, suggested workflow actions will appear. To view more actions, click See more. Select an action to add it to your workflow.
- Set up your action, then click Save.
- To add another action to the workflow, click the + plus icon.
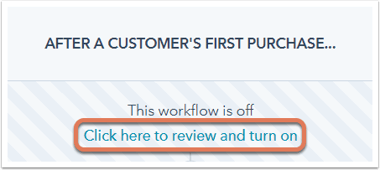
- When you're done, click Click here to review and turn on.
- You'll be redirected to the workflow in the workflows tool. In the upper right, click Review.
- Review the workflow settings, then click Turn on.
Please note: you cannot modify enrollment triggers in the default ecommerce workflows. To use an ecommerce workflow with different triggers, clone the workflow.
