
Last updated: June 11, 2024
Available with any of the following subscriptions, except where noted:
|
|
|
|
|
|
|
|
|
|
HubSpot payments is HubSpot’s payment processor that enables you to collect one-time and recurring payments through invoices, payment links, and quotes. HubSpot payments is only available to companies based in the United States, and enables the collection of USD through credit/debit cards, Apple Pay and Google Pay, and ACH.
Alternatively, if you have an existing Stripe account, you can connect it as a payment processor instead. Stripe payment processing is available for all account subscriptions and is available internationally.
Below, learn how to set up HubSpot payments to begin collecting money through HubSpot. Then, complete your setup by configuring your checkout settings. You may also want to learn how to manage incoming payments and subscriptions, or check out the FAQ.
HubSpot payments setup requirements
Please note the following before setting up HubSpot payments:
- HubSpot payments is only available to businesses and organizations that are located in and operating in the U.S. You must have a U.S. bank account and be using a paid version of HubSpot.
- Each HubSpot account can only have one instance of HubSpot payments set up. If you use business units to manage brands in your account, all business units must use the same instance of HubSpot payments.
- HubSpot payments is designed for selling non-physical goods (ex: software, services, events, courses, content, donations, etc.) and is less suitable for those shipping physical goods, as HubSpot does not calculate taxes or shipping fees at this time.
- HubSpot payments is not supported in sandbox accounts, and should only be set up in standard accounts. Trying to set up payments in a sandbox account will result in your payments application being rejected. In addition, payment links created in sandbox accounts will appear in the standard account instead and cannot be used for collecting payments.
Set up HubSpot payments
To activate HubSpot payments in your account, you'll need to complete an application process. HubSpot's risk assessment and underwriting team will review your application within two to three business days. Once your application is approved, you can start collecting payments from your customers.
Before starting the application, make sure you have your company's tax identification information, ownership information, and U.S. bank account information ready.
- In your HubSpot account, navigate to Commerce > Payments.
- Click Set up payments.
- Click Enroll now under Collect payments with HubSpot.
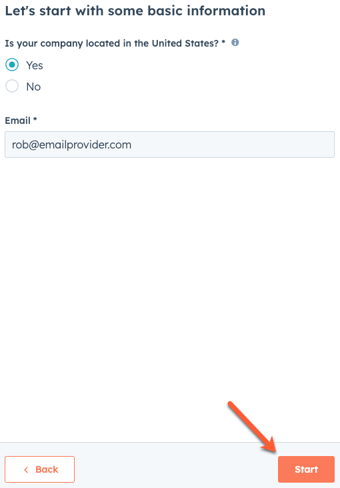
- In the Is your company located in the United States? section, select Yes. If your company is not located in the U.S., consider connecting your Stripe account as a payment processor.
- Enter your email, then click Start.
- Click the Type of business dropdown menu and select the business type.
- If you selected Company as the type of business, select the Business structure from the second dropdown menu.
- Click Next.
- Enter your business name, industry, business website URL and the products or services you'll collect payments for.
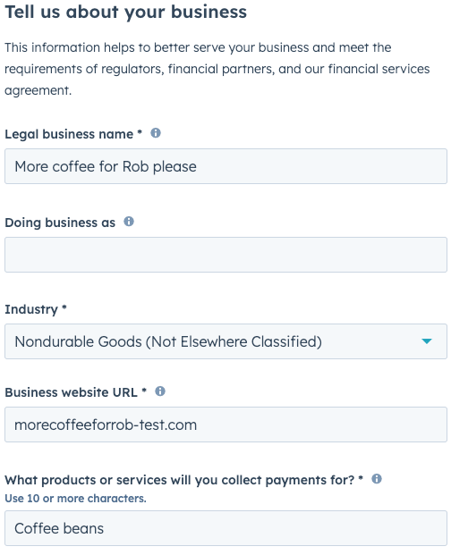
- Click Next.
- Enter your registered business address, support email, support phone number (U.S. phone numbers only) and bank statement description.
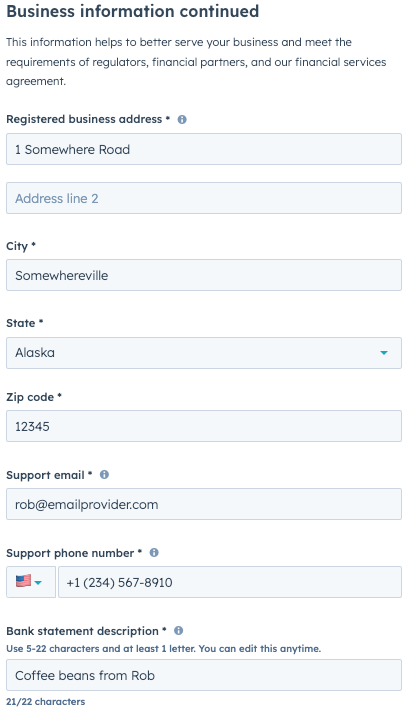
- Click Next.
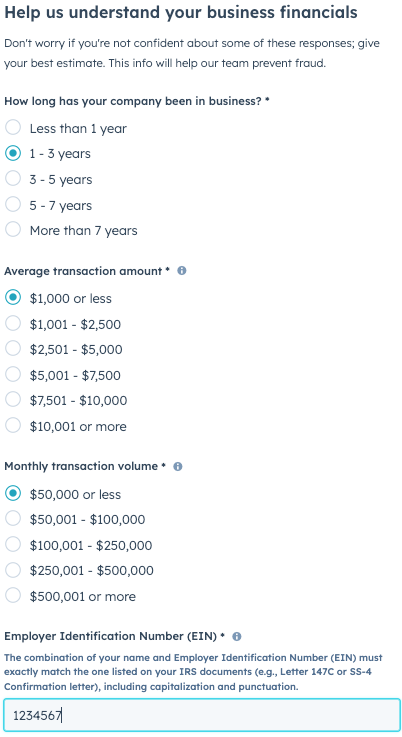
- In the How long has your company been in business section, select the answer that applies to your business.
- In the Average transaction amount section, select the average amount you expect a customer to pay per transaction.
- In the Monthly transaction volume section, select the estimated range of cumulative payments you expect to collect during one month via HubSpot payments.
- In the Employer Identification Number (EIN) section, enter your EIN.
- Click Next.
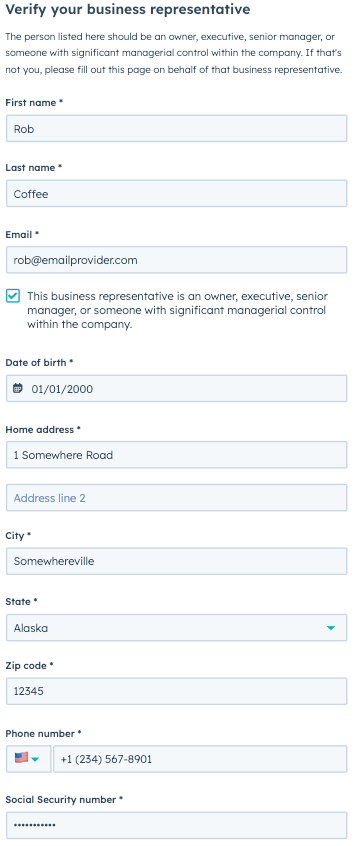
- Enter the first name, last name and email of your business representative.
- Select the This business representative is an owner, executive, senior manager, or someone with significant managerial control within the company checkbox. This is a mandatory field.
- If you selected a company or non-profit organization as the type of business earlier in the onboarding set up, optionally select if this person owns 25% or more of the company.
- Enter the representative's date of birth, address, phone number and social security number.
- If onboarding as a company or non-profit organization, you'll only need to enter the last 4 digits of the Social Security number or you can select the This person does not have a Social Security number checkbox.
- Click Next.
- If onboarding as a company, you must add additional owners who own 25% or more of the company. Click Add another owner to add other owners’ details and click Save.

- Click Next when all owners have been added.
- You'll be brought to a screen to review each section of the sign up process. If you need to amend any information, click the pencil icon against the section you need to make the amendments for.
- Review the Terms & Conditions by clicking the Terms of Use link at the top of the panel, or the Terms & Conditions link at the bottom of the panel.
- When you are satisfied that all of the information entered is accurate and have reviewed the terms and conditions, select the I agree to the Terms & Conditions checkbox.
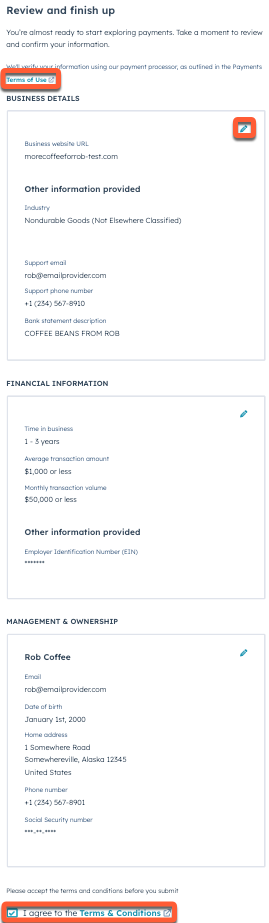
- Click Submit.
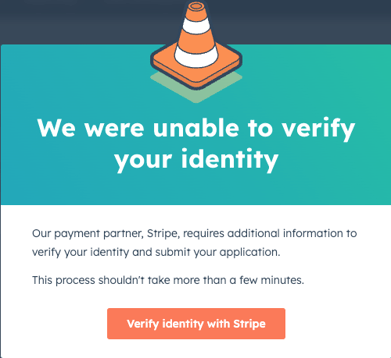
- If your identity couldn’t be verified, you'll be prompted to provide additional information.
- Clicking Verify identity with Stripe will direct you to Stripe to enter the additional information.
- After submitting your application, HubSpot’s risk assessment and underwriting team will review it within two to three business days. Once approved for HubSpot payments, you can add your bank account information to begin collecting payments.
Add and edit bank account information
Please note: if you've connected Stripe as a payment processor, you'll need to manage your bank information within Stripe.
After your account has been verified and activated, enter the details of the US bank account where your payouts will be deposited. You can add one bank account per HubSpot account. You can also review your current payment processing rates and fees. Only users with Super Admin permissions can make changes to the bank account information. HubSpot will send an email confirmation to each Super Admin in the account whenever the bank account information is updated.
If you need to update the name of your company or the authorized representative for your account, contact paymentsunderwriting@hubspot.com. To make other changes to your payments account settings, or to close your payments account, contact HubSpot Support.
To add a bank account, or update the existing one:
- In your HubSpot account, click the settings icon in the top navigation bar.
- In the left sidebar menu, navigate to Payments.
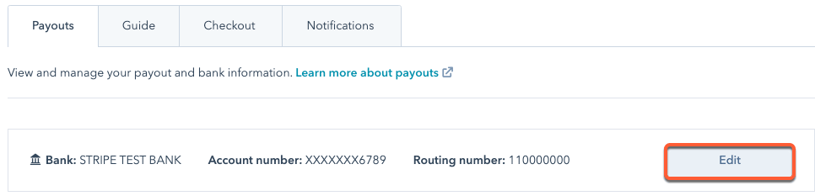
- On the Payouts tab, click Add or Edit next to the bank account information section.
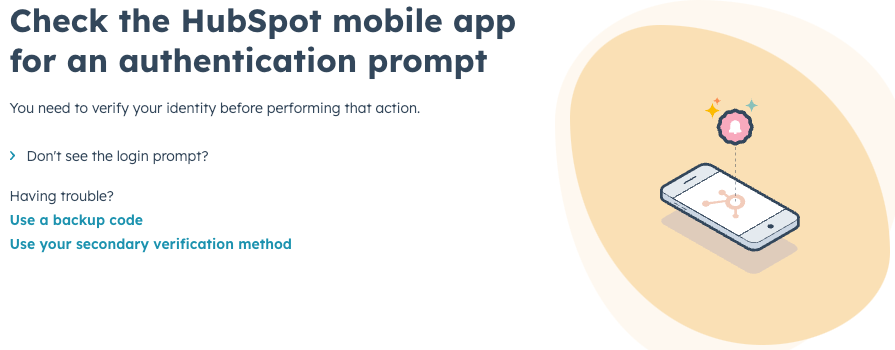
- If editing information, you may be prompted to verify your identity via your chosen authentication methods (e.g., HubSpot mobile app or a security app) or a backup code.
- In the right panel, enter the following information:
- Account holder name: the owner of the bank account, which can be a person or a company.
- Routing number: the number that identifies the bank or financial institution in a monetary transaction.
- Account number: the number used to identify the account at a bank or brokerage
- Confirm account number: when first entering new bank account information, confirm the number that you entered in the previous field to make sure it is accurate.
- Click Save.
Once your account has been activated and your bank information has been updated, you can start to create and share payments links, or integrate payments with your quotes.
Next, configure your checkout page settings to customize default payment methods, policies, shipping information, Google Analytics tracking, and more.
To disconnect HubSpot payments, follow these steps.
