Last updated: June 1, 2026
Available with any of the following subscriptions, except where noted:
-
 Commerce Hub
Professional, Enterprise
Commerce Hub
Professional, Enterprise
-
 Seats required
Permissions required Super Admin or Manage quote templates permissions are required to create and configure quote templates.
Seats required A Commerce Hub seat is required to configure quote templates.
The contracts object in HubSpot is a centralized source of truth for committed revenue. Create change and renewal quote templates to help sellers build standardized change and renewal quotes more efficiently. Configure a layout and pre-filled modules including the cover letter, executive summary, terms, payment options, and acceptance method.
Optionally set quote branding at the template level, or use the default branding set for all quotes. Sellers can use the template and choose to update only the sections they need, before sending it to the buyer.
To get started, learn more about how contracts are used, and how to create contracts.
Before you get started
- If you're a Super Admin, you can opt your account into the HubSpot Contracts with Commerce Hub beta.
- It isn't possible to enroll in the beta if you're using HubSpot payments or Stripe as a payment processing option.
Create templates
Create a quote template
- In your HubSpot account, click the
settings icon in the top navigation bar. - In the left sidebar menu, in the Data Management section, click Objects.
- On the Objects page, click the Select an object dropdown menu and select Quotes.
- At the top, click the Quote templates tab.
- Click Open template library.
- Click Create new quote template in the upper right, then select Create change quote template or Create renewal quote template.

- In the quote template editor, edit the template by clicking each module and using the module editor in the left sidebar. If you can't see the module editor, click the quote template icon in the upper left. Changes will be autosaved as you make edits.

- To override the default branding style of the quote, click the template styles icon. The branding styling set will only apply to the template you're editing. You can create multiple templates with different branding styles for each. Or, if you want to use the same branding for every quote, set up default quote branding for all quotes.

- Under Containers, you can edit the window and document containers of the quote:
- Window: click to expand the Window section to adjust the window container color and transparency.
- Document: click to expand the Document to adjust the fill color, lines, and borders.
- Under Foundation, you can edit the fonts, buttons, and links of the quote. After making edits, click Back to Template styles to return to the template styles side panel:

- Fonts: click Fonts to adjust the base font, and font used for headings, the body, and other elements (such as captions and font case). You can also adjust the font style, colors, and line heights.
- Buttons: click Buttons to adjust the button shape, color, state (e.g., default, hover), and font.
- Links: click Links to adjust link colors and formatting.
- Fonts: click Fonts to adjust the base font, and font used for headings, the body, and other elements (such as captions and font case). You can also adjust the font style, colors, and line heights.
- Under PDF layout, you can set whether to keep sections on the same page or allow them to split across pages. For example, if a section of the quote takes up a large part of the quote, it can be moved to the next page and leave white space.
- Click to expand the Page break section.
- Toggle the Keep sections on the same page switch off to allow sections to be split across pages in the PDF of the quote.
- Under Containers, you can edit the window and document containers of the quote:
- You can show or hide sections on the template. For example, you could hide the cover letter section. Then, if using the template, the cover letter section would be hidden when building a change or renewal quote. Users can choose to show it when building a quote. To show or hide sections on the template, in the left sidebar menu:
- Click the view icon to hide a section.
- Click the hide icon to show a section.

- To stop quote creators from showing or hiding modules on a quote, in the left sidebar menu, deselect the Allow visibility changes on [change/renewal] quotes checkbox. When this option is deselected the visibility of a module in a quote is based on what is configured in the template.

-
Show, hide, or lock sections to control which sections are visible and editable when building a quote.
- Show or hide sections on the template to control which sections display when a user builds a quote. For example, you could hide the cover letter section. When users create quotes from the template, the cover letter section will be hidden by default. Users can still show the section when creating a quote. To show or hide sections on the template, in the left sidebar menu:
- Click the view icon to hide a section.
- Click the hide icon to show a section.
- Lock quote modules to prevent editing when users create quotes. Add content and lock the module to prevent editing, or hide and lock the module to prevent users from showing it when creating quotes.
- Click the unlock icon to lock a module.
- If you want the module to be hidden, and don't want quote creators to be able to unhide it, click the hide icon first, then click the lock icon.
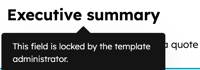
- For locked modules that remain visible, a tooltip appears when users hover over the module.
- Click the lock icon to unlock a module.
- Show or hide sections on the template to control which sections display when a user builds a quote. For example, you could hide the cover letter section. When users create quotes from the template, the cover letter section will be hidden by default. Users can still show the section when creating a quote. To show or hide sections on the template, in the left sidebar menu:
- Edit in a desktop or mobile preview by clicking the desktop or mobile icons at the top of the preview.

Edit the cover letter module
Create a cover letter to include in the quote template. Cover letters can be added manually, or generated using Breeze, HubSpot's AI. Learn more about Breeze. To edit the cover letter:
-
Click the Cover letter module in the quote template editor.
- To manually enter a cover letter that populates within the quote each time the template is used:
- Click the cover letter title, then enter a title.
- Below the title, enter the cover letter text.
- Use the formatting toolbar at the top to personalize the section:
- Personalize the text, and add links, emojis, and snippets. Click the Breeze icon in the top left of the formatting toolbar to generate text using AI.
- To insert a personalization token, click Personalize.
- Click the Type dropdown menu and select the record type you want to add the token from (e.g., company, deal, quote). Then click the Token dropdown menu and select a token.
- To edit or change the token, click the token name, then click Edit token to make changes or the Delete icon to remove the token from the quote template.
- To access the module's source code (for example, to add HTML), click the Advanced dropdown menu and select Source code. In the dialog box, edit the source code, then click Save changes.

- To generate cover letter content using Breeze:
- In the left sidebar, under Content used for this section on new quotes, select Generate with AI.
- In the Writing guidelines field, enter writing guidelines for the cover letter. Specify tone, messaging, structure, and any constraints to help guide how the section should be written.
- The cover letter content will be automatically generated using structured data, such as line items, and unstructured data from the deal activities such as, meeting transcripts, notes, and emails.
- To add attachments to the cover letter module:
- In the left sidebar, under Attachments, click Add an attachment.

- In the right panel:
- Use the search bar to search for a file that is already uploaded to the files tool. Once found, click the file to select it, then click Insert files to add them to the quote.
- Under Recently updated, click the checkboxes next to files you'd like to add. Click View all to view all files. Click Insert files to add the files to the quote.
- Click Upload to upload files from your device. Click Insert files to add the files to the quote.
- In the left sidebar:
- If you'd like the attachment to be part of the signing envelope, select the In signing checkbox.
- To rename the attachment, click Actions, then select Rename. The file won't be renamed in the files tool.
- To remove the attachment, click Actions, then select Remove. The file won't be removed from the files tool.
- To download the attachment, click Actions, then select Download. The file will remain in the files tool.
- Users can remove attachments when building a quote. Learn more about attachments.
- In the left sidebar, under Attachments, click Add an attachment.
Edit the executive summary module
Add an executive summary to give your buyer a high-level overview of the quote. To edit the executive summary:- Click the Executive summary module in the quote template editor.
- To manually enter an executive summary that populates within the quote, each time the template is used:
- Click the executive summary title and enter a title.
- Below the title, enter the executive summary text.
- Use the formatting toolbar at the top to personalize the section:
- Personalize the text, and add links, emojis, and snippets. Click the Breeze icon in the top left of the formatting toolbar to generate text using AI.
- To insert a personalization token, click Personalize.
- Click the Type dropdown menu and select the record type you want to add the token from (e.g., company, deal, quote). Then click the Token dropdown menu and select a token.
- To edit or change the token, click the token name, then click Edit token to make changes or the Delete icon to remove the token from the quote template.
- To access the module's source code (for example, to add HTML), click the Advanced dropdown menu and select Source code. In the dialog box, edit the source code, then click Save changes.

- To generate executive summary content using Breeze:
- In the left sidebar, under Content used for this section on new quotes, select Generate with AI.
- In the Writing guidelines field, enter writing guidelines for the executive summary. Specify tone, messaging, structure, and any constraints to help guide how the section should be written.
- The executive summary content will be automatically generated using structured data, such as line items, and unstructured data from the deal activities such as meeting transcripts, notes, and emails.
- To add attachments to the executive summary module:
- Click the Executive summary module in the left sidebar.
- Under Attachments, click Add an attachment.

- In the right panel:
- Use the search bar to search for a file that is already uploaded to the files tool. Once found, click the file to select it, then click Insert files to add them to the quote.
- Under Recently updated, click the checkboxes next to files you'd like to add. Click View all to view all files. Click Insert files to add the files to the quote.
- Click Upload to upload files from your device. Click Insert files to add the files to the quote.
- In the left sidebar:
- If you'd like the attachment to be part of the signing envelope, select the In signing checkbox.
- To rename the attachment, click Actions, then select Rename. The file won't be renamed in the files tool.
- To remove the attachment, click Actions, then select Remove. The file won't be removed from the files tool.
- To download the attachment, click Actions, then select Download. The file will remain in the files tool.
- Users can remove attachments when building a quote. Learn more about attachments.
Edit the header module
The header module displays the logo (set via quote branding), quote reference, issue date, expiration date, and currency of the quote. A default expiration period can be configured in settings. To edit the header:
- Click the Header module in the quote template editor.
- To edit how the quote reference, issue date, expiration date, currency, and PO number are displayed on the template, in the left sidebar, on the Details tab:
- Under Quote reference:
- In the Label field, edit the label displayed above the quote reference.
- Toggle the Quote reference switch off to hide it.
- Under Issue date:
- In the Label field, edit the label displayed above the issue date.
- Toggle the Issue date switch off to hide it.
- Under Expiration date:
- In the Label field, edit the label displayed above the expiration date.
- Toggle the Expiration date switch off to hide it.
- Under Currency:
- The quote's currency will match the Currency property of the associated deal of the quote.
- Toggle the Currency switch off to hide it.
- Under PO number:
- Toggle the PO number switch on to display a purchase order number on the quote. When switched on, a user building the quote can add the PO number before sending it to the buyer.
- Select the Allow buyer to edit PO number checkbox to allow the buyer to edit the PO number when reviewing the quote.
- In the Label field, edit the label displayed above the PO number.
- The PO number is stored in the PO number quote property.
- Under Quote reference:
- The quote will automatically use the logo and colors set in the quote branding settings, or the logo and colors set in your branding settings. Logos and colors set at the template level will override both quote branding and account branding settings. To use a different logo, in the left sidebar, click the Logo tab, then toggle the brand kit switch off.
- To show the company name instead of a logo, click Show more settings. Toggle the Show company name when logo isn't set switch on. The company name is set in account settings.
- To select a logo:
- Click Upload to upload an image from your device.
- Click Browse images to show images uploaded to the files tool. In the right panel:
- Use the search bar to search for an image that is already uploaded to the files tool. Once found, click the image to use it as the quote logo.
- Under Recently updated, click a folder to view the images within it, or click View all to view all files.
- Click the image to add it as a logo.
- To add an image from a URL, design an image with Adobe Express, or design an image with Canva, click the down arrow on the Upload button and select an option.

- Click X in the top right of the right panel when you've added your images.
Edit the parties module
The parties module displays the the contact and company of the seller and buyer, and the billing contact and company. When quotes are built, by default:
- Seller details are based on the contract.
- Seller details, including phone number, are populated from the user profile of the user that owns the contract. The seller company is populated from the account's company information. Seller details can be updated when a change or renewal quote is being created.
- Buyer details are added when a change or renewal quote is being created. You can turn on a setting in the quote to allow buyers to update their company information.
- Bill to details are added during quote creation. You can turn on a setting in the quote to allow buyers to update their billing company information.
- Click the Parties module in the quote template editor.
- In the left sidebar, on the Seller tab:
- In the Heading field, enter the heading to display above the seller's contact and company details.
- In the Label field, edit the label to display above the seller's contact details.
- In the left sidebar, on the Buyer tab:
- In the Heading field, enter the heading to display above the buyer's contact and company details.
- In the Label field, edit the label to display above the buyer's contact details.
- In the left sidebar, on the Buyer tab:
- Toggle the Tax IDs switch on to display tax IDs on the quote.
- If creating a renewal quote template, select the Allow buyer to update billing contact, company and address checkbox to allow the buyer to edit their billing details when viewing the quote.
- Toggle the Bill to switch off to remove billing contacts from the template.
Edit the summary module
The summary module displays the Effective date, Term length, Total discount , and Total contract value. To edit the summary:- Click the Summary module in the quote template editor.
- In the left sidebar under Effective date:
- Click the Effective dropdown menu and select one of the following options:
- On agreement: the default setting. This is the date the quote moves to Accepted.
- Delayed start (days): delay the billing start date by a number of days after checkout. After selecting this option, enter a number into the field.
- Delayed start (months): delay the billing start date by a number of months after checkout. After selecting this option, enter a number into the field.
- In the Label field, edit the label displayed above the effective date.
- Toggle the Effective date switch off to hide it.
- Click the Effective dropdown menu and select one of the following options:
- In the left sidebar, under Term length:
- In the Label field, edit the label displayed above the term length.
- Toggle the Term length switch off to hide it.
Please note:
- Term length is automatically calculated based on billing start and end dates across all line items of a quote. The billing end date is calculated as billing start date from billing frequency × number of payments. For example, if billing is monthly with six payments starting June 1, 2025, then the billing end date is Nov. 1, 2025.
- If all line items are set to Automatically renew until canceled, the term length is marked as Evergreen on a quote.
- In the left sidebar, under Total discount:
- Click the Format dropdown menu and select an option:
- Show as amount: show the discount amount in the quote currency.
- Show as percentage: show the discount as a percentage.
- Show as percentage and amount: show the discount as a percentage and as an amount in the quote currency.
- In the Label field, edit the label displayed above the total discount.
- Toggle the Total discount switch off to hide it.
- Click the Format dropdown menu and select an option:
- In the left sidebar, under Total contract value:
- In the Label field, edit the label displayed above the total contract value.
- Toggle the Total contract value switch off to hide it.
Edit the line items module
You can add or remove line item properties from the line items table to customize the line item information a buyer sees on a quote. The line item table can have up to seven columns. Additional properties can be displayed as rows below the line items table. To customize the properties displayed on the template:
Please note: File and HubSpot user line item properties can't be displayed on quotes.
- Click the line items table to open the left sidebar.
- In the left sidebar:
- Existing properties will be displayed under Table columns and Item rows.
- To edit the label for the property, and its placement, click the edit icon. Under Display as, select Table column or Item row. In the label field, enter a label name. Click Back to save your changes.
- To show or hide pricing tier information next to tier-priced line items, click the edit icon next to the Unit price property, click the Tiered pricing format dropdown menu, and select an option:
- Show pricing tiers: display the View tiers link in the quote, so the buyer can view the tiered pricing for the products.
- Show effective unit price only: show the price of the unit only.

- Click the X next to a property to delete it.
- To add a property, click the Add a line item property dropdown menu and select a property.
- To reorder the properties, click and drag a property using the drag handle.
- Selected properties will display as columns and rows in the line item table of the template.

-
To add a breakdown of the quote total to your template, including discount and taxes for buyers, in the left sidbar, click the Totals tab.

-
-
Toggle the Totals switch on. The subtotal amount is the total net price (after discounts) for all one-time and recurring line items beginning on the same effective date.
-
To customize how totals are displayed, under Subtotal:
- Click the Display dropdown menu and select a format. The Subtotal with breakdown format will show a breakdown of one-time and recurring line items with the same effective date.
- In the Label field, enter the text to display next to the subtotal amount.
- The subtotal amount will include the total discount amount, calculated for all one-time and recurring line items beginning on the same effective date. For example:
- Line item 1: $100
- Line item 2: $50 with a 50% discount ($25).
- Total before discount: $150
- Subtotal after discount: $125
- Total discount percentage: 17% (25/150)
- Under Discount included in the subtotal:
- Click the Display dropdown menu and select a format.
- In the Label field, enter the text to display next to the discount total.
- To hide the discounts in the subtotal, toggle the Discount included in the subtotal switch off.
- The total tax amount is calculated for all one-time and recurring line items beginning on the same effective date. Under Taxes, in the Label field, enter the text to display next to the total taxes. To hide the taxes in the subtotal, toggle the Taxes switch off.
- The amount due on the effective date is the total post-tax amount due on the effective date. It doesn't include payments starting at a later date. Under Due on effective date:
- In the Label field, enter the text to display next to the due on effective date total.
- In the Description field, enter a description to help explain the effective date total to your buyer.
- The total contract value (TCV) is the total value over the contract term, including all one-time charges and recurring charges that have defined billing terms. TCV doesn’t include recurring charges billed indefinitely. Under Total contract value (TCV), in the Label field, enter the text to display next to the TCV. To hide the TCV, toggle the Total contract value (TCV) switch off.
-
Edit the terms module
To edit the terms, click the Terms module in the quote template editor.- Enter the terms. Use the formatting toolbar at the top to personalize the section:
- Personalize the text, and add links, emojis, and snippets. Click the Breeze icon in the top left of the formatting toolbar to generate text using AI.
- To insert a personalization token, click Personalize.
- Click the Type dropdown menu and select the record type you want to add the token from (e.g., company, deal, quote). Then click the Token dropdown menu and select a token.
- To edit or change the token, click the token name, then click Edit token to make changes or the Delete icon to remove the token from the quote template.
- To access the module's source code (for example, to add HTML), click the Advanced dropdown menu and select Source code. In the dialog box, edit the source code, then click Save changes.

- To change the title, click the terms title and enter a title.
- To add attachments to the terms module:
- Click the Terms module in the left sidebar.
- Under Attachments, click Add an attachment.
- In the right panel:
- Use the search bar to search for a file that is already uploaded to the files tool. Once found, click the file to select it, then click Insert files to add them to the quote.
- Under Recently updated, click the checkboxes next to files you'd like to add. Click View all to view all files. Click Insert files to add the files to the quote.
- Click Upload to upload files from your device. Click Insert files to add the files to the quote.
- In the left sidebar:
- If you'd like the attachment to be part of the signing envelope, select the In signing checkbox.
- To rename the attachment, click Actions, then select Rename. The file won't be renamed in the files tool.
- To remove the attachment, click Actions, then select Remove. The file won't be removed from the files tool.
- To download the attachment, click Actions, then select Download. The file will remain in the files tool.
- Users can remove attachments when building a quote. Learn more about attachments.
Edit the payments module
To edit billing and payment options:- Click the Payments module in the quote template editor.
- In the left sidebar, on the Billing tab, set your billing options:
- Click the Payment terms dropdown menu and select the payment terms (invoices can be due on receipt or have net payment terms).
- To turn off automatic creation of invoices and subscriptions, toggle the Enable billing switch off. With Enable billing on, automatic payments will be processed using the buyer's payment method on each billing date.
- In the left sidebar, click the Payments tab to set up payment options:
- The Accept online payments toggle will be switched on by default when billing is enabled. The pre-filled choices reflect what's set up in payment settings.
- Select the Accepted forms of payment checkboxes to choose the payment types you'll accept.
- If you have set up fees, under Fees applied at checkout, select the checkboxes next to the fees you want to apply to payments.
- Clear the Collecting billing address for credit card purchases checkbox to not collect the billing address of your buyers.
- Select the Collect shipping address checkbox to collect the shipping address of your buyers.
- Clear the Collect your customer's payment details at checkout for future charges checkbox to not collect your buyers payment details at checkout for future charges.
Edit the acceptance module
The acceptance section defines how the buyer will accept the quote. The default acceptance method is e-signature. E-signature is required when using HubSpot payments. To edit the acceptance method:- Click the Acceptance module in the quote template editor.
- In the left sidebar, under Acceptance method, choose from the following options:
- Print and sign: leave space on the quote for the buyer to print and sign their name.
- E-signature: use e-signatures to sign the quote. When building a quote, at least one buyer must be selected to sign for this option to be available.
- Accept without signature: get quote acceptance without requiring an e-signature. This can be useful in situations where a formal signature isn't needed, such as for purchase orders (POs). This option can be used with or without online payments. A contact doesn't need to be added to the quote when it's shared.
- Click the Countersigners dropdown menu and select countersigners from your organization.
Add a rich text module
To add a rich text module to the quote template:- Click the add icon in the upper left.
- In the left sidebar, click and drag the Content section module to the quote.

- Use the formatting toolbar at the top to personalize the section:
- Personalize the text, and add links, emojis, and snippets. Click the Breeze icon in the top left of the formatting toolbar to generate text using AI.
- To insert a personalization token, click Personalize.
- Click the Type dropdown menu and select the record type you want to add the token from (e.g., company, deal, quote). Then click the Token dropdown menu and select a token.
- To edit or change the token, click the token name, then click Edit token to make changes or the Delete icon to remove the token from the quote template.
- To access the module's source code (for example, to add HTML), click the Advanced dropdown menu and select Source code. In the dialog box, edit the source code, then click Save changes.
Edit the module layout and settings
- To move modules, click the module in the editor window, and drag it to a new position.

- To turn the closing agent off, click Closing agent is on in the upper right. In the right panel, toggle the Turn off closing agent switch off, then click Save. Learn more about setting up the closing agent.
- To change the language or locale of the template:
- Click Settings in the upper right.
- Click the Language dropdown menu and select a language.
- Click the Locale dropdown menu and select a locale. Locale will change the date and address display format for your quote. The quote's currency format is inherited from the deal record's currency, so changing the quote's locale settings won't update the currency.
Publish the template
When the template is ready, click Publish in the upper right. Once published, users in your account can use the template to build their quotes.Manage templates
Edit, clone, unpublish, or delete templates from quote settings.- In your HubSpot account, click the
settings icon in the top navigation bar. - In the left sidebar menu, in the Data Management section, click Objects.
- On the Objects page, click the Select an object dropdown menu and select Quotes.
- At the top, click the Quote templates tab.
- Click Open template library.
- Hover over the template and click the three vertical dots icon, then select an option:
- Edit: edit the template. You can edit draft or published templates.
- In the upper right, click Unpublish. Click Yes, unpublish to confirm. When unpublishing, new quotes can't be created with the template, but existing quotes aren't affected.
- Make your changes to the template. Changes are autosaved.
- Click Publish in the upper right when you have finished making changes to publish the template. Or, click Back to leave the template in a Draft state.
- Clone: clone the template. In the dialog box, enter a name for the new template. Click the Template type dropdown menu and select a template type. Click Clone. Quote templates can be cloned to change or renewal quote templates, and vice versa.
- Unpublish: unpublish the template. When unpublishing, new quotes won't be able to be created with the template. Existing quotes won't be affected.
- Delete: delete the template. In the dialog box, enter the template name and click Yes, delete to confirm deletion.
- Edit: edit the template. You can edit draft or published templates.
Next steps
- Learn how to create change quotes, to record mid-contract changes.
- Learn how to create renewal quotes when customers are nearing the end of their contract.
- Learn more about managing contracts, including reviewing contract details, associated revenue, activities, and history, and how to terminate contracts and export contracts.
