Last updated: August 21, 2025
Available with any of the following subscriptions, except where noted:
Use the Track and Log features of the HubSpot Sales Office 365 add-in to monitor and keep a record of your contacts' engagement with your emails.
- With tracking turned on, you can monitor when contacts view or open your emails.
- Review email activity in the activity feed and on the contact timeline.
- Receive real-time notifications when a contact opens your email.
-
- Users with an assigned Sales Hub seat can track clicks on links included in the body of the tracked email. Learn more about click tracking.
- With logging turned on, you can log an email to the recipient’s contact record or their associated records. Learn more about the difference between tracking and logging.
Please note: this article covers tracking and logging emails with the HubSpot Sales Office 365 add-in. If you're using the Outlook desktop add-in, learn how to track and log emails with the Outlook desktop add-in.
Before you get started
Before you begin working with the HubSpot Sales Office 365 add-in, review the requirements and limitations of tracking and logging emails.
Understand requirements
- Users must connect their inbox to HubSpot to track and log emails using the HubSpot Sales Office 365 add-in.
- Users must be using Office 365 version 1910 or later to select which records an email should log to.
- To log an email and add new contacts to HubSpot from a logged email, the email address you send emails from must be one of the following:
- A user in your account
- One of your connected email addresses
- An alias in your email client (either an alias that has been configured in your connected Gmail inbox, or an alias added to your Profile & Preferences)
Understand limitations and considerations
- The HubSpot Sales task pane must be open in your inbox when you send a tracked or logged email. Learn how to pin the task pane so it's always open for tracking and logging.
- If you've turned on data privacy settings in your account, email opens can only be tracked for contacts with an assigned legal basis for data processing. Your legal team is the best resource to determine how your company uses email logging and tracking. Learn more about email tracking when data privacy settings are turned on.
- You can customize your extension settings to turn off tracking and logging for a specific message or for specific contacts or email domains.
- When logging an email with a file attachment, attachments larger than 50 MB will not log to HubSpot. Your email will still be delivered to the contact and will log to the CRM, but without an attachment.
Configure default log and track settings
Super Admins and users with the Account Access permission can update the default settings for tracking, logging, and associating emails for all users in your account.
To configure these defaults:
- In your HubSpot account, click the settings icon in the top navigation bar.
- In the left sidebar menu, navigate to Objects > Activities.
- Click the Email Log & Track tab.
- Under Email Log and Track Settings, configure how emails will be recorded in HubSpot by selecting or clearing the following checkboxes:
- Allow all users to log email attachments: when this setting is turned on, all incoming attachments will log to the CRM.
- Apply Default Log setting for all users: when this setting is turned on, you can then click to toggle the Log all emails by default switch on or off to set whether emails are logged by default across all users in your account.
- Apply Default Association for all users: when this setting is turned on, you can then click the dropdown menu and select the default record types to associate with a logged email.
- Allow all users to track emails and see recipients open and click tracking on their emails: when this setting is turned on, all users will be able to configure their own track and log settings for emails sent via the CRM, or email extension.
- Apply Default Track setting for all users: if you've selected the Allow all users to track emails and see recipients open and click on their emails checkbox, you can turn this setting on to configure whether all emails will be tracked by default across all users in your account.

Please note: if you have access to the Apply Activity Logging Defaults to External Emails beta, sales extension and BCC/forwarded emails will follow the automatic association rules and users cannot personalize default settings for emails sent via the extension. The Apply Activity Logging Defaults to External Emails beta does not affect emails sent from shared inboxes (e.g., replies in the conversations and help desk tools) or outbound emails sent from sequences. Once this is rolled out to all accounts this year, users will be unable to personalize the extension's default association logging settings, but can still edit associations when sending individual emails.
Tracking emails
Send a tracked email using the Office 365 add-in
- Compose a new email in Outlook.
- Enter the email recipient, subject line, and email body.
- Open the sales tools in your inbox. This process will differ slightly depending on the version of Outlook you're using. In the table below, hover over the icon to view the add-in for each Outlook version.
| Outlook version | Access the add-in |
|
Outlook for Windows or Mac (classic) 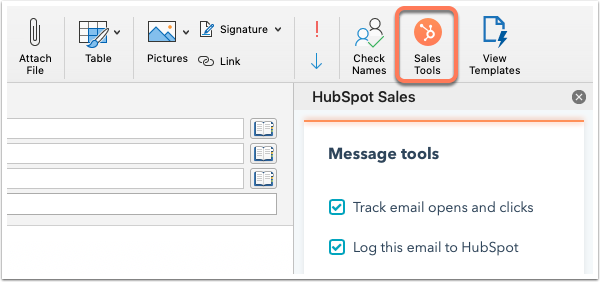
|
At the top of Outlook, in the main ribbon, click Sales Tools. |
|
Outlook for Windows or Mac (new) 
|
At the top of Outlook, in the simplified ribbon or toolbar, click the three horizontal dots. Then, select Customize Toolbar to access the add-in. You can also click and drag HubSpot Sales into the toolbar. |
|
Outlook on the web 
|
At the top of Outlook, in the main ribbon, click Apps, then select HubSpot Sales. |
- In the right task pane, select the Track email opens checkbox. Users with an assigned Sales Hub seat will see Track email opens and clicks.
- Keep the HubSpot Sales task pane open and click Send.

View the tracked email's status
Once a tracked email is sent, email activity will display a Sent status on the contact record as well as in your activity feed.

When the recipient opens the email, you'll receive a real-time pop-up notification on your desktop. The email notification will be marked as Open in your activity feed. Under the contact name, click [X] open/sent + other activity to expand the activity details and history.

You can also see how your contacts are engaging with your tracked emails from the Chrome extension. To access your activity feed from the Chrome extension, click the HubSpot sprocket icon in the upper-right corner of your Chrome browser.
Learn more about email tracking and sales notifications and how to disable tracking.
Tracking with data privacy settings turned on
If you've turned on data privacy settings in your account, HubSpot can only log and track a contact's email opens when the contact has an assigned legal basis for data processing. When emailing multiple recipients, email opens will be tracked anonymously.
For new contacts or existing contacts who have not provided legal basis for processing data:
- Email views and opens will not be tracked.
- When composing an email in Office 365, the Track email opens and clicks checkbox will be grayed out to show the contact's tracking ineligibility.
- You can update a contact's tracking eligibility by updating their Legal basis for processing contact's data property.
![]()
Logging emails
Send a logged email using the Office 365 add-in
- Compose a new email in Outlook.
- Enter the email recipient, subject line, and email body.
- Open the sales tools in your inbox. This process will differ slightly depending on the version of Outlook you're using. In the table below, hover over the icon to view the add-in for each Outlook version.
| Outlook version |
Access the add-in |
|
Outlook for Windows or Mac (classic)
|
At the top of Outlook, in the main ribbon, click Sales Tools. |
|
Outlook for Windows or Mac (new)
|
At the top of Outlook, in the simplified ribbon or toolbar, click the three horizontal dots. Then, select Customize Toolbar to access the add-in. You can also click and drag HubSpot Sales into the toolbar. |
|
Outlook on the web
|
At the top of Outlook, in the main ribbon, click Apps, then select HubSpot Sales. |
- In the right task pane, select the Log checkbox. Your BCC address will auto-populate in the BCC field.

- If your account has configured default log settings, the add-in will automatically select which records to log the email to. To manually select which records the email will log to:
- Click the dropdown menu next to the Log checkbox.
- Select/clear the checkboxes next to the records you want to log the email to.
- If you're sending the email to a recipient who isn't a contact in your CRM, you can choose to create a new contact.
- If you want to create a new contact, select the checkbox next to the email address under Create as new contacts, when editing the record associations.
- If you're using marketing contacts, a new contact created by a logged email will be set as non-marketing.
- The HubSpot user who sent the email will be automatically assigned as the contact owner, as long as no previous owner has been assigned.
- If you don't want to create a new contact, clear the checkbox next to the email address under Create as new contacts. Learn how to log emails to existing contact records only.
- If you want to create a new contact, select the checkbox next to the email address under Create as new contacts, when editing the record associations.
- Keep the HubSpot Sales task pane open and click Send.

View the logged email in HubSpot
- Navigate to your records:
-
In your HubSpot account, navigate to CRM > Contacts.
-
In your HubSpot account, navigate to CRM > Companies.
-
In your HubSpot account, navigate to CRM > Deals.
-
In your HubSpot account, navigate to CRM > Tickets.
-
-
Click the name of the record.
-
On the timeline, locate the logged email. From the email, you can do the following:
-
- Pin: click to pin the email to the top if the contact timeline.
- Copy link: click to copy the URL of the logged email.
- Reply: click Reply to send an email reply to the contact from HubSpot.
- Forward: click to forward the email to another contact.
-
- Delete: click to delete the email activity from the timeline.
-
- Expand: click the dropdown arrow see the full body of the email. If there's an ongoing email conversation, click View thread to see all of the emails in the thread.
- Associations: click to edit associated company or deals records.
- Attachments: click to open attachments associated with this specific email send.

