
Last updated: November 29, 2023
Available with any of the following subscriptions, except where noted:
|
|
If you're using the HubSpot Sales extension or add-in with your email address to log and track emails and access the sales tools in your inbox, you can manage some of the extension's settings in your account's email integration settings. Specifically, you can switch which HubSpot account the extension is syncing with, add a BCC address to log to another system, and block notifications for specific IP addresses.
To access your extension settings:
- In your HubSpot account, click the settings icon in the top navigation bar.
- In your left sidebar menu, navigate to General.
- Click the Email tab.
- Click Email extension settings to expand the section. If you've never configured your extension settings before, click Send data to this CRM and the extension settings will appear.
The sections below outline how each of the available email extension settings works:
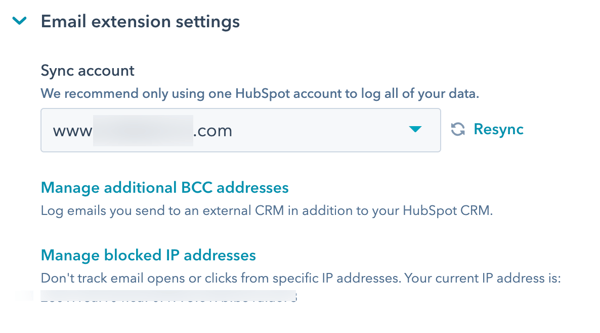
Sync account
When your user account, which is the email address that you use when you log into HubSpot, has access to more than one HubSpot account, make sure that you're logged in to the correct HubSpot account when using the extension. Any log and track data will be associated to the HubSpot account specified in your extension settings.
Please note: if you sync your sales tools to a HubSpot CRM account instead of an account with paid Sales Hub seats, you will not have access to paid tools. This includes unlimited notifications in your activity feed. Learn how to identify and switch to your HubSpot account with paid features.
To select a different HubSpot account to sync with your extension:
- In the Extension settings section, click the Sync account dropdown menu and select the correct account. You should be able to identify the correct account by its domain and Hub ID.
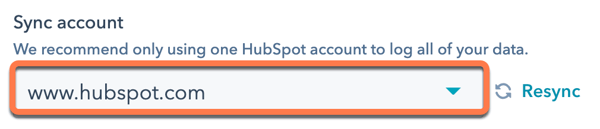
- In the dialog box, review the message then click Yes, change it.
You can also switch the HubSpot account that your sales extension or add-in is connected to from the Chrome extension, the Outlook desktop configuration settings, or the Office 365 settings.
Additional BCC address
You can add an additional BCC address if you want to log your emails to another system, such as Salesforce. First, you need to access the other system's email address. If you're using Salesforce, you can access your email to Salesforce address following the steps below:
- Log in to Salesforce.
- In the top right corner, click your name, then select My Settings.
- In the left sidebar, navigate to Email > My Email to Salesforce.
- Copy the value in the Your Email to Salesforce address field.
Next, add the address as an additional BCC address in your email integration settings:
- In your HubSpot account, click the settings icon in the main navigation bar.
- In the left sidebar menu, navigate to General.
- Click the Email tab.
- In the Email extension settings section, click Manage additional BCC addresses.
- In the dialog box, paste the email address from your other system and click Add.
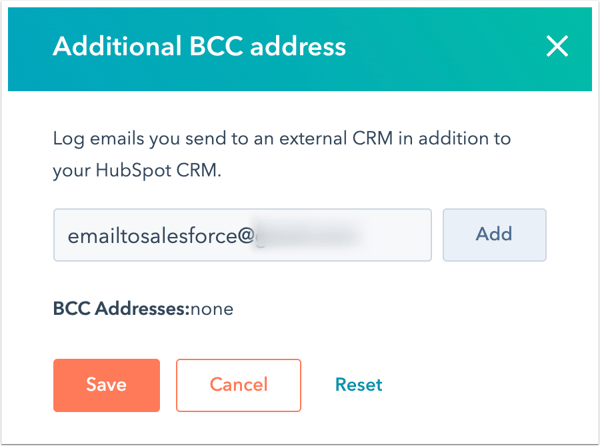
- Click Save.
Blocked IP addresses
If you don't want to receive open or click notifications for a specific IP address, you can block the IP address in your extension settings. This is useful for:
- Blocking your own computers or devices that are not using dynamic IP addresses
- Blocking specific people's IP addresses
- Avoiding notifications when your colleagues open your emails
Please note: if your activity is still not being filtered, it is likely that your mobile device, computer, or company uses a dynamic IP address, which means that it consistently changes. You can continue to update the IP address in the Blocked IP Address field, but keep in mind that because the IP addresses will change, blocking your mobile device's IP address may not completely prevent open notifications.
To find your own IP address, you can do one of the following:- Go to http://whatismyip.com or http://ip4.me/. Your IP address will display at the top of the screen. If you are working remotely, this could change frequently.
- Ask your IT department for this information.
- Call your internet provider and ask them what your IP range is.
- Find out if your internet provider can provide you with a static IP for your corporate office or home network and use that instead.
- In your HubSpot account, click the settings icon in the main navigation bar.
- In the left sidebar menu, navigate to General.
- Click the Email tab.
- In the Email extension settings section, click Manage blocked IP addresses.
- In the dialog box, enter an IP address, then click Add.
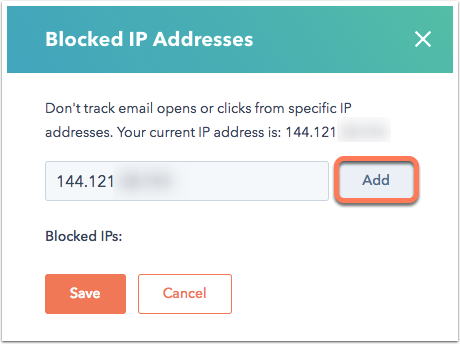
- Click Save.
Please note: if you are receiving notifications about your activity when viewing emails on your mobile device, you can disable notifications for the HubSpot mobile app on your iPhone.
