
Last updated: July 25, 2024
Available with any of the following subscriptions, except where noted:
|
|
|
|
|
|
|
|
Create a workflow to automate your business processes and make your team more efficient. Set enrollment criteria to automatically enroll records and take action on your records. You can also take action on associated records, such as updating an enrolled contact’s associated company.
After creating your workflow, it will appear in the Created in workflows tab in the workflows dashboard. Workflows created from other tools such as forms, emails, tickets, or deals will display in the Created in other tools tab. Learn more about organizing your workflows.
Select workflow object and type
From the workflows tool, you can create a workflow from scratch or use a workflow template to guide you along. In addition to using workflow templates, you can also refer to the community workflow library for ideas when setting up your workflow.
Depending on your setup flow, you will be prompted to select an object and workflow type. The number of workflows that you can create depends on your subscriptions.
To get started creating a workflow:
- In your HubSpot account, navigate to Automations > Workflows.
- You can create a new workflow from scratch or from a template:
- To create a new workflow from scratch, in the upper right, click Create workflow > From scratch.
- To create a new workflow from a template, in the upper right, click Create workflow > From template.
- To edit or clone existing workflows, hover over the workflow and click Clone or Edit.
Start from scratch
To create a workflow from scratch:
- In the left panel, select [object]-based to select your workflow object. This determines what type of records can be enrolled in the workflow. When creating a workflow from scratch, you can select from the following objects:
-
- Contacts
- Companies
- Deals
- Quotes (Sales Hub Professional or Enterprise)
- Tickets (Service Hub Professional or Enterprise)
- Custom objects (Enterprise only)
- Conversations
- Feedback submissions (Service Hub Professional or Enterprise)
- Subscriptions
- Payments
- Goals
- Leads (Sales Hub Professional or Enterprise)
- Users
- In the right panel, under Choose type, select Blank workflow.
- In the top left, click Next.
- Click the pencil icon to give your workflow a name and add a description. Or, use HubSpot Artificial intelligence (AI) to generate a description for your workflow. Click Generate.
- Click Save.

Use a template
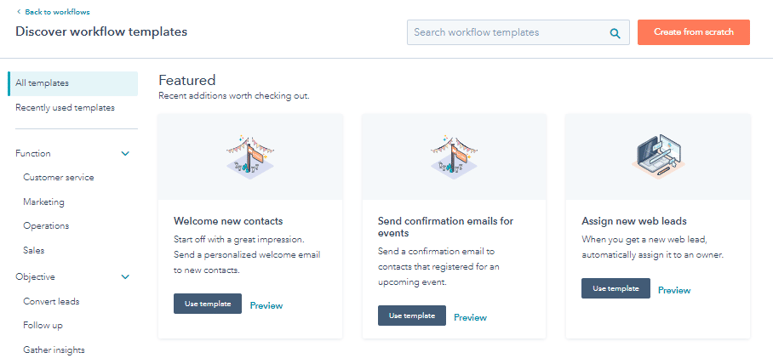
Use a workflow template aligned with your goals to streamline your automation processes. You can also browse through the templates to explore different workflow automation options.
To create a workflow using a template:
- From the templates library, search for a template that matches your workflow goals:
- To filter templates by function or objective, in the left sidebar, select a category.
- To search for a specific template, in the top right, enter a search keyword.
- To review a template's details, click Preview. In the dialog box, you can check if the template is compatible with your HubSpot subscriptions. You can also review the following details:
- Purpose: the purpose and goals of this workflow.
- Included triggers and actions: the enrollment triggers and workflow actions that are included in this template.
- What you'll need to prepare: any assets that you'll need to prepare to populate the placeholder actions, such as marketing emails or forms.
- Once you've selected your template, click Use template. In the workflow editor, the template will be displayed with placeholder actions. You can edit, add, and remove actions in the editor.
Set enrollment triggers
Enrollment triggers are a set of criteria that automatically enroll records in the workflow. Enrollment triggers can be filter-based, event-based, or based on a schedule. Learn more about setting enrollment triggers.
If you want to enroll records manually only, leave the enrollment trigger box blank. Learn more about manual enrollment.
To watch an overview of this process, check out the video below:
| See the full HubSpot Academy lesson: Workflows deep dive |
- In the workflow editor, click Set up triggers.
- In the left panel, select When an event occurs, When filter criteria is met, or Based on a schedule.
- In the left panel, select a filter type for your enrollment trigger. Set up the trigger, then click Save.
- By default, records will only enroll in a workflow the first time they meet the enrollment triggers. To enable re-enrollment:
- In the left panel, click the Re-enrollment tab.
- Click to toggle the Re-enrollment switch on.
- Select the triggers that you want to use for re-enrollment. Learn more about adding re-enrollment triggers to workflows.
- Add more enrollment triggers if needed. When you're done, click Save.
Add actions
You can use AI assistants to generate actions for a workflow or manually select and add actions. For example, you can use a workflow to send a marketing email or assign your records. Learn more about the different workflow actions available in HubSpot.
After adding an action, you can clone or move it to streamline the workflow building process. And if you'd like to leave a note on a workflow action for reference, learn how to add comments to workflow actions.
Please note: the actions available to you depend on your subscription. Locked actions require an account upgrade to use.
To add actions to a workflow:
- Click the + plus icon.
- In the left panel, select an action. Learn more about choosing your workflow actions.
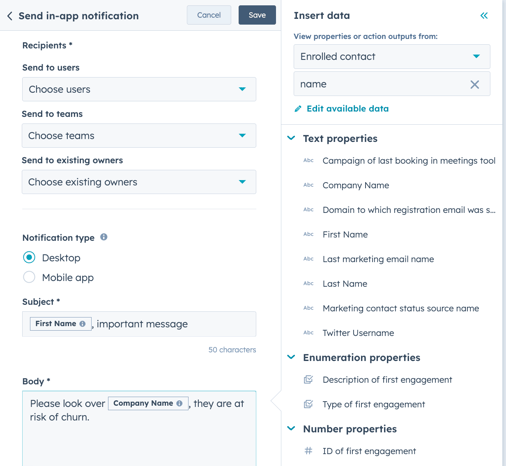
- Depending on the selected workflow action, you can also use the data panel to use data from various object sources. For example, you can use data from a contact record and its associated deal to send an in-app notification to the deal owner.
- The data panel functionality can be used with the below workflow actions:
- Send internal email notification
- Create task
-
- Send in app notification
- Value equals branch
- Set property value (when setting text properties)
- Copy property
- Create record (when setting text properties)
- Send Slack notification (requires Slack integration)
-
- Integration actions that allow data passing (such as with Google Sheets or Asana)
-
- Custom code (Operation Hub Professional or Enterprise only)
-
- Format data (Operation Hub Professional or Enterprise only)
-
- Send a webhook (Operation Hub Professional or Enterprise only)
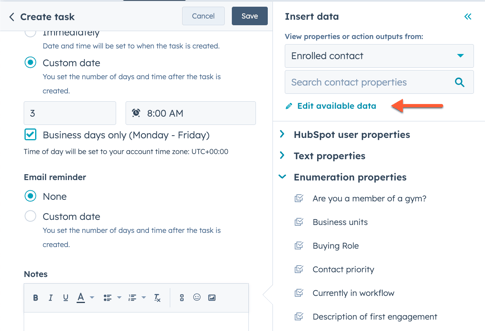
- To use the data panel functionality:
- To add a data source to the panel's available data:
- In the Available data section, click Edit available data.
- To add a data source to the panel's available data:
-
-
- In the right panel, click + Add data source.
- Click the Choose a record type dropdown menu and select a data source.
- Configure the data source details, then click Add.
-
-
- To use data from a specific source for your action:
- In the Edit action tab, click on the field that you'd like to use the data with.
- In the right panel, click to expand the data source that you'd like to use, then click on the property to use in the field. The property will be inserted into the field. Custom event properties can be used for actions that are supported by the data panel. The available custom event properties will be displayed under the name of the custom event in the data panel.
- To use data from a specific source for your action:
- After setting up the details of the action, click Save. Or, if you're adding the action as a placeholder, click Save without filling out the action details. Placeholder actions must be filled out before you can turn on the workflow. Learn more about placeholder actions.
- Click the + plus icon to add more workflow actions.
- When building larger workflows, you can use the workflow minimap for a quicker view of your workflow architecture and faster navigation. To use the workflow minimap:
- In the upper left of the workflow. timeline, click Show minimap.
- With the minimap open, you can hover over workflow actions to view the action name, and click an area of the minimap to navigate there.
- To close the minimap, click the arrow icon in the top right of the minimap.
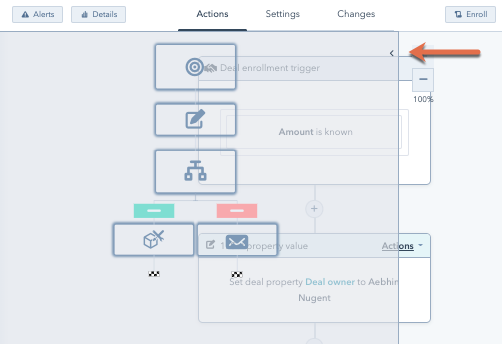
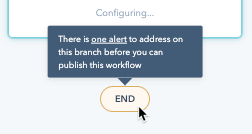
- If your workflow requires any changes before it can be published, the end marker will be yellow. Click the link in the alert and review the changes that need to be made.
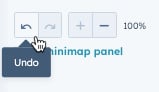
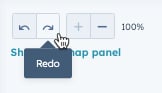
Undo or redo changes
When editing your workflow you can undo or redo changes made to the workflow in the previous 30 days.
Please note: you cannot use the undo and redo functionality for extension actions, custom code actions, or moving or cloning actions.
- Navigate to the workflow editor.
- To undo an action, click the undo icon in the top left. Changes will undo one at a time.
- To redo an action, click the redo icon in the top left. Changes will redo one at a time.
Manage settings
To manage your workflow settings:
- In the top left, click the Settings tab to manage the workflow's execution and notification settings. Learn more about managing your workflow settings.
- In the top left, click Edit > Edit enrollment trigger to manage the workflow's enrollment, unenrollment, and re-enrollment settings.

Turn on your workflow
After setting up your workflow, turn it on to begin automating. If you've saved any placeholder actions, they must be completed before you can turn on the workflow. After you turn your workflow on, you can view the workflow history to monitor the records that are enrolled.
To watch an overview of this process, check out the video below:
| See the full HubSpot Academy lesson: Workflows deep dive |
To review and turn on your workflow:
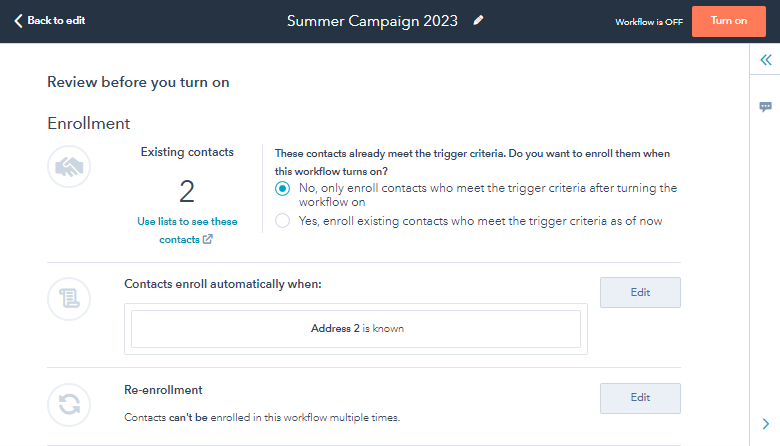
- In the upper right corner, click Review and publish.
- To only enroll records that meet the enrollment triggers after the workflow is turned on, select No, only enroll [objects] which meet the trigger criteria after turning the workflow on.
- If the [object] changes to meet the enrollment triggers for the first time after the workflow is turned on, the [object] will be enrolled.
- If the [object] changes to meet the enrollment criteria again and re-enrollment is turned on, the [object] will be enrolled. Learn more about re-enrollment triggers.
-
- To enroll existing records that meet the enrollment triggers, select Yes, enroll existing [objects] which meet the trigger criteria as of now.
-
- If you have a Marketing Hub Starter, Professional, or Enterprise account, in contact-based workflows you can view a static list of contacts that meet the criteria by clicking Use lists to see these contacts. The list will automatically be saved and can be accessed from your lists dashboard.
Please note: the number of existing contacts displayed on the review page is an estimate. To view an exact number of contacts, create a static list of contacts that meet the criteria by clicking Use lists to see these contacts.
- Review the rest of your workflow settings, including connections and unenrollment, then click Turn on.
- In the dialog box, click Yes, turn on.
HubSpot will store workflow action logs data within the below time periods:
- 90 days: all workflow action log data will be stored, including high-level action log data such as object ID (which contact, company, deal, etc.), event type (enrollment, unenrollment, etc.), and action type.
- 6 months: workflow enrollment history will be stored.
- 2 years+: historical data of enrollments will be retained in our system to enable workflow-based filters.
