- Knowledge Base
- Service
- Feedback Surveys
- Create a custom survey
Create a custom survey
Last updated: January 10, 2026
Available with any of the following subscriptions, except where noted:
-
Service Hub Professional, Enterprise
In addition to customer support and customer satisfaction surveys, you can create custom feedback surveys to send to your contacts. These surveys can have custom questions and options including star ratings, radio selects, and single-line text fields.
Please note: you must have a Service Hub seat to create, edit, and publish surveys. Learn more in HubSpot's Products & Services catalog.
Create a custom survey
- In your HubSpot account, navigate to Service > Feedback Surveys.
- In the upper-right, click Create survey.
- Click Next.
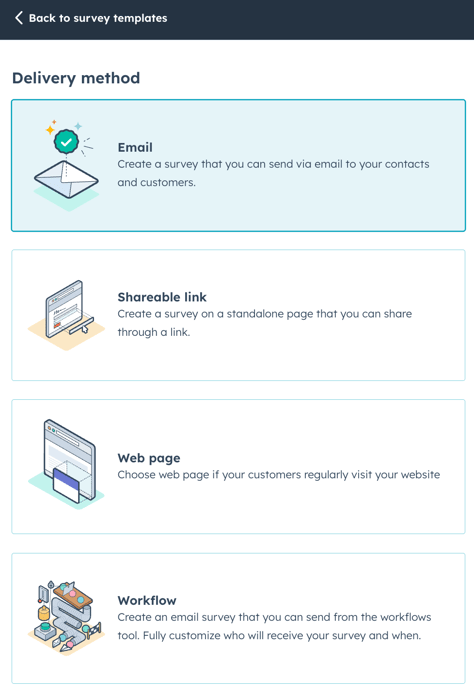
- Select the delivery method:
- Email: the survey will be sent via email to your customers.
- Shareable link: the survey will be created on a standalone page that you share through a link.
- Web page: the survey will be created on one of your website pages.
- Workflow: the survey will be sent to your contacts via workflows. Learn more about sending surveys via workflows.
- Click Create.
- Click the edit pencil icon at the top to enter a name for the survey.
- To send an email survey, users must have Marketing access permissions, including Publish access to the Marketing email tool.
- If you unpublish an email survey, contacts who have been sent the survey will be able to respond for 14 days afterward. Link-based surveys don't expire unless the survey is unpublished.
Survey
- In the left panel, you can select the types of questions you'll be asking your respondents. Click or drag a question to the right panel to build your survey:
- To add a question that's been used in other surveys, select a question from the Previously used questions section.
- To create a new survey question, select one of the types in the Question types. You can add an industry standard question for net promoter score or customer satisfaction by selecting the NPS or CSAT module.
Please note: if you're editing an existing survey that has already been published, you cannot edit or delete the survey questions.
-
In the right preview screen, click a question to edit its details.
- In the Question section:
- Click to toggle the Make this field required switch on to make a question required.
- Click the text box to edit the text or format of the survey question. If you're creating an NPS question, you cannot edit the text or format of the survey question.
- In the Question section:
-
-
- Help text: in the Help text field, provide additional information to clarify the purpose of a field.
- Placeholder text: in the Placeholder text field, enter a prompt or example to guide your visitors on what type of information to enter. This text disappears once the user starts typing.
- If you're creating a Rating question, click the Icon dropdown menu, and select Circle or Star to choose the type of icon used.
-
-
- In the Feedback property section:
- Click Create feedback property to create a new property to store your question's response data.
- In the right panel, you can edit the property label, group, as well as its field type and options.
- Once you're finished, click Create.
- Any property you create in the Survey editor can be used as a filter in other HubSpot tools, such as reports.
- To add an existing custom feedback property, you must first add a question of the same property field type. For example, to view all dropdown select custom feedback properties, add a dropdown select question to the survey.
- To use an existing feedback property, click and type in the Search existing feedback properties bar, or if applicable, select a property from the list.
- Any property you select in the Survey editor can be used as a filter in other HubSpot tools, such as reports.
- In the Feedback property section:
-
-
- Once you've selected a corresponding feedback property, depending on the property field type, click to edit the property's options, values, and labels. For Rating properties, select the Reverse scale checkbox to change the order of your rating values.
- You can also add dependent fields to custom feedback surveys. Learn more about using dependent fields in custom feedback surveys.
- Click Done in the top left to continue building your survey.
-
- In the Common modules section, click and drag a module to the right preview to add a header, paragraph of text, image, divider, or step to your survey.
- If you're adding a step to your survey, click and drag the Step module to the right preview, then customize the modules within each step. Once published, each step will have its own page within the survey and a progress bar will appear to show users their progress.
- To continue editing an Email survey, click the Thank you tab. To continue editing a Shareable link or Web page survey, click the Options tab.
Thank you
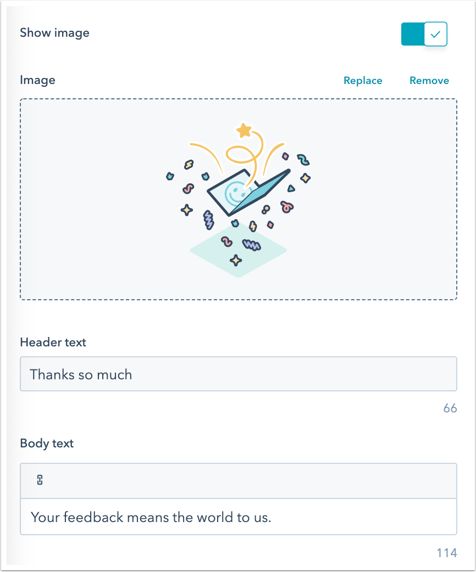
- To include a default image at the top of your thank you message, click to toggle the image switch on. Click Replace to change the image.
- Enter your Header and Body text.
- Continue to the next tab:
- For email and workflow surveys, click the Recipients tab.
- For shareable link surveys, click the Automation tab.
- For web page surveys, click the Targeting tab.
Email (Email and Workflow surveys only)
- In the Email settings section, set the Survey language, Company name, Company URL, From name, and From address for your survey. You can select the name and address of any user in your account.
- In the Subject line field, enter your subject line.
- , Click contacts Personalization token to add a personalization token.
- Custom surveys using email delivery can include contact, deal, or ticket personalization tokens. The available tokens depend on the trigger criteria you've selected for sending the survey. For example, if you've chosen a ticket pipeline trigger, you can use ticket personalization tokens.
- Custom surveys using workflow automation can include contact personalization tokens.
- Enter the default value and then click Insert.
- , Click contacts Personalization token to add a personalization token.
- In the Advanced settings section, you can select an office location. This information will appear in the footer of the email.
- In the Email body section, enter a Greeting and Introduction for your survey email. Click contacts Personalization token to add a personalization token.

- In the Theme section, add a featured image.
- Click to toggle the Featured image switch on and click Replace.
- In the right panel, select an image or click Add image to upload a new image.
- Click Remove to remove the image.
- To edit the text of the start survey button, enter Button text.

- Select one of the default color options, or set a custom color by entering a hex color value or clicking the color picker to the right.
- In the right panel, preview how the survey will look.
Options (Shareable link and Web page surveys only)
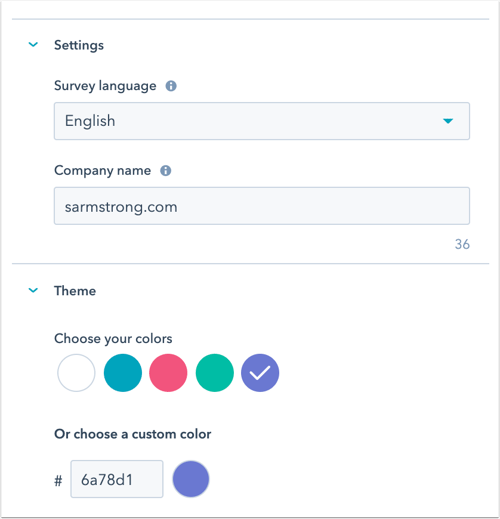
- In the Settings section, click the Survey language dropdown menu and select the language you want the survey to be in.
- If you're creating a Shareable link survey, enter your Company name.
- In the Theme section, select one of the default color options, or set a custom color by entering a hex color value or clicking the color picker to the right.
- To continue, click the Thank you tab.
Recipients (Email surveys only)
- In the Who section, select the trigger criteria contacts must meet to be sent the survey:
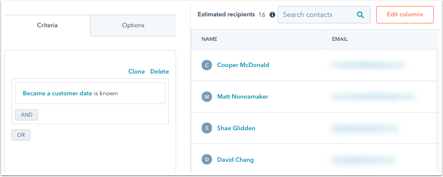
- Contact-based surveys: trigger your survey based on the date your contact became a customer, contact or associated object properties, or by selecting static lists. Survey responses will be associated to the contact and associated company only. To associate survey responses with tickets or deals, select the trigger type Ticket pipeline or Deal stage.
-
- Became a customer date: select this option to send the survey to customers who became a customer more than 30 days ago.
- Start from scratch: select this option to create your own criteria.
-
- Static lists: select this option to send the survey to contacts from a static list you’ve already created.
- Ticket-based surveys:
- Ticket pipeline: select this option to send the survey when a ticket in a selected pipeline is closed. Survey responses will be associated with the contact, associated company, and ticket. Each ticket pipeline can only be linked to one survey.
- Deal-based surveys:
- Deal pipeline: select this option to send the survey when a deal enters a specific stage. Survey responses will be associated with the contact, associated company, and deal. Each deal stage can only be linked to one survey.

- In the When section, select when the survey is sent:
- When the recipient meets the criteria: the email will send when the contact meets the criteria set in the previous section.
- Add delay: select how many minutes/hours/days the survey will send after the recipient meets the criteria.
- In the Frequency section, select how often the survey will be sent. By default, One off will be selected.
- To send the survey to customers on a regular basis, select Recurring and use the dropdown menu to select a cadence.
- It's not possible to send surveys, ticket-based or deal-based surveys on a recurring basis.
- Once a customer responds to a survey, your team can view responses within help desk or the inbox. They'll be visible on the Past Feedback card in the right panel.
- To continue, click the Automation tab.
Targeting (Web page surveys only)
On the Targeting tab, target your visitors by choosing when you want the survey to appear on your site.
Target website pages
In the Where section, choose the website URL to display the survey on. You can add conditional logic for specific URLs and/or query parameter values. By default, the survey will appear on all pages.
- To show the survey when the visitor is on a specific website URL, in the Website URL section:
- Click the first dropdown menu and select Website URL.
- Click the second dropdown menu and select a targeting rule.
- Enter your rule criteria in the text field.
- To show the pop-up form when a visitor is on a website page whose URL includes specific query parameters:
- Click the first dropdown menu and select Query parameter.
- In the first text field, enter the query parameter name.
- Click the dropdown and select a targeting rule.
- In the second text field, enter the query parameter value.
- To add another rule, click Add rule.
- To exclude the survey from certain pages, click Add exclusion rule.
- Select the option to Turn off survey on small screen sizes (mobile, tablet devices) to prevent the survey from showing on small screen sizes.
Triggers
In the When should it be shown section, set when the survey will appear on the page. You can select from the following options:
- Trigger on button click: when the visitor clicks a button on a page, display the survey.
- Trigger on page scroll: the survey will appear when the visitor scrolls beyond a certain % of the page.
- Trigger on exit intent: the survey will appear when the visitor moves their cursor to the top bar of the browsing window.
- Trigger after elapsed time: the survey will appear when the visitor has spent a specific duration on your page.
- Trigger after inactivity: the survey will appear when the visitor is inactive on your page for a specific duration.
Frequency
- In the Frequency section, choose how often the survey will appear. You can select from the following options:
- After a set time period: once a visitor has responded, the survey will appear every {x} days. Click the dropdown menu and select the number of days.
- Repeat: the survey will appear every time the visitor visits the selected web page, even if they've responded to the survey before.
- Don't show again: once a visitor has responded to the survey, the survey won't appear again.
- Click the Automation tab to continue.
Automation
Decide which users get notified about new survey responses.
Email survey automation settings
- To select users and/or teams to receive survey response notifications, click the Add users or teams dropdown menu and select a user or team.
- To remind customers to complete the survey, click the Send survey reminder email dropdown menu and select how many days after the initial survey is sent to resend the survey email. Then, toggle the switch on to resend the email.
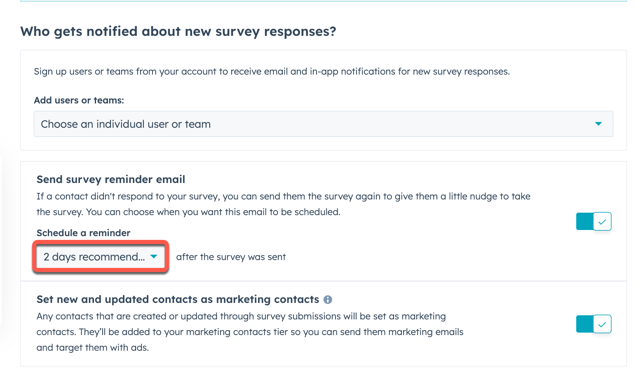
Please note: Send survey reminder email options are not supported in custom survey's using workflows as the delivery method.
- To create a workflow and automate actions based on your survey, at the top, click Create workflow. A new tab will open for you to create a workflow.
- If your HubSpot account has access to marketing contacts, you can set any contacts created through this survey as marketing contacts. The Set contacts created as marketing contacts toggle is switched on by default.
Shareable link and web page survey automation settings
- Click the Add users or teams dropdown menu to select which users receive a notification when a survey response is submitted.
- To create a workflow and automate actions based on your survey, at the top, click Create workflow. A new tab will open for you to create a workflow.
- If your HubSpot account has access to marketing contacts, you can set any contacts created through this survey as marketing contacts. The Set contacts created as marketing contacts toggle is switched on by default.
Review and publish
Review your survey settings to ensure that the settings in previous steps have been set up correctly.
- To see how the survey will appear on desktop, mobile, and tablet, click Preview.
- If you're creating an Email survey, to send yourself a version of the survey, click Send test survey in the top right. You can preview the email as a specific contact by clicking the Receive email as specific contact dropdown menu and then selecting a contact.
- If you're creating a Shareable link survey:
- Click Share in the top right, then click Copy in the dialog box to copy the survey link.
- Click externalLink Test survey in the top right to open a preview of the survey in a new tab.
- To review your settings, click Review and publish in the top right.
- When you're done, click Publish to take your survey live.
- After publishing the survey, you won't be able to edit or delete any of the survey's questions. Instead, you'll need to unpublish the survey and create a new one.
- To unpublish a survey:
- In your HubSpot account, navigate to Service > Feedback Surveys.
- Hover over the survey, click the Actions dropdown menu, and select Unpublish.
Edit, clone, and delete a survey
- In your HubSpot account, navigate to Service > Feedback Surveys.
- To edit an existing survey, hover over the survey and click Edit.
- To clone a survey, hover over the survey and click Clone.
- In the popup box, give the cloned survey a name and click Clone.
- To delete a survey, hover over the survey and click Actions > Delete.
- In the popup box, select the checkbox and click Delete.
