Set up a customer portal
Last updated: April 12, 2024
Available with any of the following subscriptions, except where noted:
|
|
Give customers control over their communication with your company using a customer portal. A customer portal is a home behind a login where customers can view, open, and reply to their support tickets. Typically, customers can access the customer portal via the knowledge base, but you can also share a link to the portal directly with your customers.
Only conversations that are associated with a ticket will appear in the customer portal; this includes messages sent to a chat, Facebook Messenger, form submission, or connected team email channel. Emails sent to or from an email address that is not connected to the conversations inbox will not appear in the customer portal.
Please note: you must have Customer Portal settings access to set up the customer portal.
Set up a customer portal
Before you turn on your customer portal, you need to connect a domain, set up your login and authentication method, and customize your consent to process language. You can also manage the customer portal's branding, preview the ticket listing and ticket detail page templates, and add a support form to your customer portal.
- In your HubSpot account, navigate to Service > Customer Portal.
- Enter a page title. This is the title that will appear in the browser tab when customers are logged into the customer portal.
Connect a domain
You can edit the URL slug in your customer portal settings. If you don't already have a domain set up for your knowledge base, you can connect one from your Customer Portal settings:
- In your HubSpot account, click the settings settings icon in the top navigation bar.
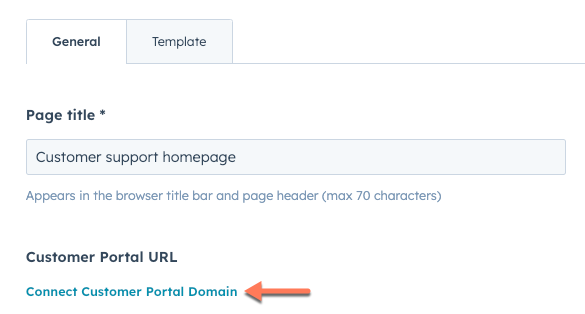
- On the General tab, under Customer Portal URL, click Connect Customer Portal Domain.
- Click Connect a domain, then follow the instructions to connect a primary domain to HubSpot.
Please note: you cannot use the default hs-sites domain to host your customer portal.
The customer portal will appear in the primary language set for your domain. If you change your domain's language in your Domains & URLs settings, the customer portal language will also update. Click Manage domain language to make changes to your domain. Learn more about HubSpot's language offerings.
Please note: multiple language customer portals are not supported at this time.
Set up login and authentication
Your customers must login to access their customer portal. You can either require member registration to access the portal or provision access using single sign-on (SSO).
Require member registration
When requiring member registration, you can either allow customers to create their own login or give access to a specific list of contacts.- To allow users to create their own login, navigate to your private content settings:
- In your HubSpot account, click the settings settings icon in the top navigation bar.
- In the left sidebar menu, navigate to Content > Private Content.
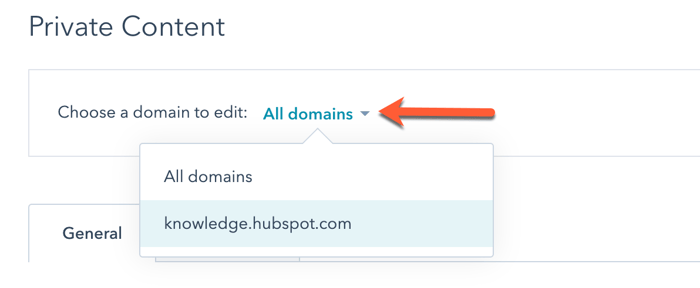
- Click the Choose a domain to edit dropdown menu and select the domain where your customer portal is hosted.
-
- Select the Allow self-registration checkbox. This will allow anyone to register and create their own login for the customer portal.
- If you only want to give access to a specific list of contacts, navigate back to your Customer Portal settings:
- In your HubSpot account, navigate to Content > Customer Portal.
- In the Customer Portal Access section, select the Give specific contacts access with lists option, then click the dropdown menu and select the lists to give access to.
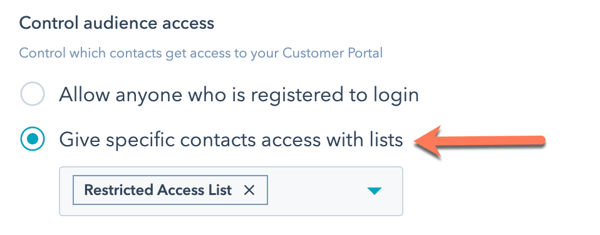
A simple registration email will be sent to the list of contacts. Learn how to customize the registration email.
Set up private content system pages
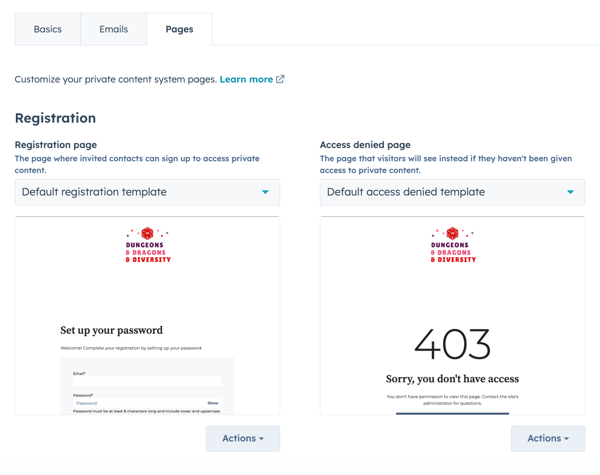
You can select and edit the system pages that your customers will use when accessing their portal, including the pages where they can register, sign in, and sign out. You can also configure an access denied page and password reset pages.
To set up your customer portal system pages:
- In your HubSpot account, click the settings settings icon in the top navigation bar.
- In the left sidebar menu, navigate to Content > Private content.
- Click the Pages tab.
- Under each type of system page, click the dropdown menu and select a template.
- After you select a template, you can edit or preview it by clicking Actions then selecting the corresponding option.
Provision access using single sign-on (SSO)
SSO allows your customers to use a single set of login credentials in your external app and customer portal.
- In your HubSpot account, click the settings settings icon in the top navigation bar.
- In the left sidebar menu, navigate to Content > Private Content.
- In the Single Sign-on (SSO) section, click Set up SSO. Your IT administrator can set up a HubSpot application in your identity provider account, such as Google or Okta, and provision access to your customers there. SAML and JWT-based applications are supported for the customer portal. Learn more about setting up SSO.
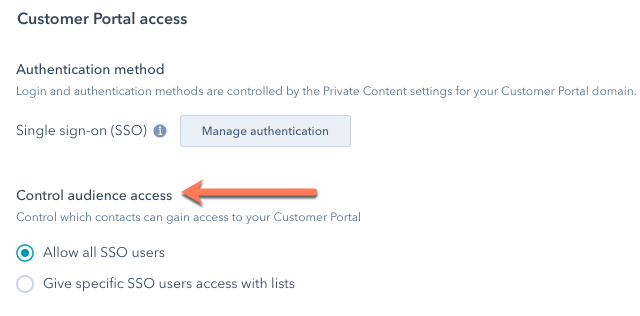
- When SSO is configured, you can choose to allow all SSO users to access the customer portal, or give access to a specific list of contacts:
- In the left sidebar menu, navigate to Content > Customer Portal.
- In the Control audience access section, select either Allow all SSO users or Give specific SSO users access with lists.
Customize consent to process language (optional)
If you're allowing customers to self-register to access their customer portal, you should configure your consent notice to let them know how you will be using their data.
Please note: while these features live in HubSpot, your legal team is the best resource to give you compliance advice for your specific situation.
- In your HubSpot account, navigate to Content > Customer Portal.
- In your Customer Portal settings, click Manage consent to process.
- You'll be brought to your Private Content settings. Click the Choose a domain to edit dropdown menu and select the domain where your customer portal is hosted.
- In the Consent to process data section, click Edit explicit consent content.
- In the Notice and consent panel, update the consent to process text or consent to process checkbox label, then click Save. You can also link out to your legal team's external resources from the Notice and consent text, if applicable.
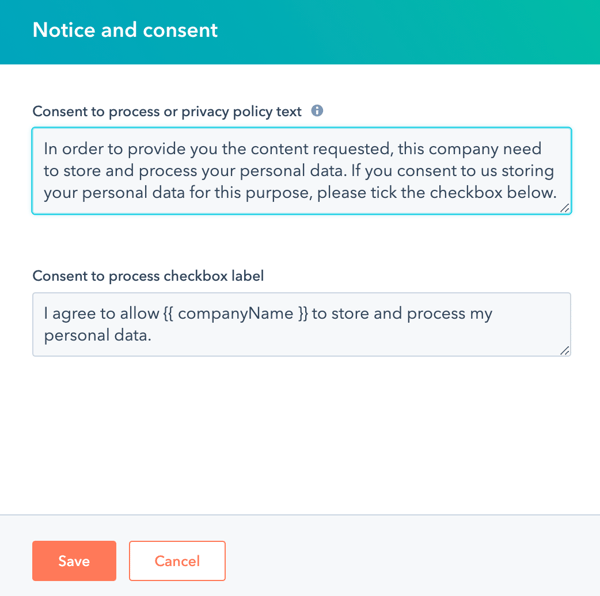
This will only update the consent to process text for your customer portal. Learn how to set default notice and consent text for other HubSpot tools.
Set up ticket filters and manage access
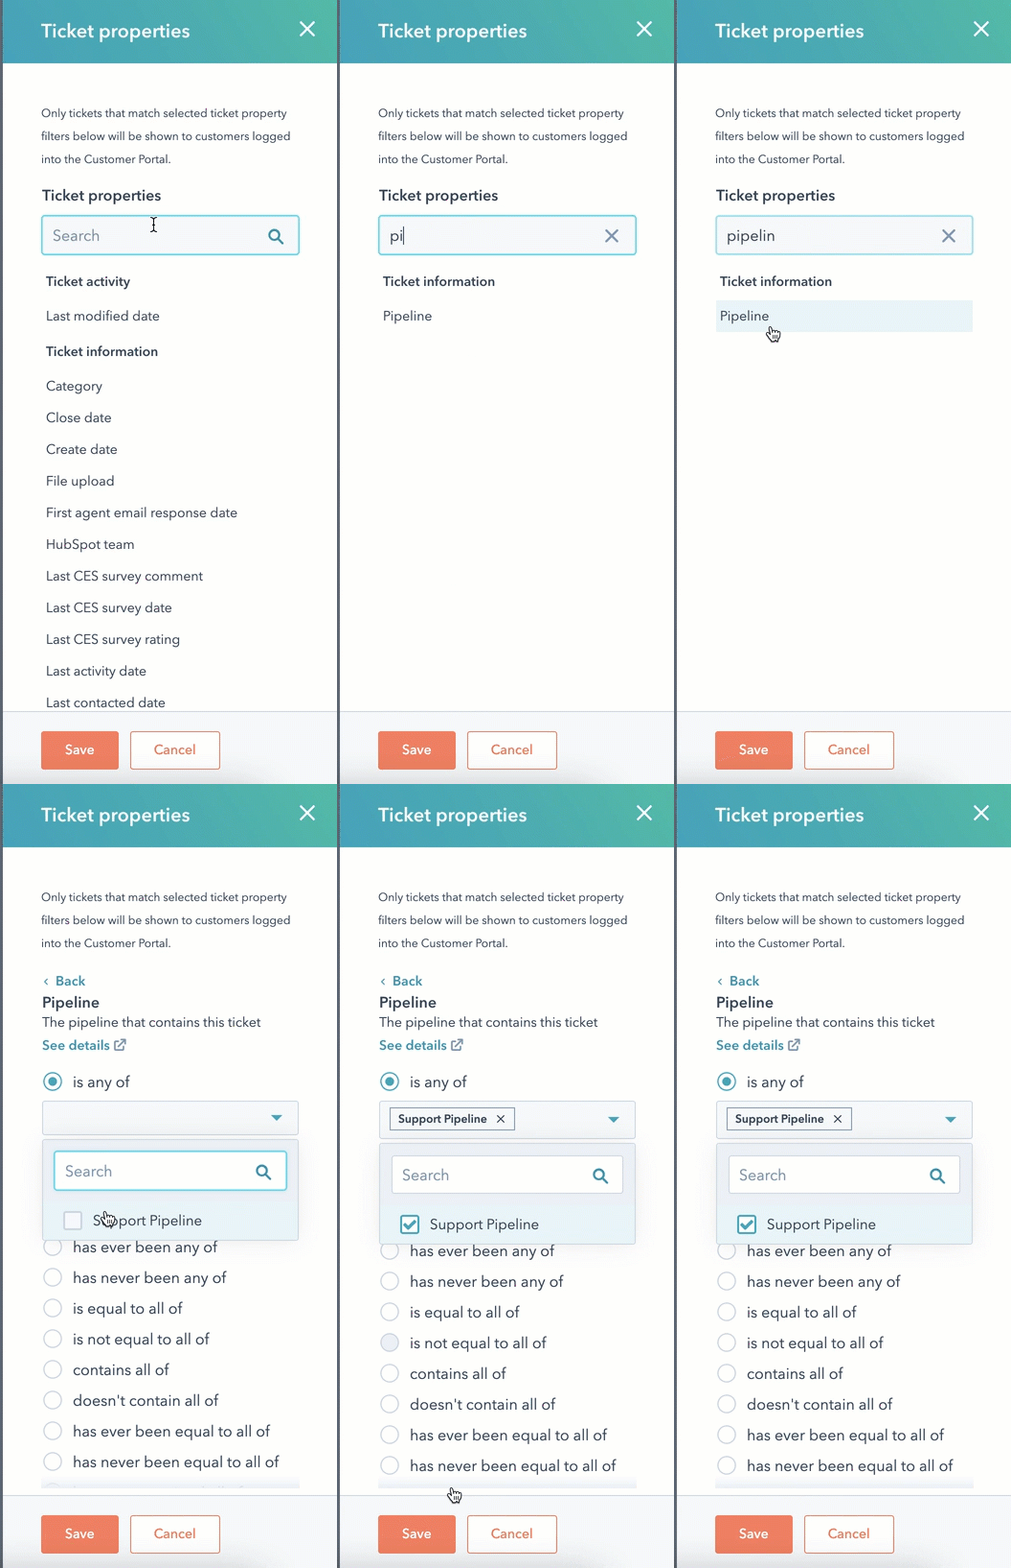
Using filters, you can customize which tickets appear in the customer portal. Only the tickets that meet the filter criteria selected here will appear in the customer portal. For example, if you only want the tickets created in your support pipeline to appear, you can set up a filtering rule to only include tickets in a specific pipeline.
- In your HubSpot account, navigate to Content > Customer Portal.
- Click Configure ticket properties.
- In the right panel, select a ticket property to filter by, then select an option for the filter criteria.
- Click Save.
To verify which conversations will appear in the customer portal, use the Conversations card in the ticket record's right sidebar. If multiple conversation threads are associated with a ticket, only the most recent thread will appear in the customer portal.
It's recommended that you and your team use notes and comments to communicate internally on your tickets, or set up filtering rules to filter out any internal communication from the customer portal.
You can also choose which tickets a contact has access to in the customer portal:
- In your HubSpot account, navigate to Content > Customer Portal.
- In the Ticket Permissions section, select an option:
- Allow your customers to view only tickets that their contact is associated with: when a contact logs into the customer portal, only the tickets that are associated with their contact record will appear.
- Allow your customers to view any tickets that their company is associated with: when a contact logs into the customer portal, any tickets that are associated to their primary company record, in addition to the tickets associated to their contact record, will appear.
- Click Save.

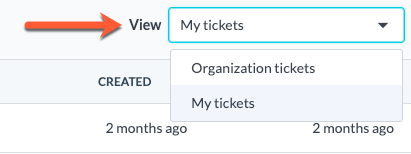
If you select Allow your customer to view any tickets that their company is associated with, your customers can switch between their tickets and their company's tickets. When the customer logs accesses their customer portal, they can click the View dropdown menu in the top right of the Tickets view, then select an option:
- Organization tickets: all tickets associated with the customer's company will appear.
- My tickets: only tickets associated with the customer's contact will appear.
Select a default inbox
You can select a default inbox for tickets in the customer portal that aren't associated to a conversation in the inbox. For example, if a customer calls your support phone line and a rep creates a ticket for the customer, the ticket will appear in the customer's portal but will not be associated with a thread in the inbox. When the customer logs into their customer portal, they can reply to the ticket and their response will appear in the inbox that you select here.
- In your HubSpot account, navigate to Content > Customer Portal.
- In the Default Inbox section, click the dropdown menu and select an inbox.

Customize ticket templates and branding
When a customer logs into their customer portal, they can view a list of their tickets on the listing page, then click into individual tickets to view the associated conversation. You can preview the ticket listing and detail page templates, review your branding settings, or add a support form to your portal so visitors can submit a new ticket.
- In your HubSpot account, navigate to Content > Customer Portal.
- Click the Template tab.
- Next to the template that you want to review, click Edit.
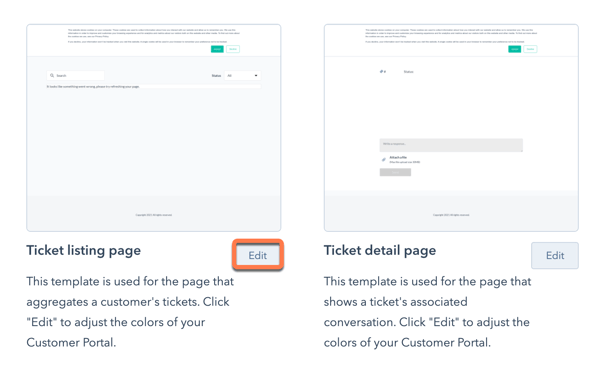
- In the theme previewer, use the styling options to make sure your customer portal's appearance stays consistent with the rest of your website. Learn more about editing theme style settings.
Please note: if you make changes to the theme styles, these changes will apply to the ticket listing, ticket detail, and ticket form page.
- The customer portal inherits the favicon and colors that you select in your account's branding settings. You can change the default logo in your knowledge base template or by creating custom membership templates. Currently, there are no additional customization options for the customer portal.
- To select the navigation menu that will appear in your customer portal, click Customize your Customer Portal navigation menu. In the right panel, click the Menu dropdown menu and select a navigation menu, or learn how to create a new menu.
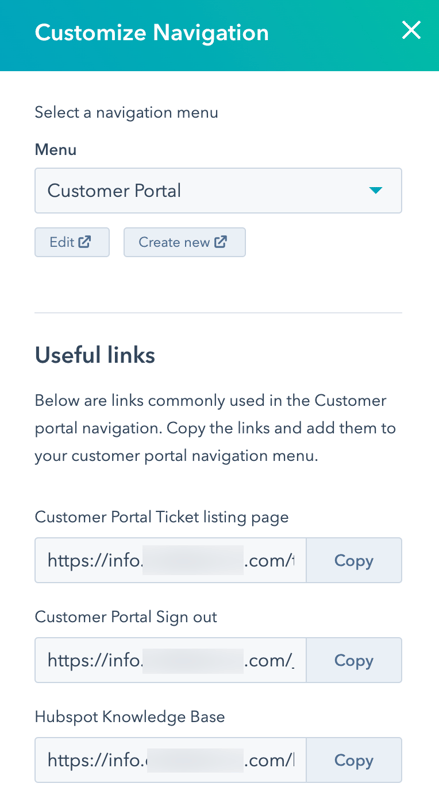
- You can also give customers access to the customer portal from your knowledge base template.
- In your HubSpot account, navigate to Content > Knowledge Base.
- In the top right, click Customize template.
- In the left panel, on the Content tab, click Navigation bar.
- Click to toggle the Show customer portal link ON.

When a customer is on the knowledge base, a Go to [customer portal name] hyperlink will appear in the top right.
Add a support form to your customer portal
You can add a support form to your customer portal so that when a visitor is logged in, they can submit a new support request from their customer portal. A File a Support Ticket link will appear in the customer portal navigation menu.
- In your Customer Portal settings, click the Templates tab.
- In the Connect a Support Form section, click the Forms dropdown menu and select a form.
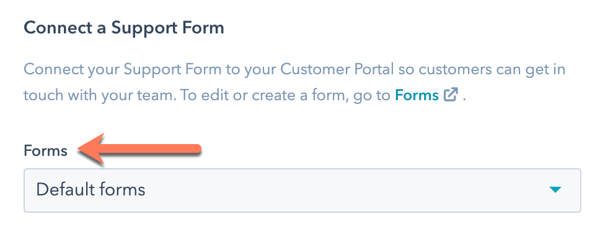
You must select a form that includes ticket properties and that is connected to the conversations inbox. To add ticket properties to your form, you can either create a form using the Support form template, or turn on ticket properties in the form builder. To turn on ticket properties for a form:
- In your HubSpot account, navigate to Marketing > Forms.
- Hover over the form and click Edit.
- In the left panel of the form editor, click to toggle the Ticket properties switch on.

- If you have multiple inboxes, in the dialog box, click the dropdown menu and select an inbox, then click Save.
A ticket will be created for each form submission, which will appear in the customer's own customer portal in addition to your conversations inbox.
Turn on a customer portal
Once you have completed the set up steps, you can turn on your customer portal by clicking to toggle the switch ON.

Any messages sent from the customer portal to your team will appear in the conversations inbox and appear as an email engagement on the record's timeline.
Give contacts access to the customer portal
To access the customer portal, you can either share the link to the portal with your customers or they can access the portal via the knowledge base. To view your customer portal:
- In your HubSpot account, navigate to Content > Customer Portal.
- In the top right, click View Customer Portal.
Depending on the login and authentication method you selected, before a customer can access their customer portal, they may need to set up their login credentials.
- If customers are able to self-register, a Register here link will appear below the login credential fields.
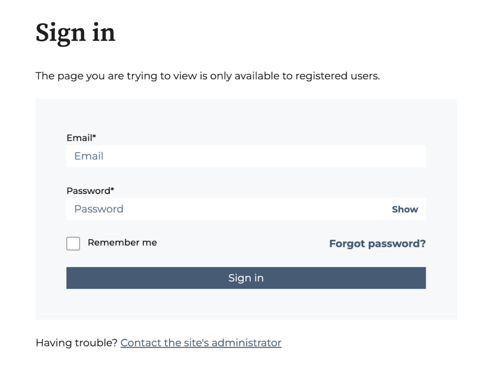
- If only a specific list of contacts have access, an email will be sent to them so they can set up their login.
Please note: if you are logged into your HubSpot account when you visit the customer portal, you will not have to login to view the ticket listing page.
When your visitors log in to their customer portal, they can view all of their open and closed tickets on the ticket listing page, and filter and search for existing tickets.
The following ticket properties are visible in the customer portal by default:
- ID
- Subject
- Create date
- Last activity date
- Status
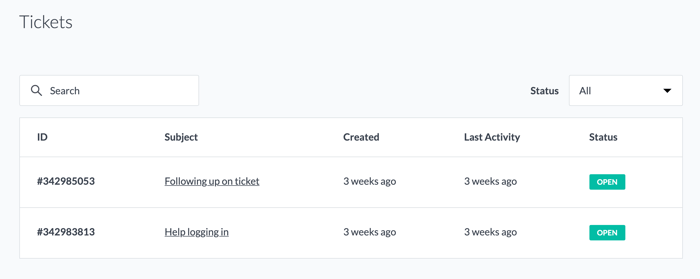
By default, a ticket's status will only appear as Open or Closed. To make the full name of a status of a ticket visible, you can update your customer portal settings:
- In your HubSpot account, click the settings settings icon in the top navigation bar.
- In the left sidebar menu, navigate to Content > Customer portal.
- Click the Template tab.
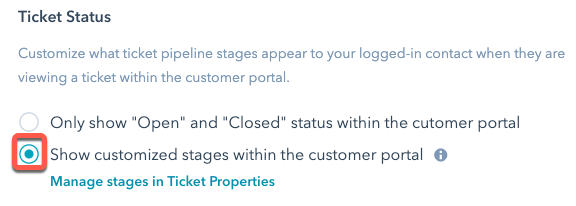
- Under Ticket Status, select the Show customized stages within the customer portal radio button.
- Click Save.
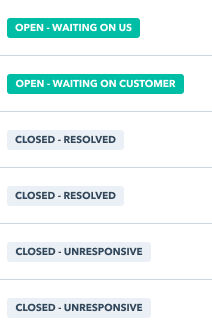
- The detailed status will now appear for each ticket, and will include any custom ticket statuses that you've configured.
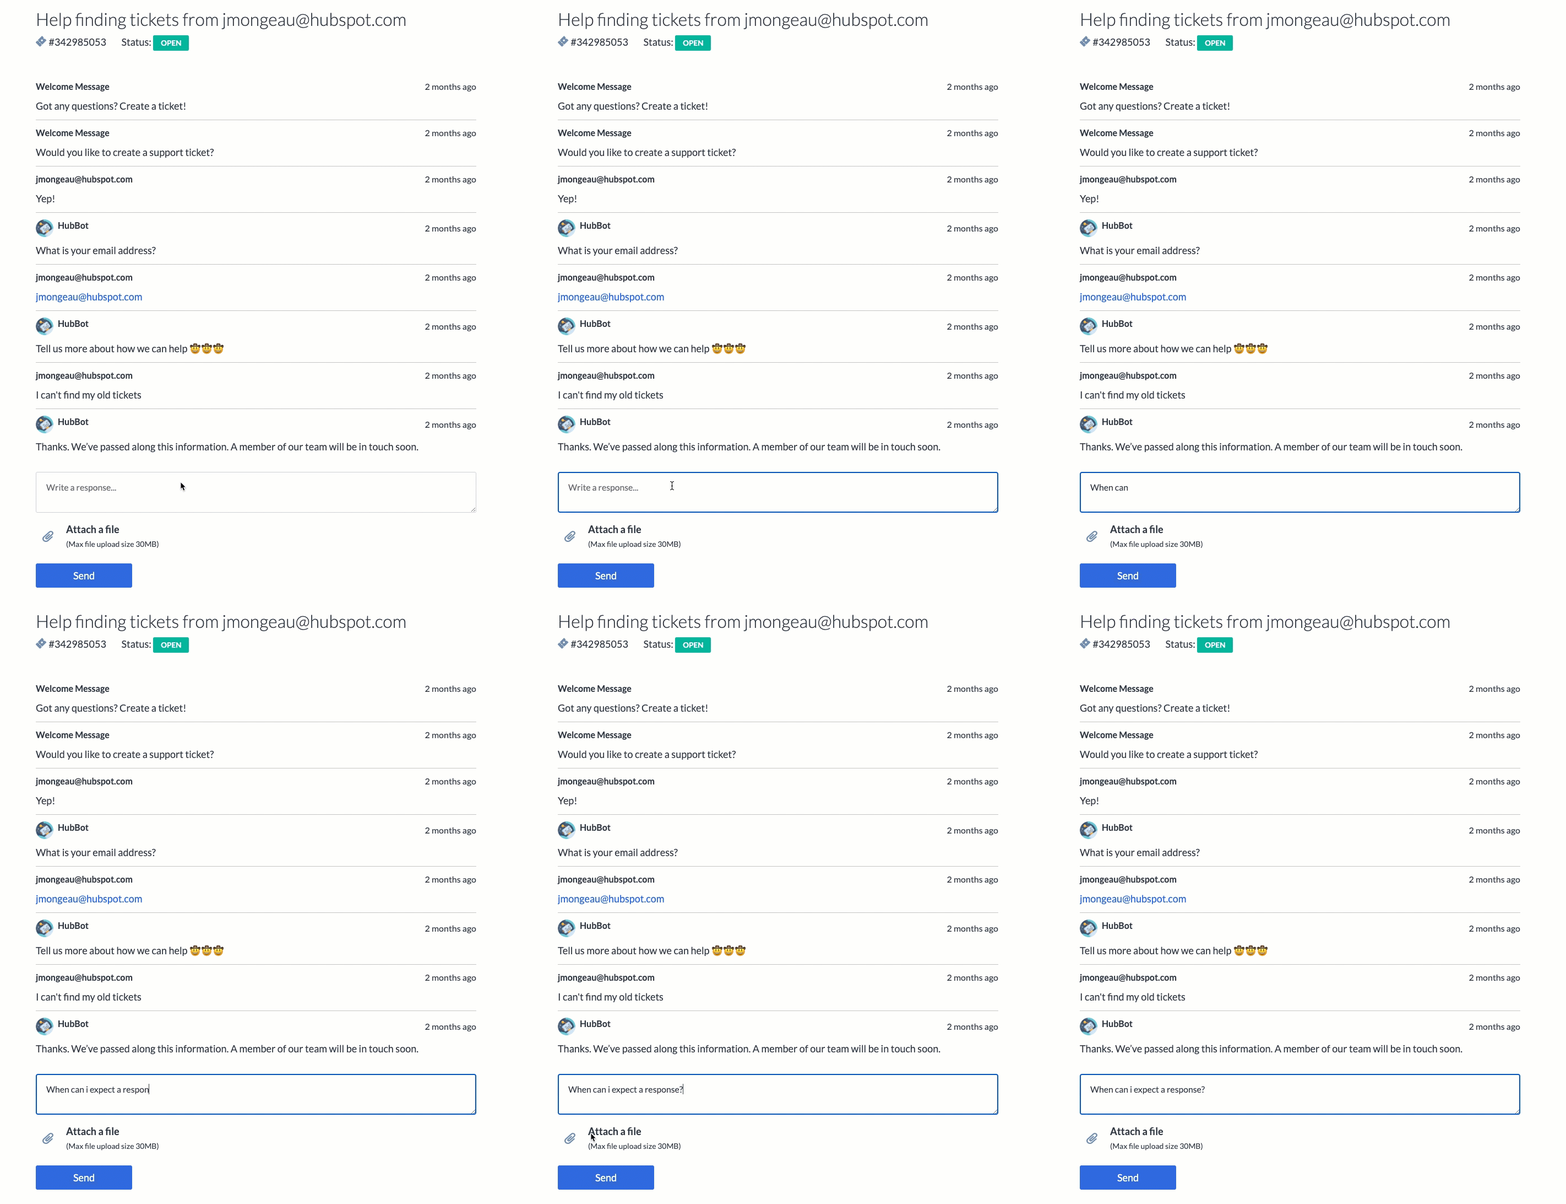
To view more ticket details and the associated conversations, your customer can click the name of a ticket to open the ticket details page. The customer can reply to any open tickets by entering a message in the text box, and include a file attachment in their response.
Please note: if multiple conversation threads are associated with a ticket, only the most recent thread will appear in the customer portal.
If the customer needs to file a new ticket, they can click File a Support ticket. This will take them to the ticket form that you created so they can submit a new issue.
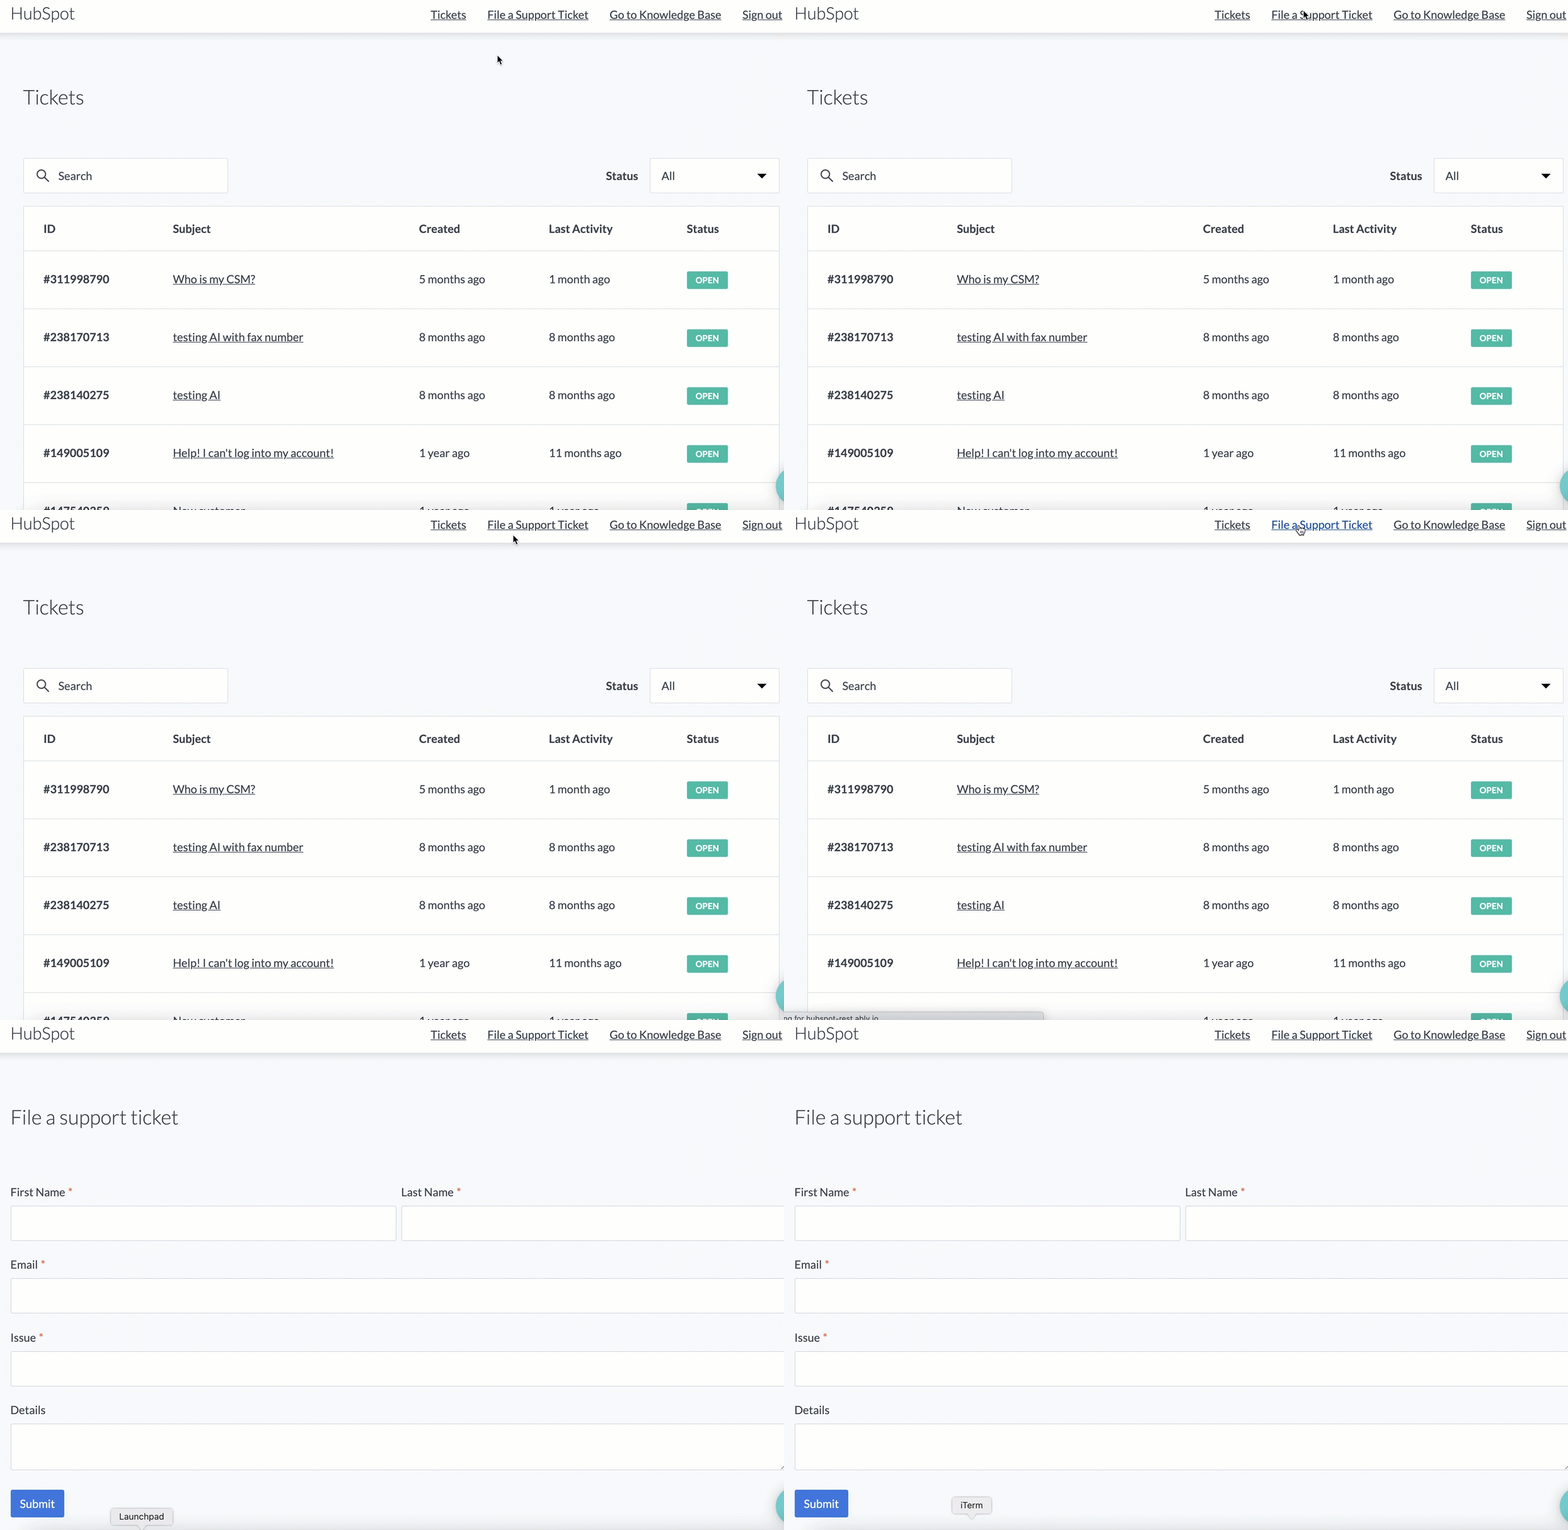
To log out of their portal, the customer can click Sign out in the top right. To automatically log customers out after a period of inactivity, you can set up idle session timeouts.
