
Last updated: March 26, 2024
Available with any of the following subscriptions, except where noted:
|
|
In your calendar settings, you can connect a Google, Office 365, or Exchange calendar to the meetings tool. A connected calendar enables you to:
- allow contacts to schedule meetings on your calendar while preventing them from booking meetings over existing calendar events
- sync meetings created in HubSpot to your calendar
- sync HubSpot tasks to your calendar (Sales Hub and Service Hub Professional and Enterprise only with a paid seat)
- customize your meeting scheduling page URL and domain
- add a meeting link to your chat profile
A connected calendar is not required to view, edit, or create scheduling pages in the meetings tool, but it is required to book meetings. If a calendar is not connected, the scheduling page will be in offline mode, so meetings can be requested but will not be automatically added to the calendar.
To connect your calendar, you must have Personal email access granted in your settings.
Please note: if your account was created before March 13, 2023 you may have connected one account for calendar settings and one account for meeting settings. You will maintain these connections. However, if you disconnect one of the accounts after March 13, 2023, you will only be able to connect one account.
Connect your Gmail or Office 365 calendar
You can connect a calendar that is hosted with Google Apps (G Suite), Gmail (Google Free), or Office 365. Before connecting your calendar, keep in mind the following:
- If you've connected your inbox as a shared inbox in the conversations tool, your calendar cannot be connected with the meetings tool. Only personal inboxes can be connected to the meetings tool.
- When you connect a calendar, the associated inbox will automatically connect in your email integration settings. After connecting your calendar, you can disconnect the inbox.
- Ensure that you're logged into the correct Gmail or Office 365 account before connecting to HubSpot.
To connect a calendar:
- In your HubSpot account, click the settings icon in the top navigation bar.
- In the left sidebar menu, navigate to General.
- Click the Calendar tab.
- Click Connect your Calendar.
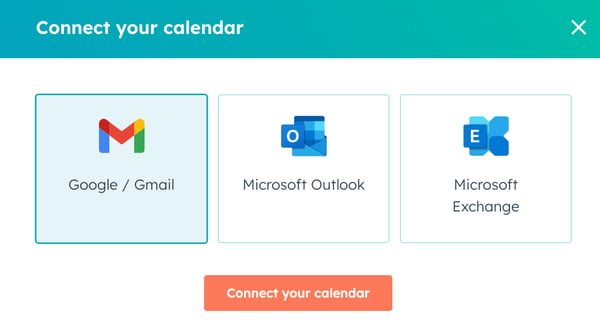
- In the dialog box, click Google / Gmail or Office 365, then click Connect your calendar.
- Review the information in the dialog box, then click Accept and connect to [Google/Office 365] to give the meetings tool access to your calendar.
- On the Google sign-in page, select the account you want to connect to, then review the permissions. Click Allow to continue connecting your calendar.
- On the Office 365 sign-in page, ensure you're signed in to the correct account and review the permissions. Click Yes to continue connecting your calendar.
You'll be redirected to the meetings dashboard, where you can manage your calendar settings.
Necessary disclosure: HubSpot will have access to both your Google Calendar and any other calendar you access via Google in order to power the meetings tool, and allow you to associate events with contacts in the CRM. HubSpot will have the ability to create or change your calendars, and update individual calendar events.
Connect your Exchange calendar
Before connecting your Exchange calendar, keep in mind the following:
- Confirm with your IT team that your Exchange server is running Exchange 2010 SP2 and above.
- Your Exchange email address and password are required to connect your calendar, but depending on your Exchange server's configuration, HubSpot may require additional information to connect. Refer to the table below before connecting your calendar to make sure you have all of the necessary information.
| Information (*required) | Example values |
| Email address* | jdoe@hubspot.com |
| Password* | HubSpot123 |
| Username | jdoe |
| Exchange URL | https://email.hubspot.com/ews/exchange.asmx |
| Exchange version | Exchange 2010 SP2 and above |
Please note: if your Exchange account is configured to use two-factor authentication, you'll need to enter a third-party app password. Review documentation from Microsoft to learn how to generate a third-party app password.
Before you connect your calendar, keep in mind the following:
- You cannot cancel or reschedule a meeting for a connected Exchange calendar.
- Bi-directional sync between your Exchange and HubSpot calendars is not supported:
- Meetings created via a CRM record will not be added to an Exchange calendar.
- Meetings created in an Exchange calendar not sync with HubSpot as a calendar event.
- You cannot insert proposed meeting times in an email using an Exchange calendar.
To connect a calendar:
- In your HubSpot account, click the settings icon in the top navigation bar.
- In the left sidebar menu, click General.
- Click the Calendar tab.
- Click Connect your calendar.
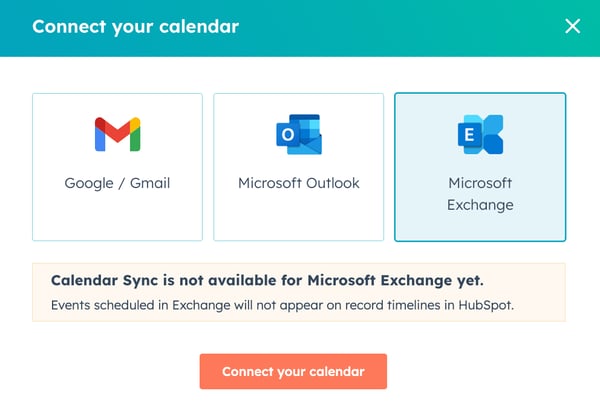
- In the dialog box, select Exchange, then click Connect your calendar.
- Read through what to expect when you connect your calendar to HubSpot, then click Continue.
- In the dialog box, enter the following information:
- Email address: your exchange email address.
- Username: enter your username. Typically, this is what is listed before the @ symbol in the email address, or your user ID.
- Password: your Exchange password.
- Exchange URL: enter the URL used to access your Exchange server.
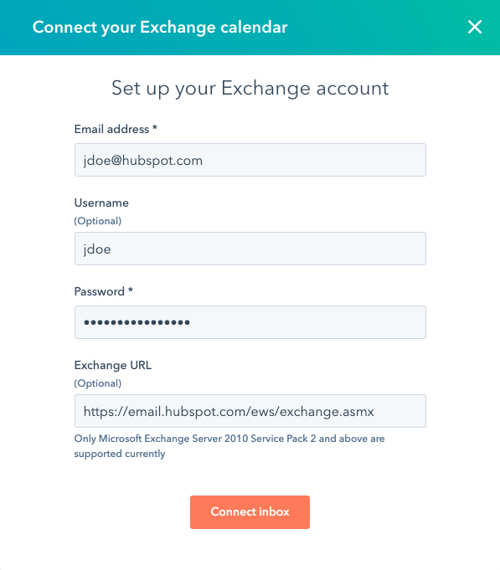
- Click Connect inbox.
You'll be redirected to the meetings dashboard, where you can manage your calendar settings.Manage your calendar settings
Customize your connected calendar settings
After connecting your calendar, you can:
- allow HubSpot to sync with your calendar.
- users with an assigned Sales Hub or Service Hub Professional or Enterprise paid seat can sync their HubSpot tasks to their calendars.
- allow HubSpot to create a meeting scheduling page and connect additional calendars.
- users with an assigned Sales Hub or Service Hub paid seat can customize their scheduling page URL.
- depending on your HubSpot subscription, you can also host the scheduling page URL on a custom domain that is connected to HubSpot.
- add a scheduling page to your chat profile.
To manage your calendar settings:
- In your HubSpot account, click the settings icon in the top navigation bar.
- In the left sidebar menu, navigate to General.
- Click the Calendar tab.
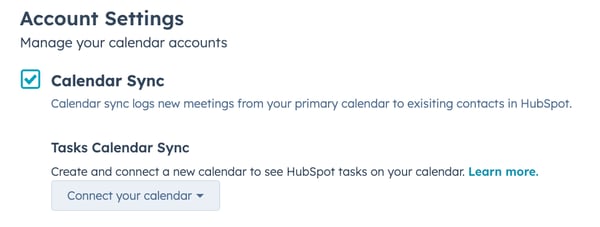
Sync your calendar and tasks
By default, the Calendar Sync checkbox will be selected when you connect your Google Calendar or Office 365 Calendar
Please note: calendar sync does not sync meetings created by integrations.
With calendar sync, meetings created directly on a contact record in the CRM will send calendar event invitations to the contact. Without calendar sync, it will create a meeting engagement on the record with no calendar event invitation sent. Learn more about scheduling meetings in HubSpot.
- In your HubSpot account, click the settings icon in the top navigation bar.
- In the left sidebar menu, navigate to General.
- Click the Calendar tab.
- Select the Calendar Sync checkbox.
If your calendar is synced and you have a paid seat of Sales Hub or Service Hub, you can also sync your HubSpot tasks to a subcalendar so HubSpot tasks appear on your Google or Office 365 calendar. Learn more about syncing your HubSpot tasks to your calendar.
Turn on meeting scheduling pages and connect availability calendars
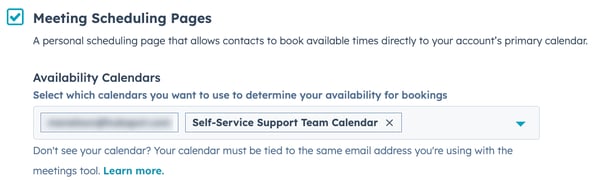
By default, the Meeting Scheduling Pages checkbox will be selected when you connect your Google Calendar or Office 365 Calendar sync with HubSpot. With this selected, you will be able to create a personal scheduling page that allows people to book available times directly to your account’s primary calendar. You can then connect additional calendars to your integrated calendar so that HubSpot will check your availability on each calendar before presenting available times to your prospects. Learn more about creating a meeting scheduling page.
Please note: if you are using Gmail and you have permission to view another email address's calendar, your email must have the Gmail permission View all event details for the calendar to be shown as an option in HubSpot.
- In your HubSpot account, click the settings icon in the top navigation bar.
- In the left sidebar menu, navigate to General.
- Click the Calendar tab.
- Select the Meeting Scheduling Pages checkbox.
- Click the Availability Calendars dropdown menu and select any additional calendars.
- Click Save.
You can only add calendars to your HubSpot account that your email address owns or has access to in your connected Gmail or Office 365 account. Learn how to set up and share new Google calendars and new Office 365 calendars. When a prospect books a meeting with you, the meeting event will only appear on your personal default calendar, not your other integrated calendars.
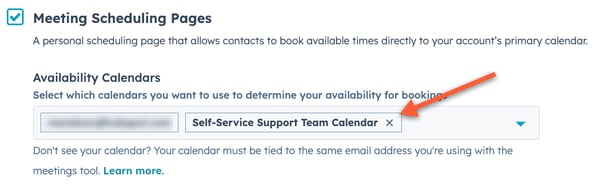
If you lose access to one of your calendars, contacts will not be able to book meetings with you, even if you have other integrated calendars. instead, you'll receive an email notifying you that someone is trying to book a meeting with you. You can then either ask the calendar owner to give you access again or remove the inactive calendar from your settings.
To manage inactive calendars:
- In your HubSpot account, click the settings icon in the top navigation bar.
- In the left sidebar menu, navigate to General.
- Click the Calendar tab.
- To remove the calendar from your settings, click the X next to the inactive calendar.
Edit your scheduling page URL and default scheduling page (Sales Hub or Service Hub Starter, Professional, or Enterprise only)
In your calendar settings in HubSpot, you can change your scheduling page URL that is used for each scheduling page that you create moving forward. You can also change the default scheduling page that is used when inserting meeting links into sales email templates.
- In your HubSpot account, click the settings icon in the top navigation bar.
- In the left sidebar menu, navigate to General.
- Click the Calendar tab.
- In the Meetings URL field, edit the URL. Changes to your scheduling page URL will apply to all new scheduling pages going forward, but will not change existing scheduling page URLs.

- To select a different default scheduling page, click the Default meeting link dropdown menu.
Host scheduling pages on a custom domain
Please note: any user can host scheduling pages on any custom domains connected in the domain manager.
You can use your own custom domain for your scheduling pages to reflect your brand and enable form fields to pre-populate with information from past form submissions.
- In your HubSpot account, click the settings icon in the top navigation bar.
- In the left sidebar menu, navigate to General.
- Click the Calendar tab.
- Click the Meeting domain dropdown menu and select a custom domain to host your scheduling pages on instead of a HubSpot address. Only domains that have been connected in your domain manager will appear in the dropdown menu for selection.

Once you have changed your domain, all of your meeting links will be updated.
If you want to prevent search engines from indexing scheduling pages on custom domains, you can add "Disallow: /meetings*" to your robots.txt file.
Please note: if you're using a custom domain, the URL still needs to have a different slug than the existing scheduling page on other domains.
For example, http://yourcustomname.com/meetings/example and http://app.hubspot.com/meetings/example are considered the same, so you wouldn't be able to use http://yourcustomname.com/meetings/example if http://app.hubspot.com/meetings/example already exists.
Turn off your scheduling pages
If you would like to turn off all of your scheduling pages without deleting them:
- In your HubSpot account, click the settings icon in the top navigation bar.
- In the left sidebar menu, navigate to General.
- Click the Calendar tab.
- In the Scheduling pages section, click Turn off.
- To turn on your scheduling pages again, click Turn on.
Add a meeting link to your chat widget
You can include a meeting link in the chat widget so that visitors can access your scheduling page and book time with you during a chat conversation.
- In your HubSpot account, click the settings icon in the top navigation bar.
- In the left sidebar menu, navigate to General.
- Click the Calendar tab.
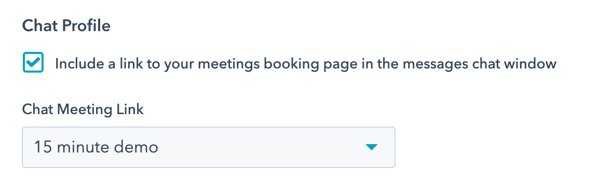
- In the Chat profile section, select the Including a link to your meetings booking page in the messages chat window checkbox.
- Click the Chat meeting link dropdown menu and select a meeting link.
When you're done making changes to your meetings tool settings, click Save. Learn how to create or edit a scheduling page then share it with your contacts.
