- Knowledge Base
- Service
- Help Desk
- Connect a WhatsApp channel to help desk
Connect a WhatsApp channel to help desk
Last updated: November 18, 2025
Available with any of the following subscriptions, except where noted:
-
Service Hub Professional, Enterprise
You can connect a WhatsApp Business Account as a channel in the help desk workspace. Messages sent to your WhatsApp phone number will create a new thread and ticket in help desk.
You must have a verified Meta Business Manager for your WhatsApp Business account to have access to more than 50 business-initiated conversations per day. Learn more about verifying your business.
Before you get started
Before connecting a WhatsApp Business Account to help desk, you will need the following:
- The legal name of your company and your WhatsApp display name.
- The URL of your business website.
- Your business email address.
- Admin permission for your company’s Meta Business Manager account.
- Access to the company phone number that you want to send messages with.
- The number must be able to receive voice calls.
- It must not be part of an IVR (Interactive Voice Response) system, or have IVR disabled for a period.
Please note: the phone number you use must not be connected to another WhatsApp account, WhatsApp for Business App, or another WhatsApp integration. If the number is already associated with another WhatsApp account, you must first disconnect it before connecting it to HubSpot.
Limitations
Keep in mind the following limitations when connecting and using the WhatsApp integration:
- Each WhatsApp for Business Account can have up to 25 phone numbers associated with it.
- Only new messages after you connect your WhatsApp Business Account will sync to HubSpot. Historical conversations will not be synced.
- Once connected to HubSpot, messages will no longer appear in the WhatsApp mobile app or web app, and will only appear in help desk in your HubSpot account.
Business accounts vs. personal accounts
Due to Meta's requirements for using the WhatsApp integration, you cannot connect a personal WhatsApp account to HubSpot and must connect a Business account instead. Learn how to convert a personal account to a WhatsApp Business account in WhatsApp's documentation.
Connect a WhatsApp Business Account as a channel
You can connect an existing WhatsApp Business account as a channel in HubSpot, or you can create a new WhatsApp Business account during the connection process.
Please note: if you want to connect a WhatsApp account which is already connected to the conversations inbox, you must delete the channel from the inbox before connecting it to help desk.
- In your HubSpot account, click the settings settings icon in the top navigation bar.
- In the left sidebar menu, navigate to Inbox & Help Desk > Help Desk.
- Under Ticket sources and routing, select Channels.
- Click Connect a channel then, click Connect a new channel.
- Select WhatsApp.

- Click Continue with WhatsApp.
By clicking Continue with WhatsApp you understand and agree the Connect your WhatsApp Business Account to the conversation inbox section of the HubSpot Product Specific Terms apply to you. As detailed in the HubSpot Product Specific Terms, i) you agree Meta Platforms, Inc. ("Meta") is functioning as a Sub-Processor under the DPA and ii) if your Customer Data is hosted outside of the United States, you agree Meta will be subject to the Exclusions section in HubSpot's Regional Data Hosting Policy. By connecting your WhatsApp Business account to HubSpot, you agree to WhatsApp's Business Solution Terms available at https://www.whatsapp.com/legal/business-solution-terms/.
-
In the pop-up window, log in to your Facebook account, then click Continue as [name].
-
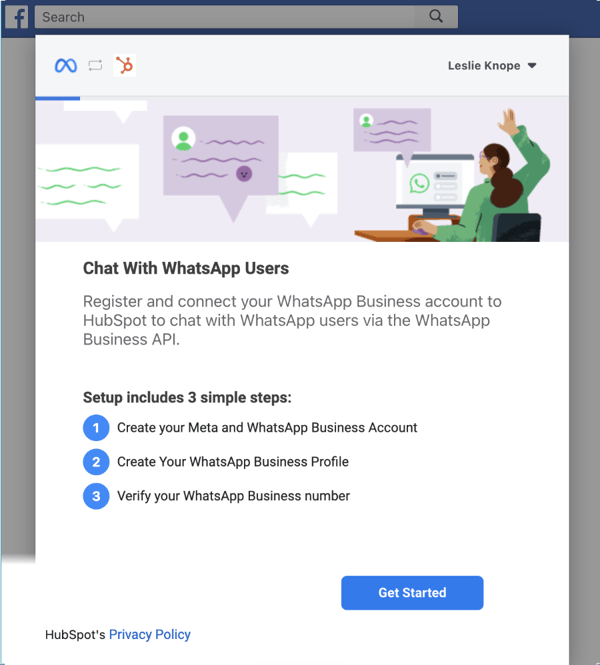
Click Get started.
-
Review the permissions HubSpot will need to access in order to connect, then click Continue.

-
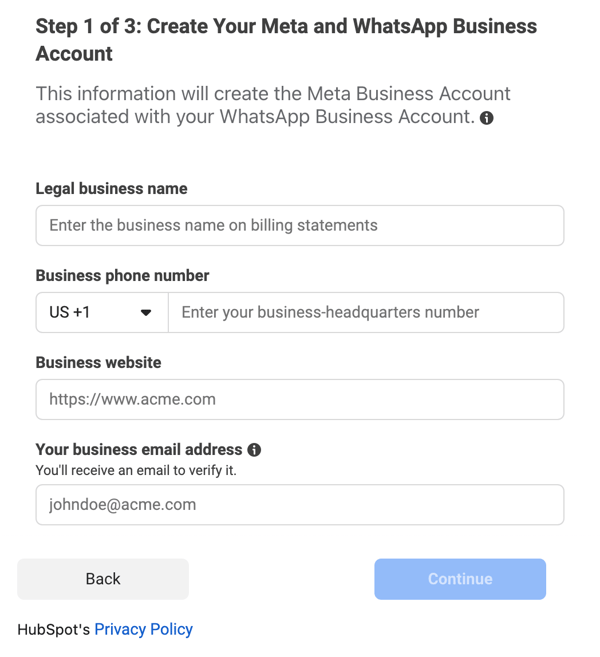
Select an existing Meta Business Account that will be connected to your WhatsApp Business Account, or create a new Meta Business account. If you're creating a new Meta Business Account:
-
Enter the legal name, phone number, website, and email address for your business, then click Continue.
- Use the Country and Timezone dropdown menu to select the country and timezone your business is located in.
-
-
Click Continue.
- Select the WhatsApp Business Account that will be associated with your Meta Business Account, or create a new WhatsApp Business Account. If you're creating a new WhatsApp Business Account, enter a name for the account and select a timezone from the dropdown menu.

- Click Continue.
- A confirmation message will appear. Click Continue to Step 2.
- Select an existing WhatsApp Business profile, which is what your audience will see when they contact your business. If you don't have an account, you can create a new one by configuring your business profile:
- In the text field, enter your business display name. If your WhatsApp Business Profile does not match your business's legal name, select the My display name is different from my legal business name checkbox.

- Click Continue.
- Click the Category dropdown menu and select a category that best describes your business. You can also enter a description of your business in the text box.
- In the text field, enter your business display name. If your WhatsApp Business Profile does not match your business's legal name, select the My display name is different from my legal business name checkbox.
-
Click Continue to Step 3.
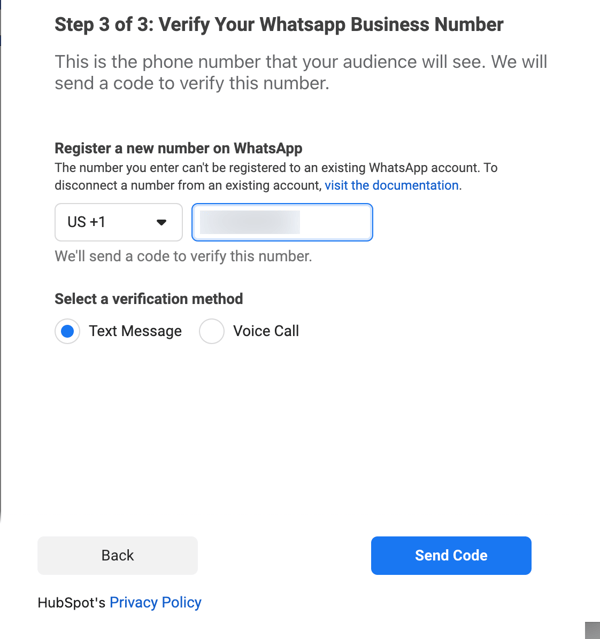
- If you've already verified a phone number with WhatsApp, select a verified number. If you haven't verified a phone number, you can register a new number:
- In the text field, enter a phone number to register with WhatsApp.
- Select Text Message or Voice Call as a verification method, then click Send Code.
-
- After you successfully verify the phone number, click Ok to close the set up window and return to HubSpot.
- You'll return to help desk where you can finish setting up the WhatsApp channel. Next to the WhatsApp account name, click Connect.
The connected WhatsApp account will now appear in your list of connected channels.
Create a WhatsApp view in help desk
WhatsApp conversations will appear in the list of conversations associated with any of the status filters in the left sidebar (e.g., All open, All closed, sent, etc.), but it's highly recommended you create a custom view to filter for messages specific to your connected WhatsApp channels:
To create a custom view for WhatsApp messages:
- In your HubSpot account, navigate to Service > Help Desk.
- In the left sidebar menu, next to the Less dropdown menu, click add Create global view.
- In the right panel, enter the view details, including the view name, type, and sharing option. Then, click Next.
- In the search bar, search for and select Originating channel type.
- Click the is any of dropdown menu, then select WhatsApp.
- Click Apply filter, then click Create view.
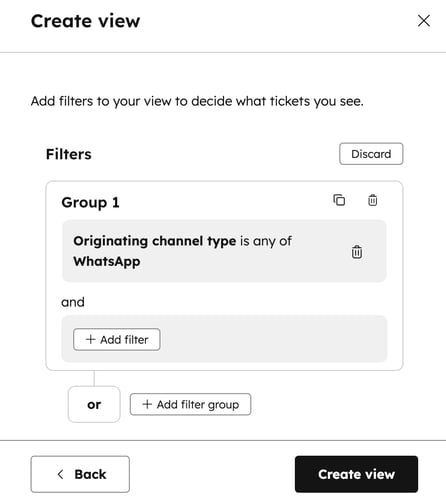
- The new view will appear below the other default help desk views. Learn more about creating and managing custom views in help desk.
Compose and respond to WhatsApp messages in HubSpot
You can start a WhatsApp conversation with individual contacts in HubSpot from the contact record, or initiate it from the associated company, deal, ticket, or custom object record.
Incoming WhatsApp messages will create a new ticket and thread in help desk and start a WhatsApp session. You and your team can respond to WhatsApp messages in help desk for the duration of the session.
WhatsApp sessions will be open for 24 hours after the last response from the contact. Once an existing WhatsApp session has closed you can reinitiate the thread by sending a template message to the contact. If the contact replies to your template message it will open a new 24 hour session during which you can send non-templated WhatsApp messages.
WhatsApp messaging limits
A limit of 1,000 template messages per month is shared by all your connected WhatsApp business accounts. The day of the month that the limit resets depends on the date you first purchased a Marketing Hub or Service Hub Professional or Enterprise subscription. For example, if your subscription began on October 28, the limit will reset on the 28th of each month. Learn more about WhatsApp pricing.
HubSpot does not charge for free entry point conversations. Learn more about free entry point conversations.
Supported media types in messages
WhatsApp messages can include different media types and attachments based on whether the message was sent or received by your business account.
- The following rich media types are supported in messages received in your connected business account:
- Images
- Videos and GIFs (3gpp or mp4)
- Voice messages
- Attachments (e.g., mp3, PDF, etc.)
- Location
- Stickers
- Contact sharing
- The rich media types below are supported in messages sent from your connected business account:
-
- Attachments
- Meeting links
- Quotes
- Knowledge Base links
- Documents
Initiate a WhatsApp conversation from the record timeline
To create a message directly from the record timeline:
- Navigate to the home page of your associated records:
- In your HubSpot account, navigate to CRM > Contacts.
- In your HubSpot account, navigate to CRM > Companies.
- In your HubSpot account, navigate to CRM > Deals.
- In your HubSpot account, navigate to CRM > Tickets.
- Click the name of a record.
- In the left panel, click the WhatsApp icon. If the WhatsApp icon doesn't appear below the record name, click the ellipses icon, then select Create a WhatsApp message.

- In the pop-up box, compose your message:
- Click the From dropdown menu and select a connected business account.
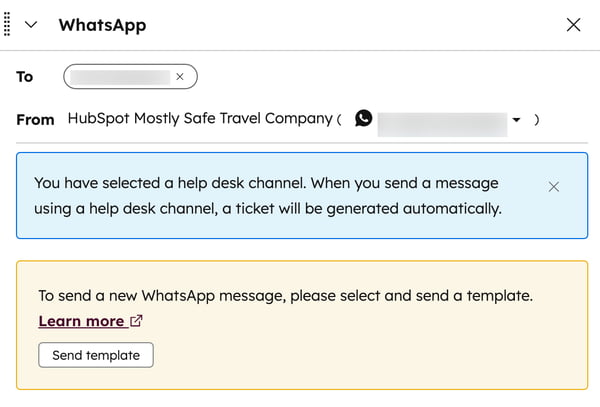
- If the contact has not sent your business a WhatsApp message in the last 24 hours, you can only send a business-initiated message by selecting one of your message templates.
-
- Click Send template.
- In the dialog box, locate your template, then click Send template.
-
- You may be prompted to navigate to help desk to respond to messages if there's already an existing thread with the contact.
Manage and respond to messages in help desk
You can respond to WhatsApp messages directly in help desk. Messages can include media audio files, voice notes, stickers, images, and videos. You will be notified when you receive a new WhatsApp message, but you can turn off these notifications in your settings.
- In your HubSpot account, navigate to Service > Help Desk.
- Click the search search icon in the top left and enter a search term to lookup a WhatsApp conversation, and apply filters to narrow your search. For example, you can apply filters that segment out messages that originated from your connected WhatsApp channel. Learn how to create a custom view that only contains WhatsApp messages.
- In the left panel, click a WhatsApp conversation to open it. A socialWhatsapp WhatsApp icon will appear in the top right corner of the message preview.
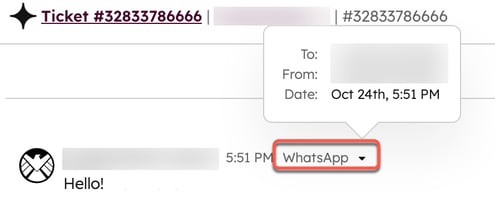
- You can click the down arrow icon downCarat next to a contact's name to reveal message metadata, such as the phone numbers of the sender and recipient, along with the date the message was sent.
- To reassign the message, in the top left click the Ticket Owner dropdown menu and select a different user. Learn more about assigning incoming tickets based on agent skills.
- If a contact has turned on read receipts in their WhatsApp account, you can review when they read one of the messages you sent them. If they opted out of read receipts, this information will not appear.
- In the right panel, view contextual information about the visitor and associated records to help with your response.
- If the contact hasn't sent a WhatsApp message to your business in the last 24 hours, you can only send a business-initiated message by selecting one of your message templates. Click the Send template, then in the dialog box, locate your template and click Send template.

- In the reply editor, write your response:
- Use the icons across the bottom of the editor to modify your text style, insert a link, add an image, or upload a file. You can also drag and drop files from your computer into the reply editor.
- To add a document, snippet, meeting link, knowledge base article, quote, or video in your response, click Insert.
- Please note: some media formats cannot be included in a WhatsApp message. Learn more about the supported document, image, audio, and video file formats in Meta's documentation.
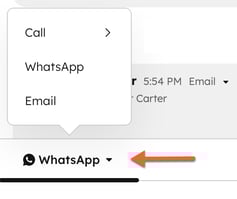
- During the conversation, you may need to switch to email or call the contact. Click the Channel dropdown menu above the reply editor and select a different channel.
Troubleshoot unsupported message types
Due to API limitations, some messages types and responses are unsupported, and the message's contents will not appear in help desk.
Unsupported messages may occur due to one of the following scenarios:
- A WhatsApp user reacting to a message
- A WhatsApp user deleting a message
- A WhatsApp message includes any attachments that are not included in the list of supported media types.
- An unsupported message type (e.g., a poll)
Quarantined messages
Messages that violate WhatsApp content policy will be flagged and their content will be hidden in help desk to prevent potential phishing attempts and reduce the risk of sharing personally identifiable information.
Further reading
- WhatsApp message details stored in ticket properties can also be used in workflows and reporting.
- You can create and sync message templates in your WhatsApp Business account, which can then be personalized in HubSpot. Learn more about how to customize and send message templates.